Dealing with mid-day sun can be the absolute worst when it comes to preserving tonality and color in your images. Here, we are breaking down exactly how to post-produce images taken in harsh lighting conditions to balance out the overall tone of the image, while retaining highlights & shadows – an essential skill.
The Common Scenario – Harsh Light
Let’s face it, sometimes things are happening too fast to allow you to setup a flash, or pull out a reflector. In those situations, you simply have to shoot in the harsh sunlight so as not to miss a key moment.
However, shooting in harsh sunlight, i.e. hard light, isn’t the end of the world, and most of the time, we can do a pretty good job of repairing and correcting the hard shadows in ACR (Adobe Camera Raw) and Lightroom.

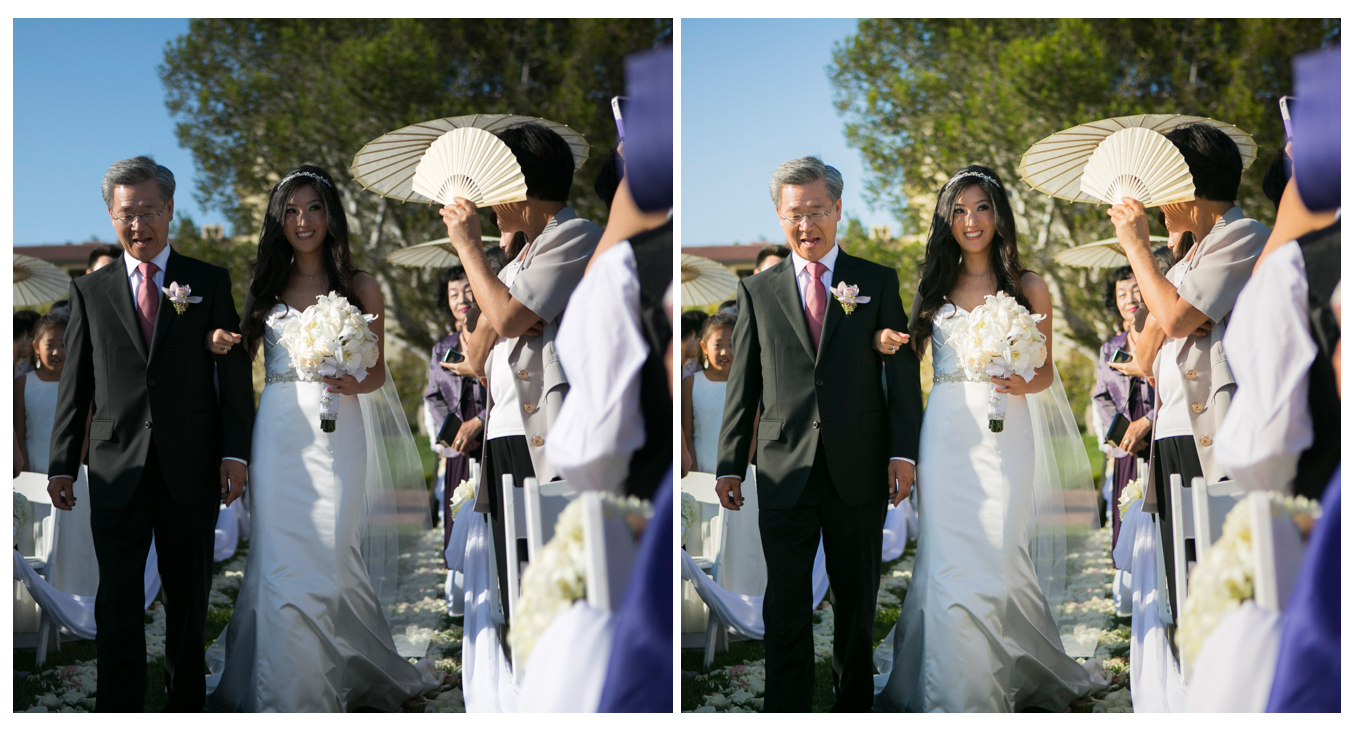
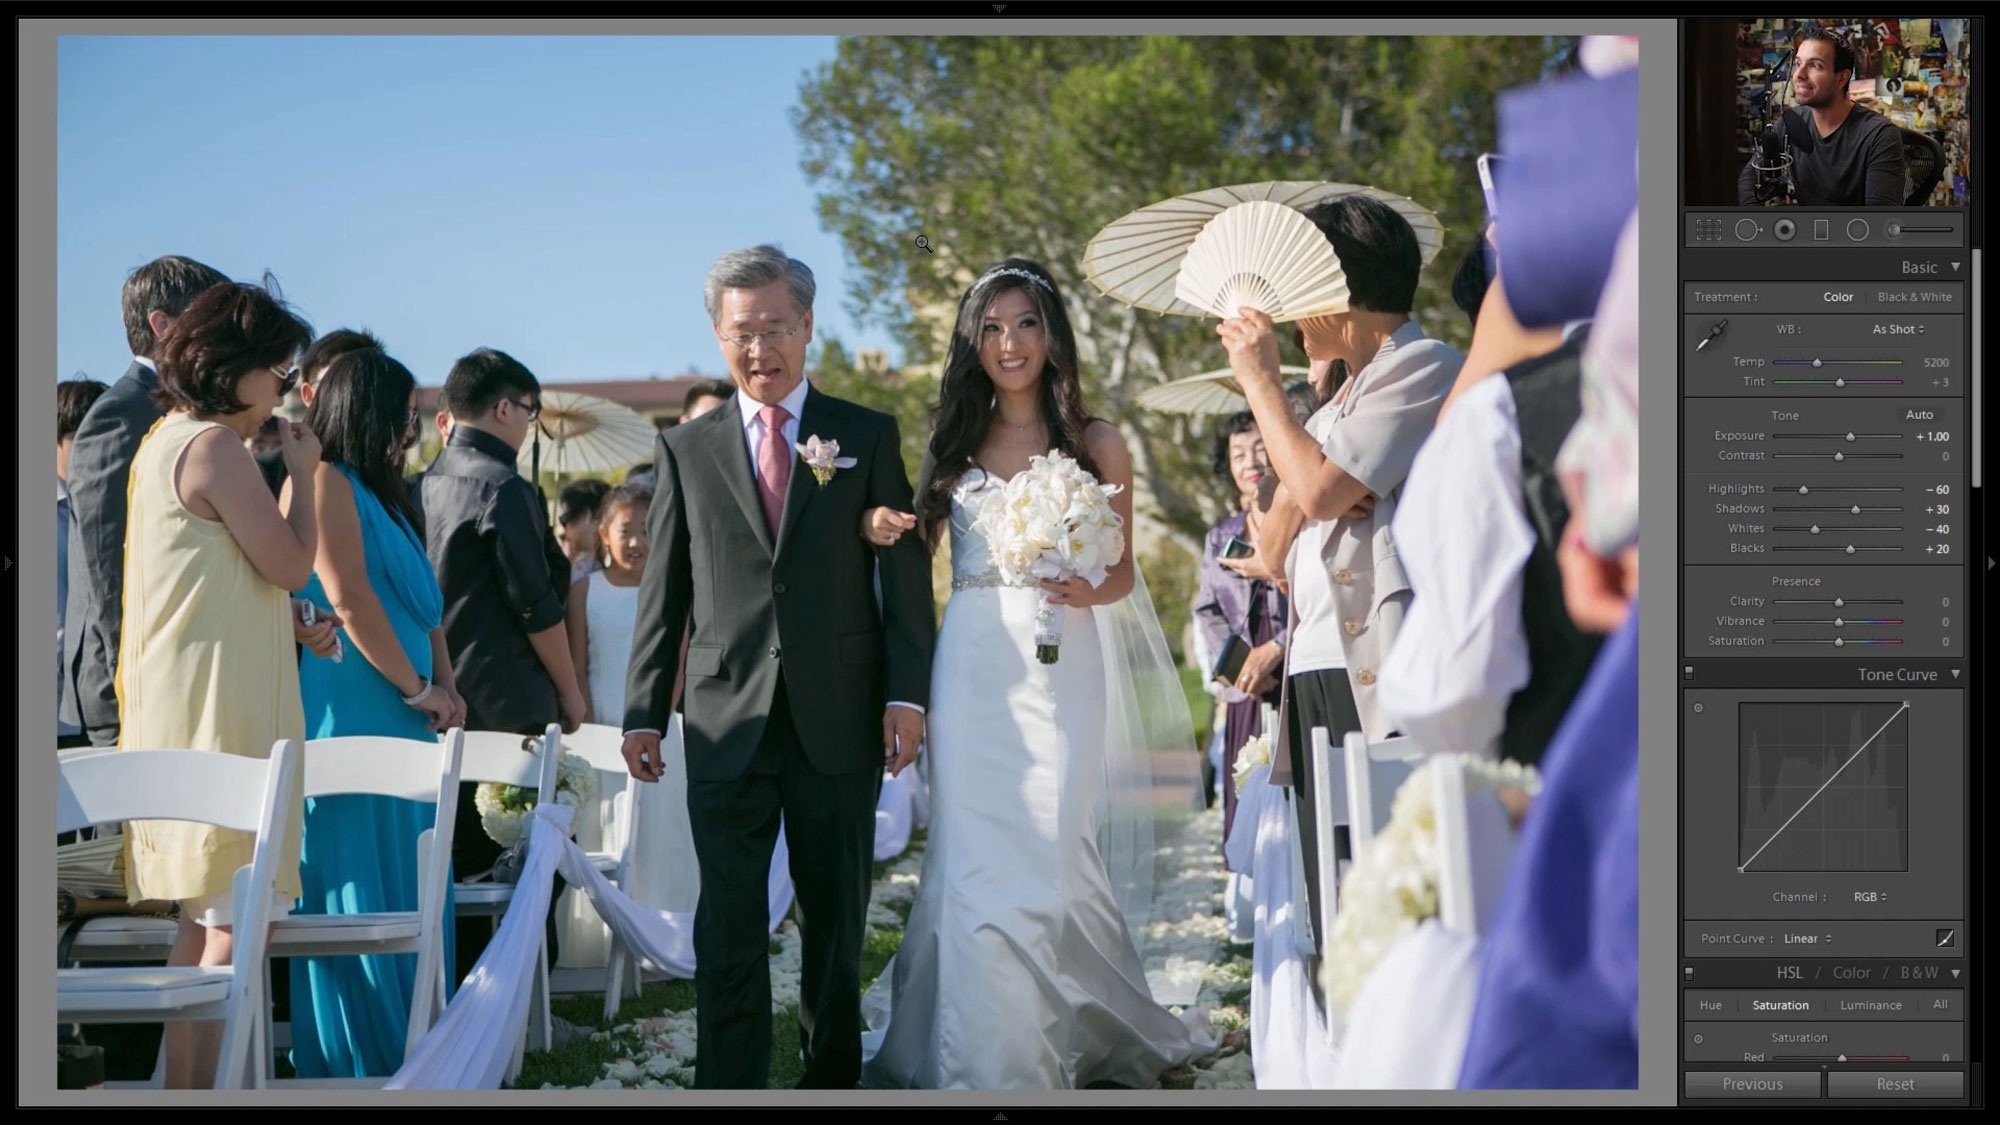
Take for example this image above, with our beautiful bride making her way down the aisle. There’s spotty lighting at its worst, and absolutely nothing to do to prevent it. Moments like these cannot be rehearsed nor re-done, you only get one shot to make it work. Your best bet is to expose to prevent any clipping of highlights and shadows in order to set yourself to improve upon the image in post production. After bringing the image into Lightroom, bump up the exposure to get the subject’s skin tone to an even point.
Shoot in RAW
Now, it is important to note that in order for this technique to work well, you need to be shooting in RAW not JPEG. A JPEG image will not have enough tonal detail to be able to get the same results. In addition, you want to make sure your exposure isn’t too bright. You want to preserve as much highlight detail and shadow detail in your image. Which, in harsh sunlight, this may mean that you will be slightly underexposing the images.
Modify the Highlights & Shadows
After bringing the image into Lightroom, bump up the exposure to get the subject’s skin tone to an even point. When approaching a harsh lighting situation, notice the heavy contrast between the highlighted areas and the deep shadows in the scene.
- First, start off by pulling down the ‘Highlights’ and ‘Whites’ of the image in order to balance the overall tone.
- Bring up the ‘Shadows’ and ‘Blacks’ in the photo to brighten the darker portions of the image.
You’ll notice that the reduction of Highlights and the brightening of Shadows leaves the image lacking in contrast , though never fear, the Tone Curve is here!
Use the Tone Curve to Bring Back Contrast
In order to preserve the original contrast-punch the image had, we adjust the Tone Curve accordingly, and to do that a simple S-Curve does the trick. We use the Tone Curve to decide which range of tones we need to adjust (shadows, midtones, or highlights), and in this case, we want to deepen the shadows and brighten our highlights to increase overall contrast.
By pulling down the shadows on the left side of the curve and bringing up the highlights on the right, we have added back the contrast lost from the previous adjustments in the Basic Panel.

Making minor preferential adjustments thereafter, such as warming up the temperature; adding radial or graduated filters to draw attention to the important parts of the image, and sharpening and noise reduction, bring us to the final image! The main goal is to balance out the image and add back contrast where it is lacking.

Bonus Demo | Fixing Harsh Lighting in LR 3
Here’s an older but still useful demonstration for fixing harsh lighting in Lightroom 3.
Have suggestions or other techniques to fix harsh lighting conditions? Leave them in the comments below! For more tips and tricks to take your images from ordinary to extraordinary in Lightroom check out our Advanced Lightroom Processing Workshop in the Premium Subscription to SLR Lounge!


