Black and white photographs have a whole language of their own. By removing the colors, the tones have to carry all the weight of the story. There’s no right or wrong way to edit black and white images. It’s all about personal preference and what carries the story forward. In this video/article, I’ll be showing you how to edit black and white landscape images using a unique method in Adobe Lightroom.
For more tutorials from the “Master Your Craft” series, be sure to visit AdoramaTV and check out our playlist! For a complete course on Lightroom editing, check out the Mastering Lightroom Course on SLR Lounge Premium!
Video: How to Edit Black and White Landscape Images in Adobe Lightroom

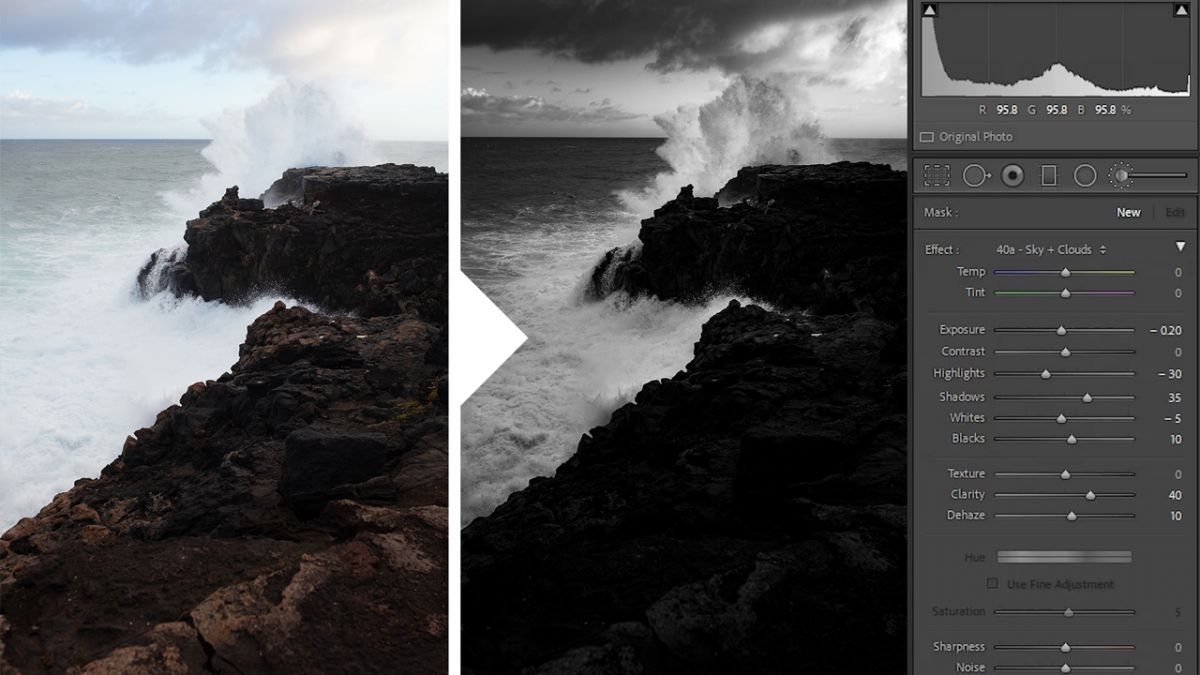
Before we begin, I wanted to show you what a typical black and white edit would look like in Lightroom. I used a simple black and white conversion on the raw file, then tweaked the basic adjustments.

However, on the right is the final image we want to end up at after the editing process that we’ll walk through in a moment. Compare it to the basic edit on the left. Notice the difference in depth and details in the tones. It makes for a much more dramatic black and white image and the steps are quite simple. You can follow the same steps for any black and white image.
Before we begin, download the exercise file here and follow along. Let’s jump straight in.
Editing Steps
- Separate the Colors
- Color Calibration
- Convert to Black & White
- Basic Adjustments
- HSL / B&W Mixer
- Amplify Presence
- Local Adjustments
Step #1: Separate the Colors

The first step is to leave the image in color. Use the color temperature until you can see the different colors. We want the water to appear blue and the rocks to appear warm/orange. At extreme color temperatures, you’ll notice that the entire image takes on a single hue. This makes it difficult to adjust individual colors later on.
Step #2: Color Calibration
Next, I bumped up saturation and played with the channels in the color calibration panel. This further intensifies and isolates each color. We’re going to want that to directly control the brightness of each color after converting to black and white.
Step #3: Convert to Black & White

Press “V” to convert the image to black and white. I then lowered the exposure.
Step #4: Basic Adjustments

I used the basic adjustments to set the highlights and to bring details back into the shadows. Here are the final adjustments. We’ll save the presence panel for a later step.
Step #5: HSL / B&W Mixer

This is where the first two steps comes in handy. The HSL panel becomes the B&W mixer, allowing us to adjust the brightness of each color. Because we separated the colors earlier, each slider will affect a different part of the image. For our image, I deepened the reds and oranges. I then darkened the sky and water using the blue and aqua sliders. See the before and after.
Step #6: Amplify Presence

Now, we’re going to add clarity and de-haze to intensify everything we just did. Notice how much more detail pops out. I then made final adjustments to my base tones to get that extra contrast.
Step #7: Local Adjustments

I used Profile Correction from Visual Flow’s Retouching Toolkit. This straightens out any distortion caused by the lens. Then, I leveled the horizon and added in a vignette.

I then used a radial filter around the wave to pull the attention toward that part of the image. I increased the highlights only to leave some contrast in the waves rather than just darkening it.

In the Retouching Toolkit is a Sky-Cloud-Ocean Enhancing brush to intensify the sky. Make sure to feather the effect off of the waves.

Next, I used Dodge Whites brush to pop out the bright areas of the image. This brush isolates the highlights and doesn’t affect the dark areas at all.

Lastly, I used a graduated filter to burn the bottom of the image. This is to draw the attention toward the top where all the action is happening. See the final edit compared to the RAW image.
Conclusion
I hope you enjoyed this video/article on how to edit black and white landscape images. Black and white photographs are all about precise tone control. By separating the color tones, we get complete control of specific areas of the image. This allows us to get dramatic effects we wouldn’t otherwise get using basic black and white conversion techniques. For a comprehensive editing tutorial, check out the Mastering Lightroom Course from our SLR Lounge Premium Library. Also, be sure to check out Visual Flow’s Retouching Toolkit to get access to all the intuitive tools like we used here.
Don’t miss our next episode of Mastering Your Craft on Adorama’s YouTube channel next week! If you want to catch up on all the episodes, make sure you check out our playlist!


