
Is Monochrome the Same as Black and White?
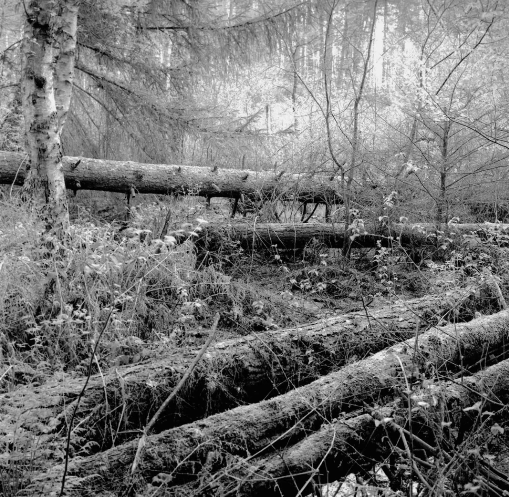
Black and white and monochrome are related but not the same in photography. A straight black and white photo has only shades of black, white, and gray, as seen directly from film or a camera setting. Monochrome, however, means “one color,” so it includes black along with another tone like sepia, selenium, or warm hues, which are added in the darkroom or digitally. Although toning changes the mood and adds some emotional weight, pure black and white remains neutral. In short, all black and white photos are monochrome, but not all monochrome photos are strictly black and white.
How to Take a Monochromatic Photo? 7 Best Tips
Here are the seven tips on how to improve your monochrome photography. You are going to see some photographs and also learn why it can really make you enjoy your photography.
1. Train Your Eye for Monochrome
Now, the first thing to do is to train yourself to see a monochrome. This is quite difficult because you see the world in color, and cameras are initially set up to take photographs in color. But there are a couple of things you can do to aid the process of seeing in mono.
The first thing is very simple: squint your eyes ever so slightly so you’re looking through nearly closed eyes. Then all of the contrasts become much clearer, and you can see the lights and darks as they stand out more. You can instantly tell whether something will make a good mono image. You can also set your camera to mono mode.
This is not a destructive process. It just shows you a monochrome version in the viewfinder or on the back of the camera. If you take your photographs in RAW, the RAW file will still have full color, so you can then edit that after you’ve taken the photograph. Once you start to look through the camera and only see black and white, you focus more on the tonal range.
A lot of colors have a very similar brightness, and when you turn the image to black and white, the colors just blend together.

You don’t see much difference, so it forces you to look for different contrasts, which can help accentuate pattern and texture.
2. Look for Patterns and Shapes in Monochrome
The next tip is to search for patterns, shapes, and textures because they can become really interesting mono images. Textures that don’t stand out much in color can really pop in black and white. They can also isolate the patterns so you only focus on the light and dark areas, which makes the whole pattern much more vivid.
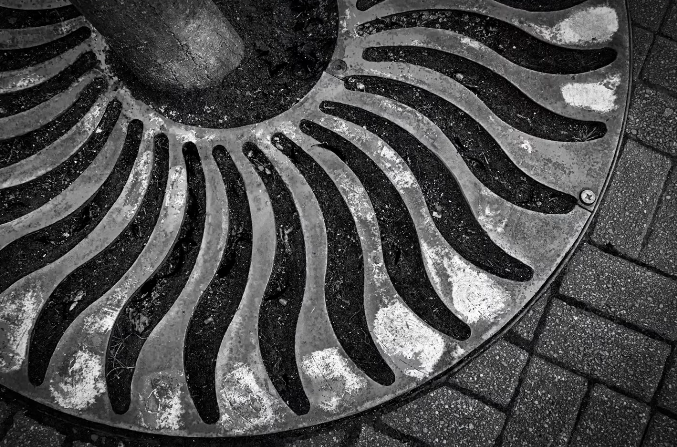
Also, keep an eye out for interesting juxtapositions that can really grab the viewer’s attention.
3. Explore Tonal Contrast
Number three is one of the most important aspects of black and white photography: tonal contrast. Once you turn an image into mono, the only thing that tells the story and sets the mood is the contrast between the tones.
Some images can be strong and punchy with a strong definition of contrast, while others can be soft and subdued, which gives a more gentle image.
Basically, you’ve got three types of contrast: high, medium, and low.
- High contrast photos have a big difference between whites and blacks, so it is very punchy.
- Medium contrast pictures have a good range of tones: some whites, some mid-tones, and some strong blacks. The overall image is very balanced.
- Low contrast images can be very gray, which often appears washed out, and you should generally avoid these kinds of mono images.
4. Lighting in Monochrome
The quality of the lighting is important in any photograph you take, but once you take away color, the mood and effect of the lighting become much more distinctive. The good thing about monochrome is that you can take photographs in harsh lighting conditions, and often it’s even more effective.
Normally, you wouldn’t take photographs in bright sunlight, but it’s a great time to shoot in monochrome because of the strong contrast between the brights and darks. Depending on the image you want, overcast light will produce subdued, flat images. But if you shoot in the middle of the day, you get sharp contrast in monochrome that looks very punchy.
The key is to go out at different times of the day and experiment with different types of light to see what works for you and suits the type of image you want to create.
5. Use High Key and Low Key
The next one is experimenting with high and low-key images. As a photographer, you often try to capture a whole range of tones, but you can also push the tones to one end of the histogram. This gives you a mainly white image (high key) or a mainly dark image (low key).
These can create amazing results if you have a lot of one tone in the image. You still need some mid-tones or a few dark areas if you’re shooting high key, or some lighter points if you’re shooting low key, so the differences remain visible. The best thing to do is experiment. Try taking shots in both high and low key, and you’ll learn what works in different situations.
6. Composition and Element Balance
You should think about the relationship between elements in your composition. In color photography, some background colors can distract from the subject. But in mono, it’s all about the relationship between shapes and tones.
A strong foreground can work on its own, even with a busy background. You might also put the background out of focus. Then, you’ll start to see how all the elements belong together, and this also improves your color photography because you begin to notice things in a simpler way.
7. Edit for Maximum Impact
The last tip is to edit your monochrome photographs to get the best out of them. It’s important to capture something that works well as a monochrome image, but without proper editing, it may look flat.
To do this, check the preview in-camera first. Then, in editing, boost the contrast during RAW conversion. Use brushes and masks to brighten the subject and darken distractions to guide the viewer’s eye.
In Photoshop, don’t just strip the color away with saturation sliders. Instead, apply a black and white adjustment layer for more control. You may also need to adjust yellows and greens to give depth and make the photo pop. Then, refine in Luminar Neo by adding structure, reducing highlights, or adding a vignette to draw focus.
Careful final edits like cropping, painting out distractions, or enhancing textures make your image stand out.






