What are the Two Types of Architectural Photography?
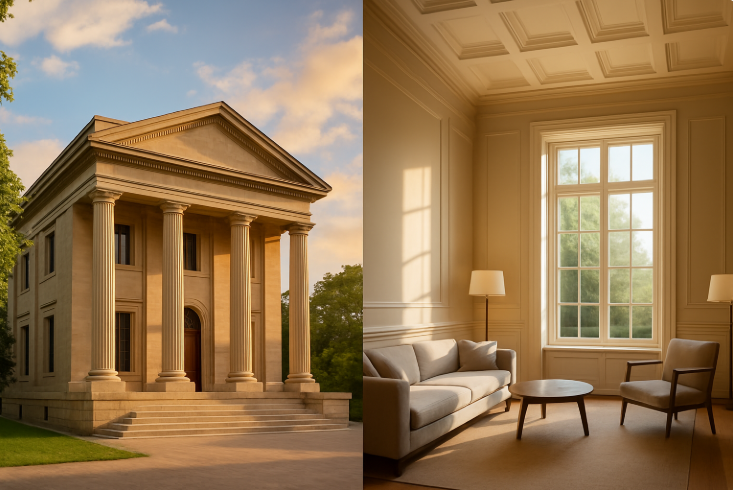
In architectural photography, there are really two main types: exterior and interior. Exterior photography is all about the outside of the property. You’re showing how it looks from the street, sits in its surroundings, and the way the design interacts with the environment around it.
Interior photography flips the view to the inside. Here, the goal is to show the character of the space, the way it’s designed, and the atmosphere it gives off. You focus on details like how light fills a room, the furniture or materials fit together, and the space it feels to be in.
Together, these two types cover both the outer identity of the property and the inner personality of its spaces.
How to Become an Architectural Photographer? Follow These 6 Tips
1. Vertical Alignment
The first and most important tip in architectural photography is vertical alignment. You always need to make sure the verticals are parallel to the picture plane. This is the prime directive, and it separates professional-quality architectural photography from everything else.
This is not a rule you can bend or break. It doesn’t matter if you are photographing a cottage, a mansion, a tall high-rise, a small interior, or a grand interior. In every case, the verticals must stay parallel to the picture plane.
If you ever find yourself tilting the camera, you don’t need to throw away the shot. You can correct the verticals in Photoshop using a very simple adjustment. That is why vertical alignment is rule number one in architectural photography.
2. Axial Composition
The second tip is axial composition, and you should use it whenever possible. That means the primary horizontals are parallel to the picture plane. Doing this gives stability and order to your composition. Some people think it makes the photo less dynamic, but that’s not true. You can still include plenty of other elements that create interest, but the horizontals will keep the shot stable.

When you are dealing with subject matter that is complex and dense, axial composition helps keep the whole image under control and gives it visual order.
The wider your lens, the more important axial composition becomes. Wide lenses increase the chance of distortion, so axial horizontals bring stability to balance that effect.
3. Control the Shadows
You are a photographer, not a painter or an engraver, so you depend on the real light that is there. You need to plan your shots according to the sun angles and the seasons. Shadows are not just dark areas. They bring depth, rhythm, and articulation to your photos when timed correctly.
To control shadows, you first need to learn how sun angles behave. For example, during the winter months, the sun rises and sets south of the East-West line. Because of that, there is no time of day when the north elevation gets sunlight. If you want to photograph a north elevation, you must plan to shoot it early in the morning, late in the afternoon, or as a night shot. This timing is critical and is the key to this technique.
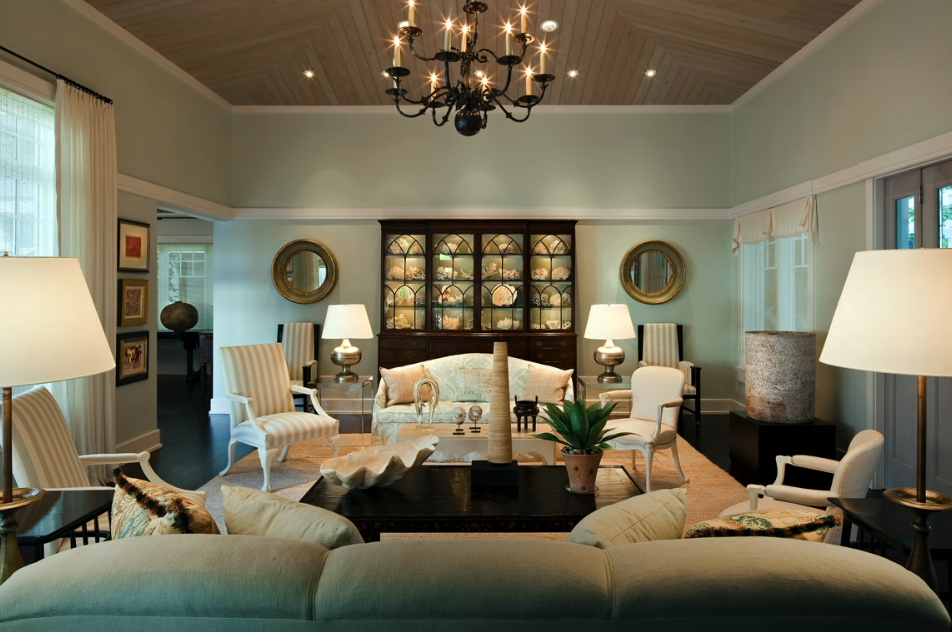
4. Natural and Artificial Light In Interior Architectural Photography
For interior architectural photography, think of the sun as your main light source that changes its character through the day. In the morning and evening, the light comes in soft and warm, which makes a building look more welcoming. When the sun is high at midday, the light turns sharper, and that sharpness throws out strong shadows that can actually bring out the shapes and details in the structure. Instead of fighting it, you can use it to show textures that might otherwise go unnoticed.
When the light is too bright or uneven, you don’t just stand there stuck. You can bring out a reflector, which bounces sunlight into darker spots, or a diffuser, which softens the glare and spreads it evenly. That way, you keep control over how the light falls on the building instead of letting the sun call all the shots.
Sometimes, natural light alone won’t show the building the way you want. That’s when artificial lights come in handy. You can use an external flash or a strobe, which lets you highlight the parts that matter most, like the curve of an arch, the detail on a doorway, or the texture of a wall.
You’re basically shaping the whole scene with light to make certain details stand out and guide the viewer’s eye to what you want them to see. So by mixing your electric lights with the sunlight, the result looks natural instead of staged.
5. Control Your Eye Height
The next tip is to control your eye height while doing architectural photography. One of the biggest mistakes you can make as a beginner is to set the camera too high, especially when using a wide-angle lens. A high camera position creates distortion in the foreground, which ruins the shot.
So, you should lower your camera to keep the eye height low, which gives ceilings a soaring presence that the viewer’s eye accepts naturally. But if the floor looks like it is diving away underneath you, the photo feels wrong.
Look at the example of Pieter Saenredam, who photographed cathedral interiors. His eye height was very low. That choice gave ceilings a soaring presence overhead, which your eye accepts naturally. What your eye does not accept is a floor that looks like it is diving down underneath you.
For interiors in general, place your camera only as high as needed to see the tops of tables and to separate key elements in the room.
A good method is to begin lower than you expect, then gradually raise the camera until everything in the frame looks right. Stop at that point and do not go higher.
Also, avoid setting the camera too high and off-axis with a wide-angle lens, because that distorts tables and chairs, and the furniture looks like it is sliding out of the frame. In tight spaces, when you have no choice but to use an extreme wide-angle lens, distortion will appear at the top and bottom. Don’t settle for that. Use Photoshop’s “Edit → Transform → Distort” tool to press the top down and push the bottom up. This gives you an image that avoids the warped effect that extreme wide angles can cause.
6. Pay Attention to Compositional Elements
Everything in your frame is compositional. With digital photography, you have far more control than you did with film. You can fine-tune every element of your shot and improve it in ways that were not possible before.
When you are striving for perfection, every detail matters. For example, if wires or poles interfere with the frame, you can remove them in editing. You can clean up windows, cars, or any unnecessary objects to create your desired image.
Even foliage needs attention. Small branches or random leaves that distract the eye should be removed. By cleaning them up, you make those areas part of the composition rather than random distractions. Again, the point is that everything in your frame has to contribute to the final image. If something doesn’t support the composition, get rid of it.
This rule is about discipline. Don’t settle for a shot that looks “good enough.” Instead, train yourself to notice details and improve them. Every part of the frame is either helping your composition or hurting it.
Related Articles to Architectural photography Definition


