How to Use Steel Wool for Photography to Create a Perfect Circle of Fire?
Steel wool photography is one of those things that feels crazy when you first see it, but once you know how to do it, it becomes a lot of fun. Here is exactly what you need, how to set up, and what to watch out for.
What You Need
The first thing you need is a normal kitchen whisk. Then you need a dog lead or a chain with a clip on it. You can use any that works, but something sturdy is best. You also need some fine-grade steel wool (0000 or 000), a lighter, a pair of gloves, and safety goggles. A tripod is also of great use here. On top of that, you need a person who’s going to do the swinging for the photos. That person is going to be your model, and they’ll be the one holding the whisk once it’s lit.
What Camera Settings for Steel Wool Photography?
There’s no single camera setting that works for every situation because steel wool photography is fully manual. You’ll need to play around with it after a few test shots, but you should start with some basic settings that give you a solid foundation.
First, switch your camera over to manual mode. Then put your ISO on 100. That keeps the image clean and stops extra noise from showing up. Next, set your aperture to f/22. With that kind of aperture, you’ll get a wide depth of field, and it helps control the amount of light coming into the camera when you’re exposing for a long time.
After that, go to a 25-second exposure. This gives you enough time for the sparks from the wire wool to fly around and create trails in the photo.
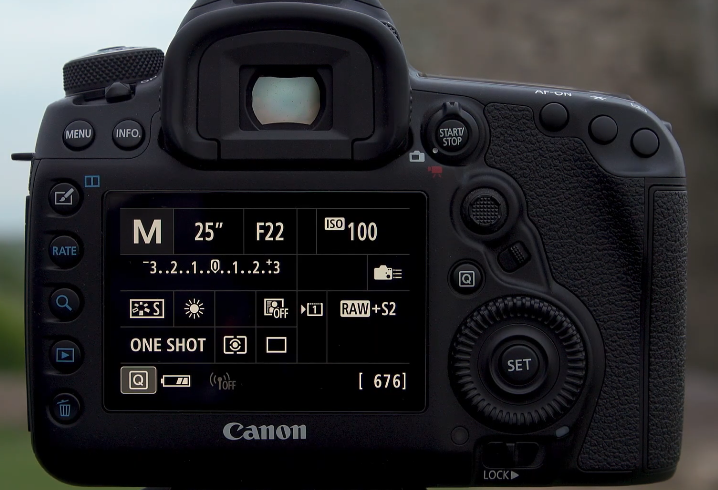
You’ll also want to set your white balance to daylight. The reason for that is simple: when the wire wool burns, it glows orange, and you want that orange to stay strong in your photo. If you keep your camera on auto white balance, it might look at the scene and think it’s tungsten light. That would shift the orange back toward white, and you’d lose the real fiery color. By setting it to daylight balance, you lock in that proper orange glow.
There’s another thing to do before you shoot. You can’t rely on autofocus because it’ll be too dark. Instead, shine a flashlight on the model for a moment so your camera can focus on them in the dark and you can see them clearly. Once you’ve got them lit, focus on them while autofocus is still on. After you’ve nailed that, switch your lens to manual focus so it stays locked. That way, when the lights go out and the sparks are flying, your focus doesn’t start hunting and ruin the shot.
Safety First
You can’t ignore safety because you’re literally dealing with fire. Wear proper clothes that cover you up and make sure they aren’t made of anything that catches fire easily. Also, put on gloves so your hands don’t get hit by sparks, and wear a hat if you can. The most important thing here is safety goggles. Sparks will be flying everywhere, and you don’t want one of them ending up in your eyes.
Keep a fire extinguisher nearby just in case. Do this outside in an open space. Don’t try it in a backyard full of trees or a place with dry grass, because sparks can catch and spread quickly. After you’re done shooting, hang around for five or ten minutes. Smoldering bits of wire wool can stay hot, and if they land somewhere, they might start a fire when you’ve already packed up. And if you’re under 18, don’t even try this unless you have an adult with you.
Setting Up the Steel Wool
To prepare your whisk, puff up the steel wool so it isn’t tightly packed. Stuff it into the whisk and layer it smartly. Then, put fine wire wool at the bottom because it lights quickly. Next, place medium wire wool above it. The medium wire wool lasts longer when you spin it, and that’s exactly what you want for a 25-second exposure. The fine wire wool starts burning right away and spreads the fire into the medium wool as you spin.
First Test Shot
When all is set, put your camera on a tripod, light the wool in the whisk, and ask the model to spin it.
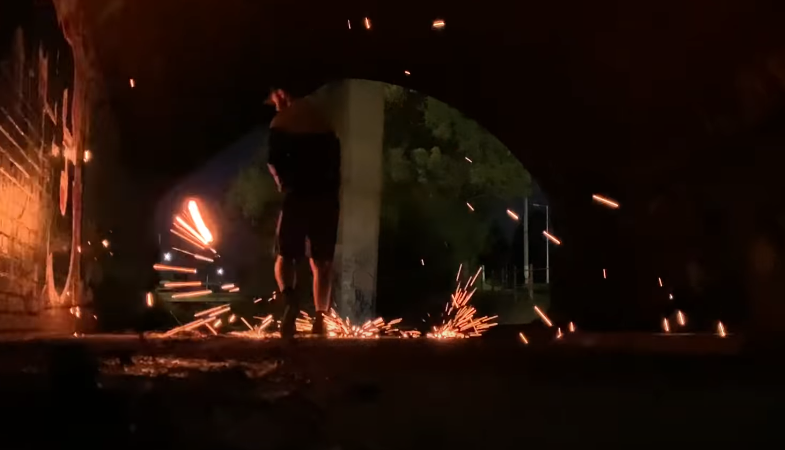
Take your shot with the 25 second exposure and look at the background. If it’s too dark, adjust your aperture. For example, if you started at f/22, drop it to f/16. That brings in one more stop of light, and you’ll see more of the background without blowing out the sparks.
Getting It Right
Once you’ve tested and balanced your settings, you’ll find the sweet spot. When you get the timing and exposure nailed, the results look insane.
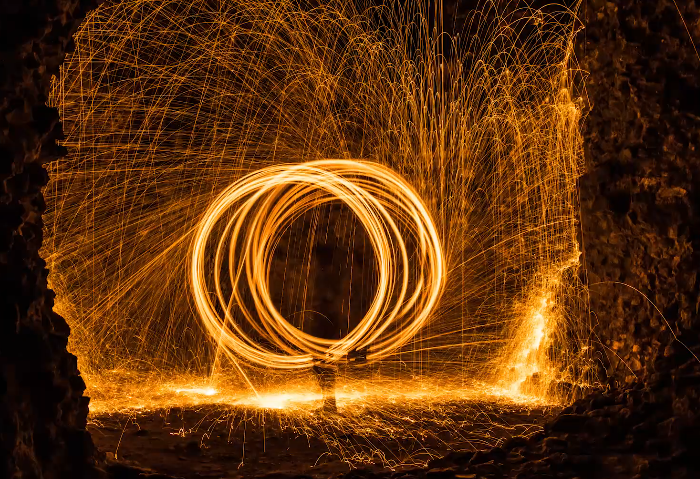
At this point, you can just have fun. Try spinning the whisk in different ways. A good first attempt is spinning it in a full circle to create a sphere of sparks. When you do that in the right spot, like inside an old castle arch, it looks incredible.
Steel Wool Photography: Experimenting With Ideas
Once you’ve mastered the basic sphere, you can start pushing things further. One way is to frame the sparks inside doorways or arches, which adds more structure and context to your photo instead of just having floating trails of light. After that, try switching to an ultra wide-angle lens and moving in closer. This lets you capture the full burst of sparks while also pulling in more of the surroundings.
Another fun idea is to have your model spin the wire wool above their head so the sparks rain down over the camera. To do this safely, set your camera on a tripod and use a two-second timer. That gives you just enough time to step back while the exposure starts, letting the sparks fly overhead while your camera captures everything.