Trends come and go yet film photography has been resilient through times of evolving technology. With the advancement of DSLR’s we are able to see how an image will look prior to its capture, a monumental advancement from the slow processing of film cameras. Although an image can be shot straight-out-of-camera (SOOC) with the attributes of film in mind, it comes down to the post-production phase to dial in the appropriate settings to replicate that vintage feel. In this tutorial, we’ll teach you How to Edit Photos to Look Like Film for images that can be described as vintage, timeless, or bright and airy.
Watch the video
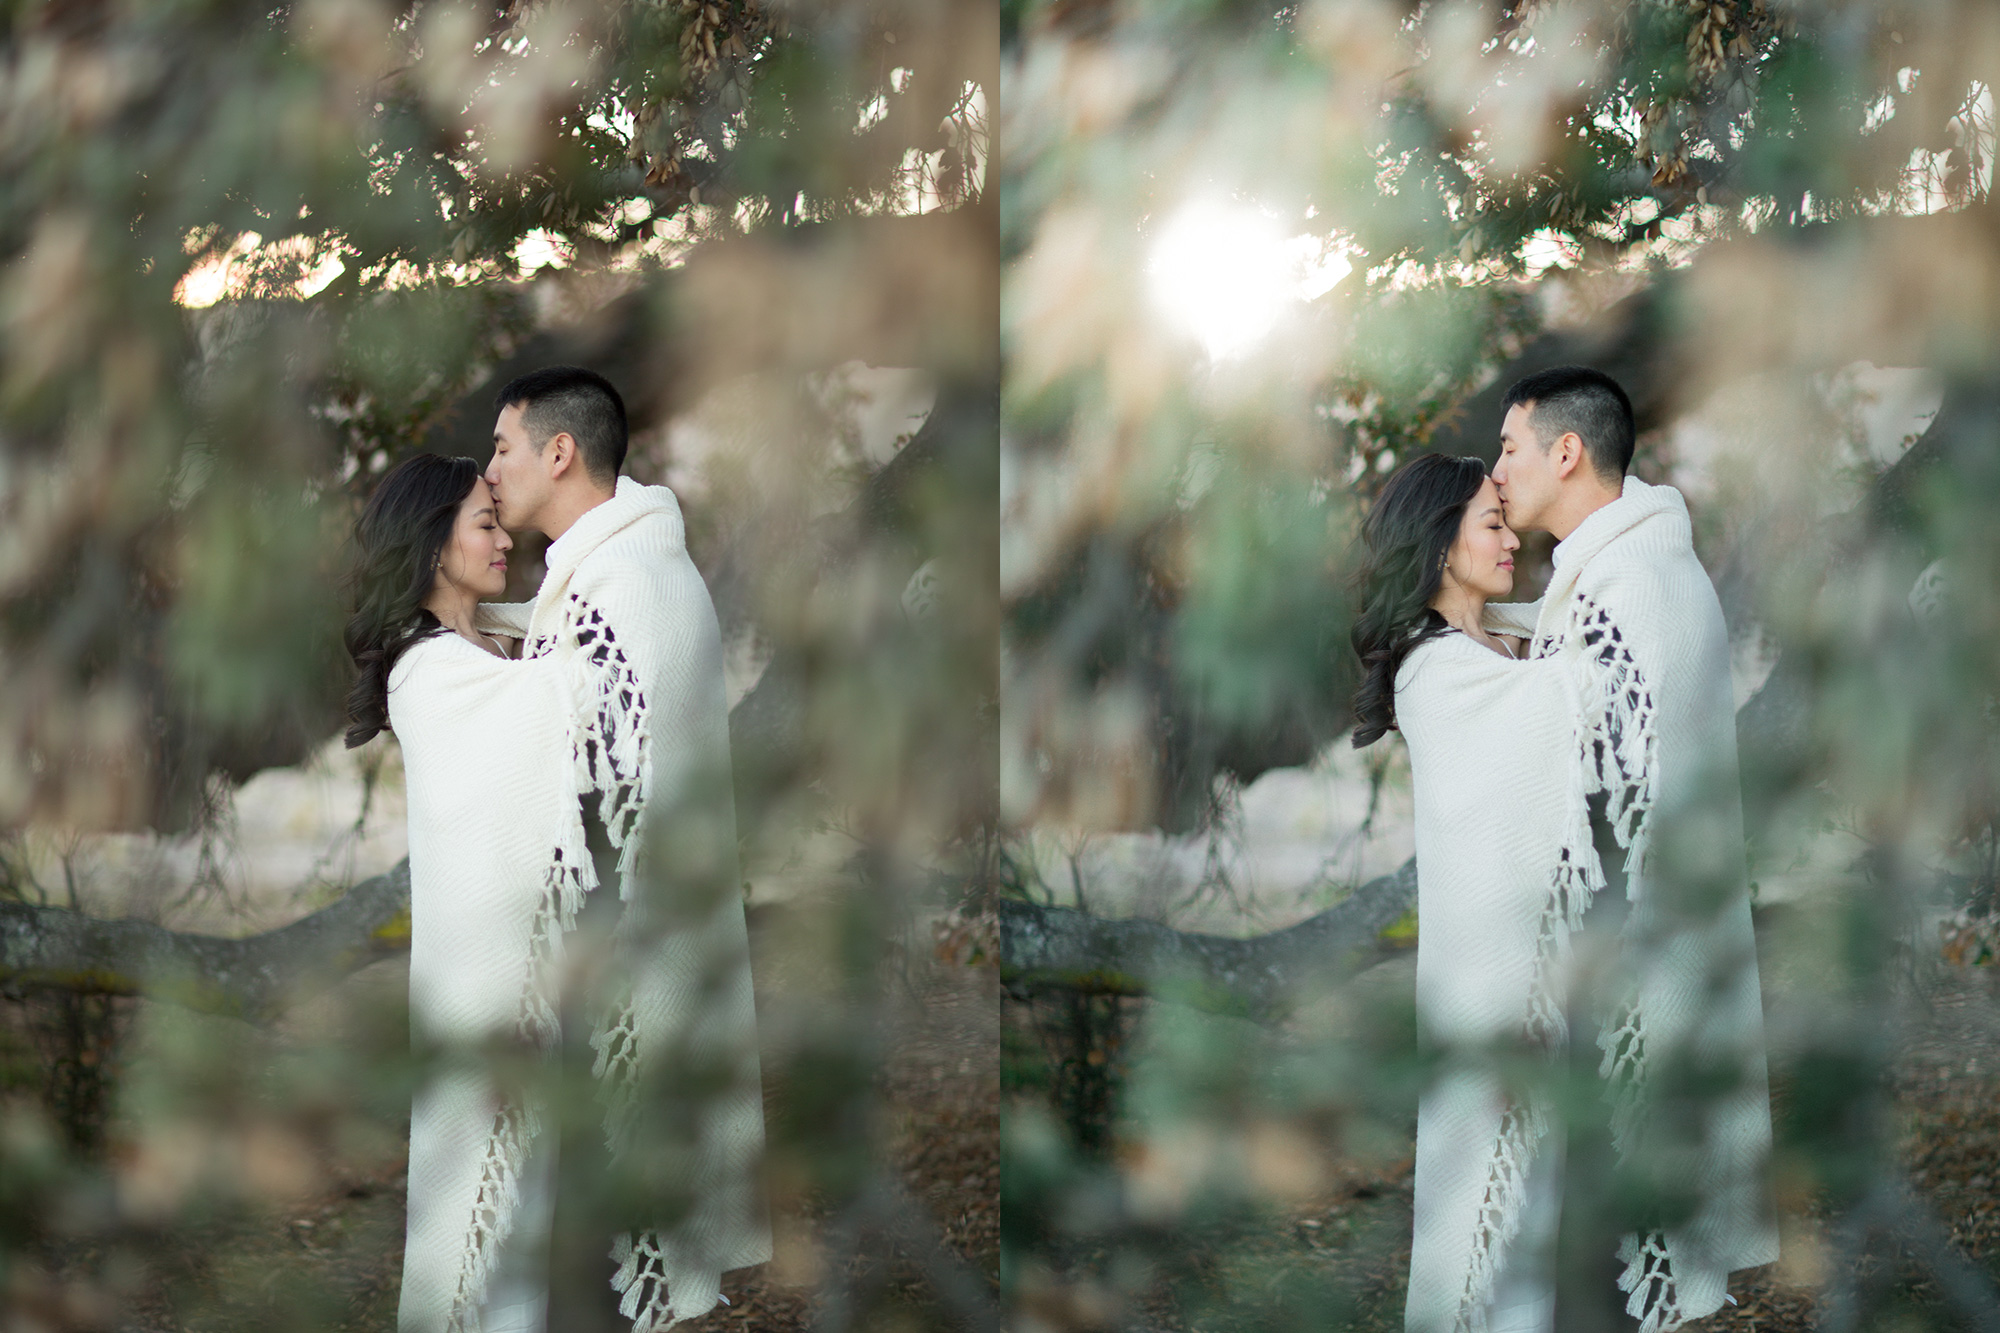
Canon 5D Mark III, Sigma 35mm f/1.4, 1/4th sec at f/1.4, ISO 3200
Shoot for the Photo Edit

Editing your photos to look like film starts in camera with how the photo is hot. Bridge the gap between your photo sessions and post-processing by creating your vision in-camera and making the necessary tweaks in post. The key to achieving timeless and filmic images begins during the session and ends with a consistent delivery.
Bright and airy images are in currently in high-demand and don’t seem to be leaving any time soon. They give female subjects a softer appeal and the image overall a state of subtlety.

The image used in this tutorial was shot with the intention of being photographed using a film camera, and the grain caused by the high ISO is purposeful, resembling the granulation of film. Now, although it isn’t quite necessary to be shooting at 1/4 of a second, the blur for this shot was also intentional, creating a softer focus throughout the image.
Shoot RAW For More Flexibility
When editing photos to look like film, capture as much information as possible. Raw files provide a collection of unprocessed data making them the ideal foundation for Camera Calibrations in Lightroom. Unlike their JPEG counterparts, RAW files are uncompressed, meaning they do not contain an embedded camera profile, providing the most color data and recording greater exposure levels. By maximizing our dynamic range and shooting in RAW, we can increase our exposure levels in post-processing and achieve our desired light and airy look.
Adjust HSL for Soft Highlights & Desaturation
Film images generally have softer highlights, never reaching a pure white look. To replicate that effect, pull the highlights down while preserving the shadows and blacks to brighten skin tones and darker portions of the image.
Any contrast lost is gained through adjustments in the Tone Curve, muting the shadows by pulling up on the left side of the curve, and decreasing highlights even further to exaggerate that matte film effect.

Dramatic alterations are made to the color in the image by fine tuning the HSL (Hue, Saturation, Luminance) panel in Lightroom. Although a speedy way to desaturated color in an image is to simply decrease it using the Saturation slider, this affects the image as a whole, disabling you from targeting specific colors. The preset used was designed to resemble the pastel tendencies of the Fuji 400h.
While color profiles are the foundation for a film preset, the true magic lies in the Hue Saturation Luminance (HSL) section of Lightroom. Our presets adjust tonal range for blues, greens, teals and overall saturation for you. These subtle yet noticeable differences have helped us to build Film / Vintage presets that are perfect for portraiture and calibrated for skin tones.
Balance Your Sharpening And Grain
We instantly can recognize film photography because images tend to have a softer focus, subdued hues, and are light and airy. Create the softer focus in Lightroom in the Effects menu. It’s important to note that Lightroom automatically increases Sharpening regardless of presets. Remove Sharpening altogether and opt for a subtle Grain to achieve a classic film processing effect.

As mentioned above, the pre-existing grain in the image was done with intention, however, adding even more grain in without reducing the original noise might be overkill. Fluctuate the sliders to reduce noise to a balanced point where you haven’t lost edge detail.
To enhance the filmic effect, you can add in grain or leave as is. With such a high ISO you should be cautious of adding in too much granulation into the image.
Make Your Camera Calibration Adjustments
Lightroom’s Camera Calibration contains various color profiles that mimic color treatments for film. Utilize color profiles to create your own film variance/presets. Similar to filmic color treatments, the profiles adjust reds, blues, and greens in an image and have a global effect in an image. By enabling Camera Calibration we have greater control over color in a photo and easily can fine-tune hue, saturation, contrast, and shadows. If you are looking for a one-click fix, check out the SLR Lounge Presets which has a range of Film presets including Fuji 400h and Kodak 800.

To achieve an effective vintage effect first we need understand the unique tonal range (hue) and strength of the tones (saturation) for our desired film look. For example, our Fuji 400H adopts a green and pastel color grading whereas our Kodak Portra 800 highlights golds, richer color, and warmth in the image.
Adjusting the Camera Calibration sliders drastically can change the hues & colors existing in your image, but the important thing to remember here is your intention behind doing so. Make small incremental adjustments to see how prominent the change in color truly is.
Conclusion

Shooting and editing is like a symphony; every element, from shoot to post-processing, has to compliment each other. The trick? Neither can overpower the other and our timeless images start with a vision. Editing photos to look like film is the ultimate balance.
This is just one of numerous tutorials from our Lightroom Advanced Processing workshop, helping you develop superior post-production techniques by utilizing Lightroom’s RAW processing capabilities to their full potential. Stream the entire workshop as an SLR Lounge Premium Member.


Get Connected!