-
Term: Liquify Tool
Description: The Liquify Tool in Adobe Photoshop is a feature that enables users to manipulate and modify areas of an image by pushing and pulling. It behaves akin to a digital finger that can drag portions of the image in various directions. While it is frequently employed for subtle photo retouching tasks such as reshaping facial features or smoothing out clothing wrinkles, its versatile brush options and settings grant users precise control over the degree and type of distortion. For instance, a graphic designer might use the Liquify Tool to enhance the volume and flow of a model's hair in an image.
Liquify Tool
How to Use The Liquify Tool in Photoshop
The Liquify Filter in Photoshop is a powerful tool. It can make a jiggly arm, slim; a chin disappear with a flick of your mouse and turn a celebrity into a waif mere seconds. It’s like a plastic surgeon in the form of a button and it’s widely misused and blamed for its hand in “making unrealistic body proportions,” according to Jeff Rojas.
In the following video, Jeff shows us how to use the tools in the Liquify Filter to make your retouching look natural, and not questionable, like Lindsay Lohan’s recent Photoshop gaffe below. In the aforementioned photograph that Lindsey posted on Instagram the other day, it looks like in an effort to enhance her assets, she got a bit carried away and warped not only her backside, but the doorframe behind her. But I digress.

The point is, don’t do it. Watch the video to learn how to properly use the Liquify Filter so this doesn’t happen to you. Even if you are well versed in Photoshop and Liquify, this 7 minute video is still worth a watch as Jeff gives some good tips as he goes through all the basic tools in the liquify filter and how they can be used in your images. He then shows us the various tools in action, as he makes small and subtle changes to enhance his image.
In my opinion, when it comes to Photoshop, the more subtle the change, the better. I once had a client that insisted on having every single photo in her wedding album retouched so that her arm was stick thin slender and her pointed chin was rounded and smoothed out. My initial retouching was too subtle for her taste and she insisted that I comply with her requests. The final images did not even look like her, but that’s exactly what she wanted. Photoshop is a powerful tool, use it wisely.
Watch Jeff’s video below to see how to use the Liquify Filters to enhance your images and keep the body properly proportioned.
Another Liquify Tool Example

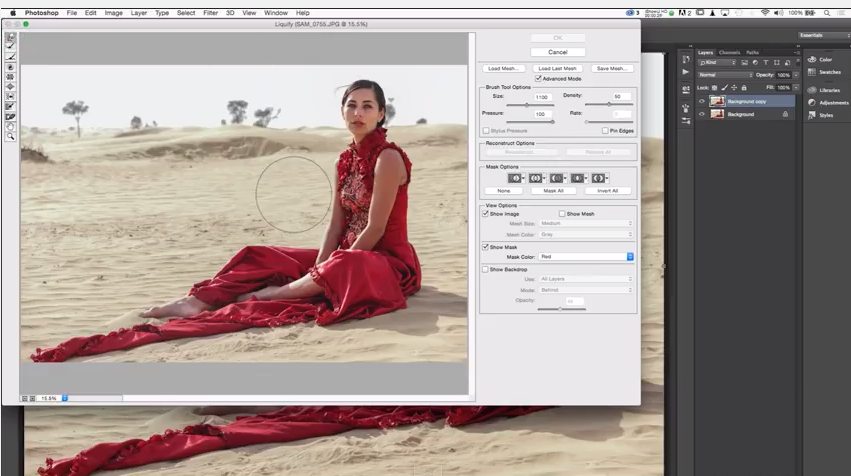
You may have a client who has asked to be modified with changes ranging from slightly to heavily retouched. The philosophical points of whether or not to make the changes are yours to consider, but should you decide to do so, here’s how it’s done:
- Stamp visible layer
- (Alt + Ctrl + Shift + E/Opt + Cmd + Shift + E)
- Liquify (Ctrl/Cmd + Shift + X)
- Forward Warp (P)
- Large brush
- Work edges
- Straighten lines
- Keep subtle
- Compare before/after
- Mask for background if needed
The liquify tool is great for reshaping subjects so long as it’s done used in moderation; otherwise, you could end up with a phony-looking image. In addition, if the client did not request specific changes and you change too much, some of the changes might be seen as insulting to the client’s natural appearance. That said, it’s best to keep things looking natural, for both the subject and the background.
Liquify Tool Tips
- Change brush size often
- Keep an eye on the brush pressure to allow for more nuanced adjustments
- Brush density can be kept on the high end, allowing for larger areas per stroke, and thus more natural changes
- Beware of editing images that fill to the border of the frame, as you may encounter some transparency. Using the masking option will help with this.
Related Articles to Liquify Tool Definition
5 Steps for Editing Clean Backgrounds in Photoshop
A clean background keeps the focus right on your subject without any unnecessary distractions. In this video, I’ll be showing…
Puppet Warp | The Really Cool Tool You Know Nothing About
Puppet Warp will allow you to quickly, easily, and drastically change the details of an image, and has applications in almost every genre of photography.
Liquify Is Broken In The Latest Photoshop Update & Here’s A ‘Fix’
Photoshop’s latest update brought with it an error that affects a massive amount of people. Here are two workarounds, that aren’t perfect, but will get the job done.


Get Connected!