
Landscape photography pushes me to explore and go the extra mile while traveling to the most exciting locations on earth. From Europe to the Pacific Ocean, here are my top five landscape locations around the world! I’ll also share quick landscape shooting tricks to make sure your photos are good from the start, as editing is only the second part of the job. Finally, I’ll share my fast editing workflow and my favorite post-processing tools in Luminar 4.
1. Dolomites
A UNESCO World Heritage site and a gem in the Italian Alps, the Dolomites have always fascinated me with their sharp and steep peaks against the background of soft landscapes and cute churches.


2. Indonesia
The country with the most islands in the world is packed with amazing scenery. The Sumba and Nusa
Penida islands are my favorites and are the main stops during my Indonesia photo tour. From mangrove forests to amazing rock formations, everything looks so beautiful and makes for perfect landscape photos. These islands are still very untouched, and travelling from one spot to another takes hours. But it’s worth it!


3. Provence
Provence is one of those places everyone should visit at least once. Infinite lavender fields create colorful leading lines. At sunrise and sunset, the light makes Provence even more magical.


4. Switzerland
The country where I live has so much to offer nature lovers. The Swiss mountain scenery is varied and breathtaking! With its cute alpine lakes and trains that go where it seems impossible to go, there are so many places to explore and capture.


5. Iceland
The land of fire and ice surprises me every time I visit, and the scenery changes every season! My favorite spots are Vestrahorn and the Jökulsárlón glacier in front of the Diamond Beach.


Shooting tricks
Want to see how I transformed these shots using Luminar 4? Keep reading to discover my favorite tips & tools.
1. Always shoot in RAW format: RAW files retain the most information possible and allow for the best post-processing.
2. Underexpose your shots: The way modern digital sensors work means dark areas of photos can be recovered much more easily than overexposed areas. If the sky is too bright, you might clip the highlights, and you won’t be able to recover them. But if you underexpose to avoid clipping the highlights, you can safely recover the shadows.
3. Don’t use GNDs: I extensively use neutral density (ND) filters for my photos, but I don’t like to use graduated neutral density (GND) filters. GNDs are used to reduce highlights in the sky but get applied without distinction to the sky, mountains, trees, and buildings that stand in the sky. I prefer to underexpose the whole photo and apply a GND effect in post-processing with Luminar. AI Sky Enhancer simulates a GND filter but applies the effect only to the sky, automatically masking elements that intersect the sky. Luminar also has an Adjustable Gradient filter you can apply to the whole sky when it’s free of objects or to selectively balance parts of the image.
My favorite post-processing tools in Luminar 4
Luminar 4 packs a lot of useful features that help us to achieve amazing effects and save shots we thought were lost.
AI Accent
For every photo, I start my post-processing workflow by adjusting the overall exposure and temperature. To do that, I operate the sliders in the Light tool in Luminar 4, working mainly on Temperature/Tint, Shadows, Highlights, and Exposure. This operation comes naturally for me after many years of post-processing, but as I saw during my post-processing courses, beginners might need some time to understand how to get the best results. The Luminar Accent AI filter takes care of that. This one slider uses artificial intelligence (AI) to analyze the image and automatically correct the exposure and colors.
Сheck out a video of how I edit photos in Luminar 4:
For the image below, Accent AI was able to properly recover and open up the shadows and increase
the overall exposure. After that, I worked selectively in the Advanced section of the Color tool and
finished with the Advanced Contrast tool.


AI Sky Enhancer
AI Sky Enhancer is also powered by artificial intelligence. It makes for a great virtual GND filter as it
automatically targets the sky, masking objects like trees, mountains, and buildings.

AI Sky Replacement
I was very unlucky with the sunset for these two photos: a completely empty sky! But I was able to get a great final result!
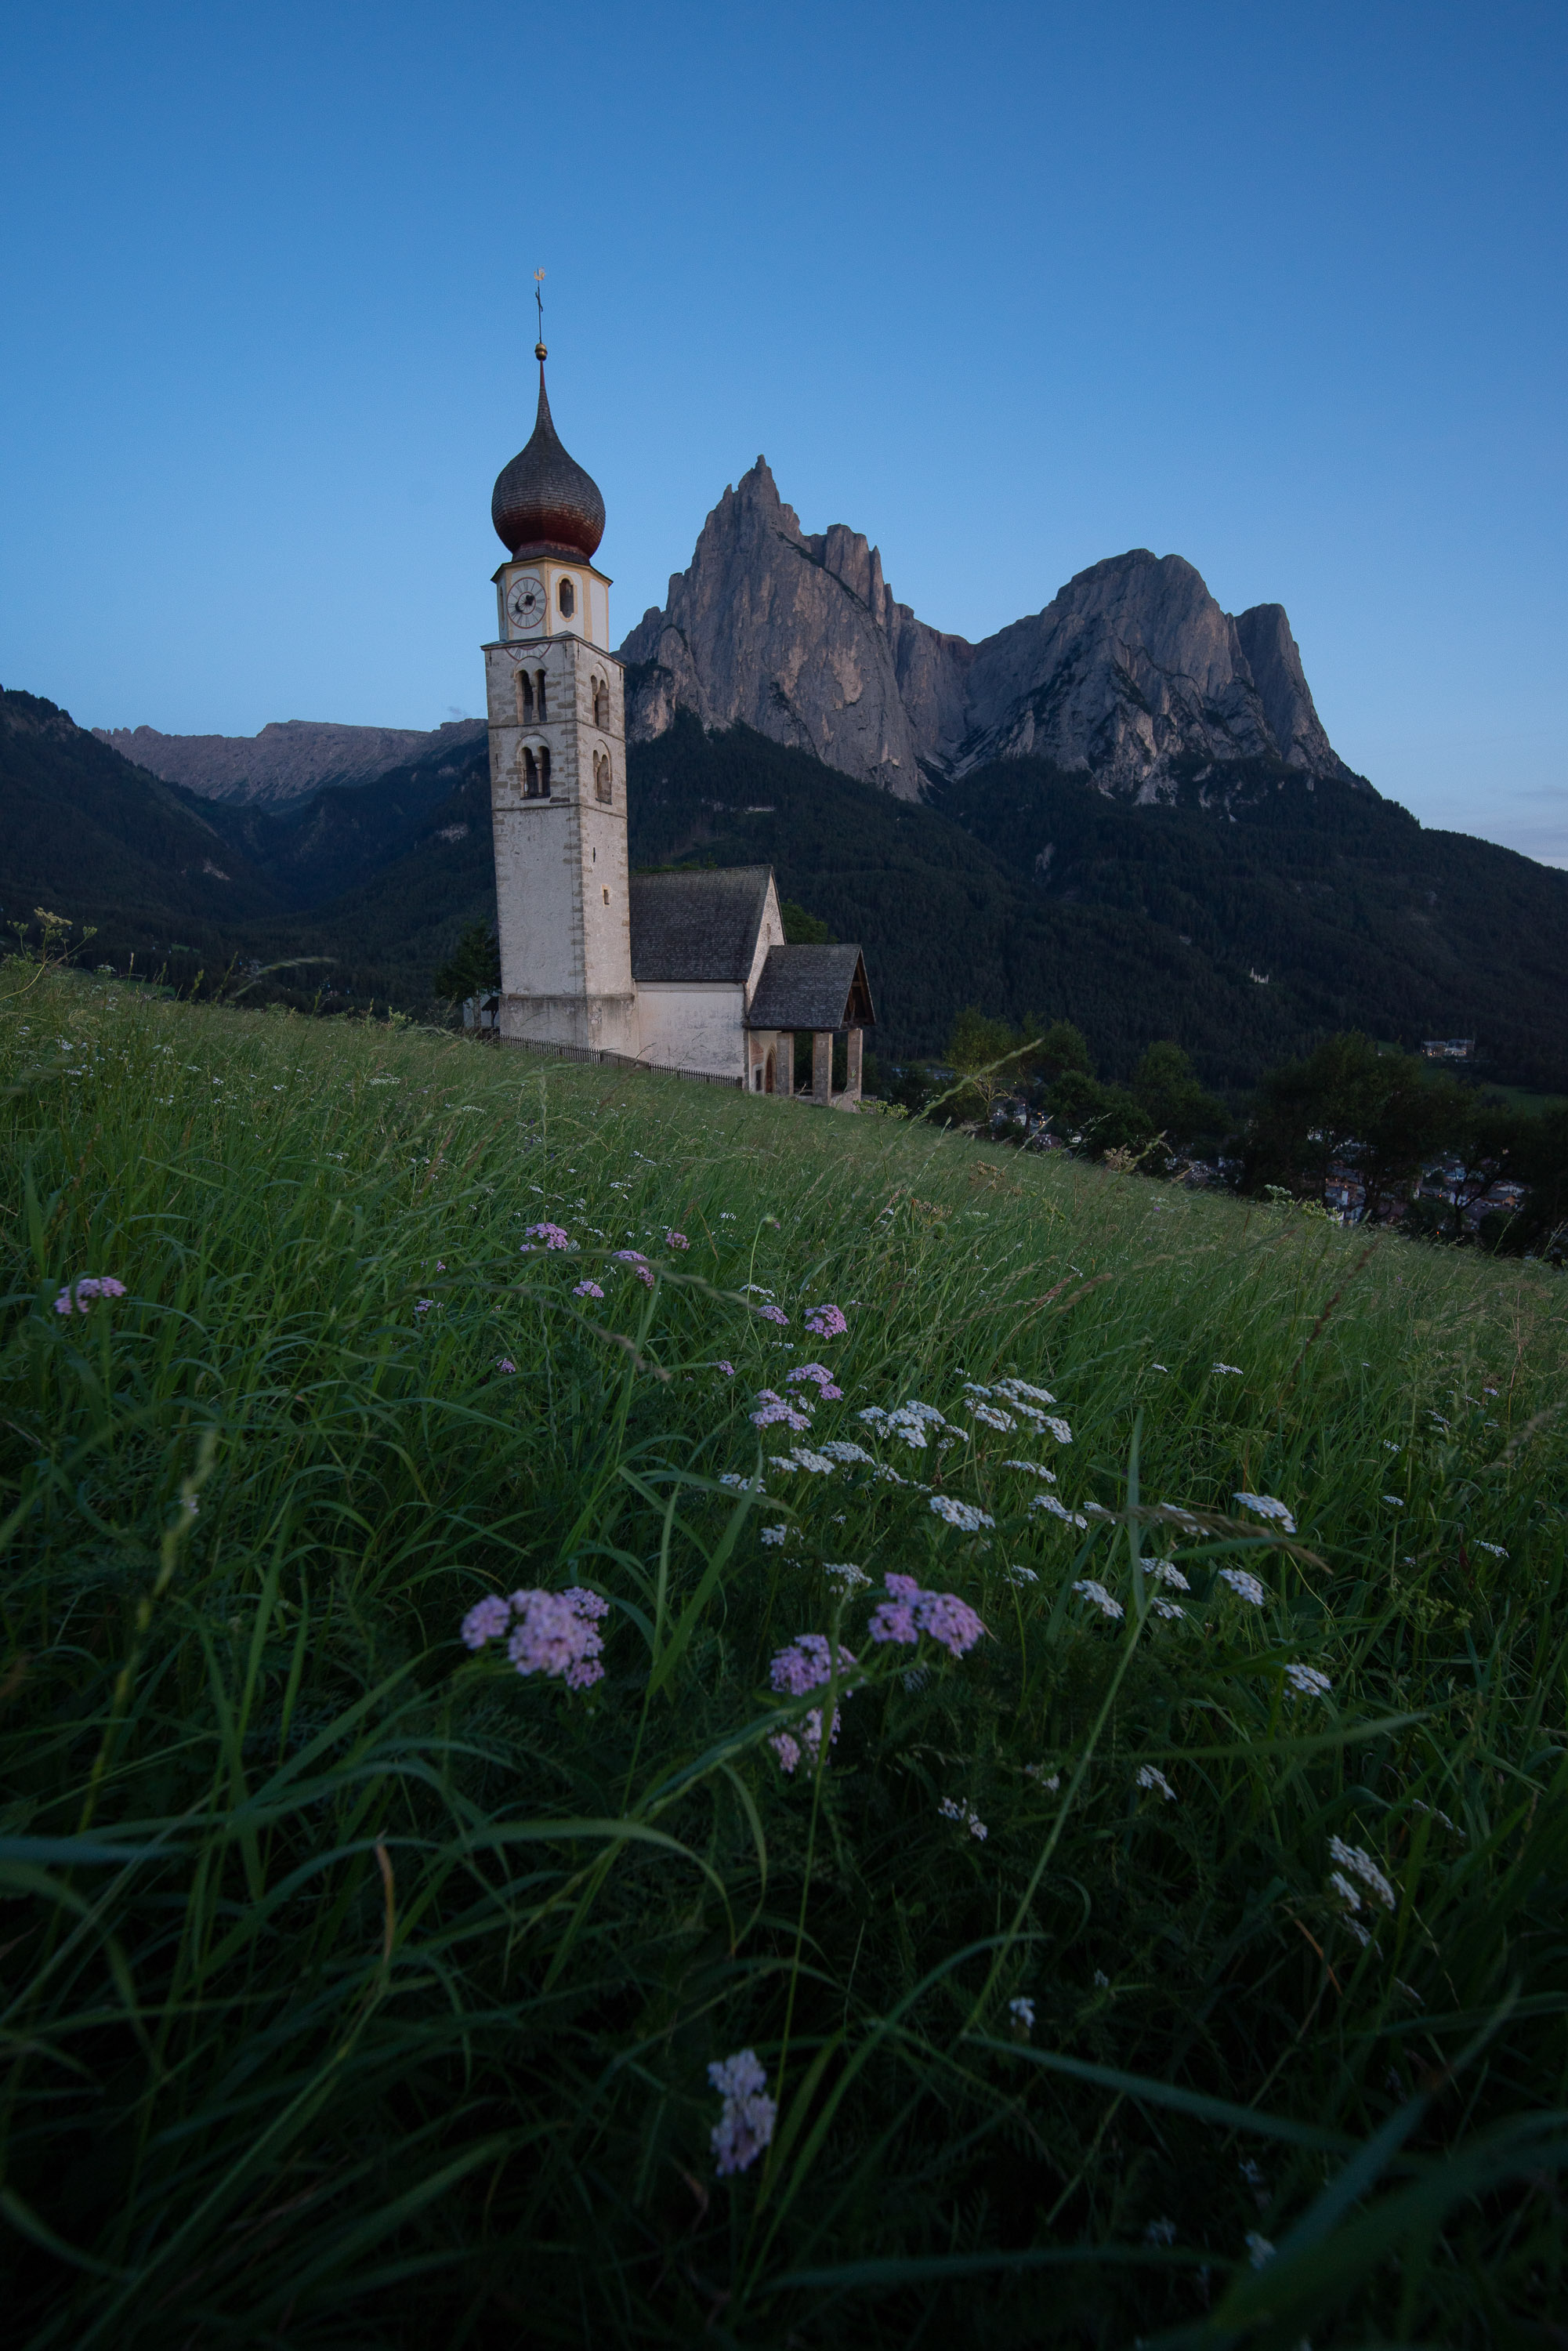

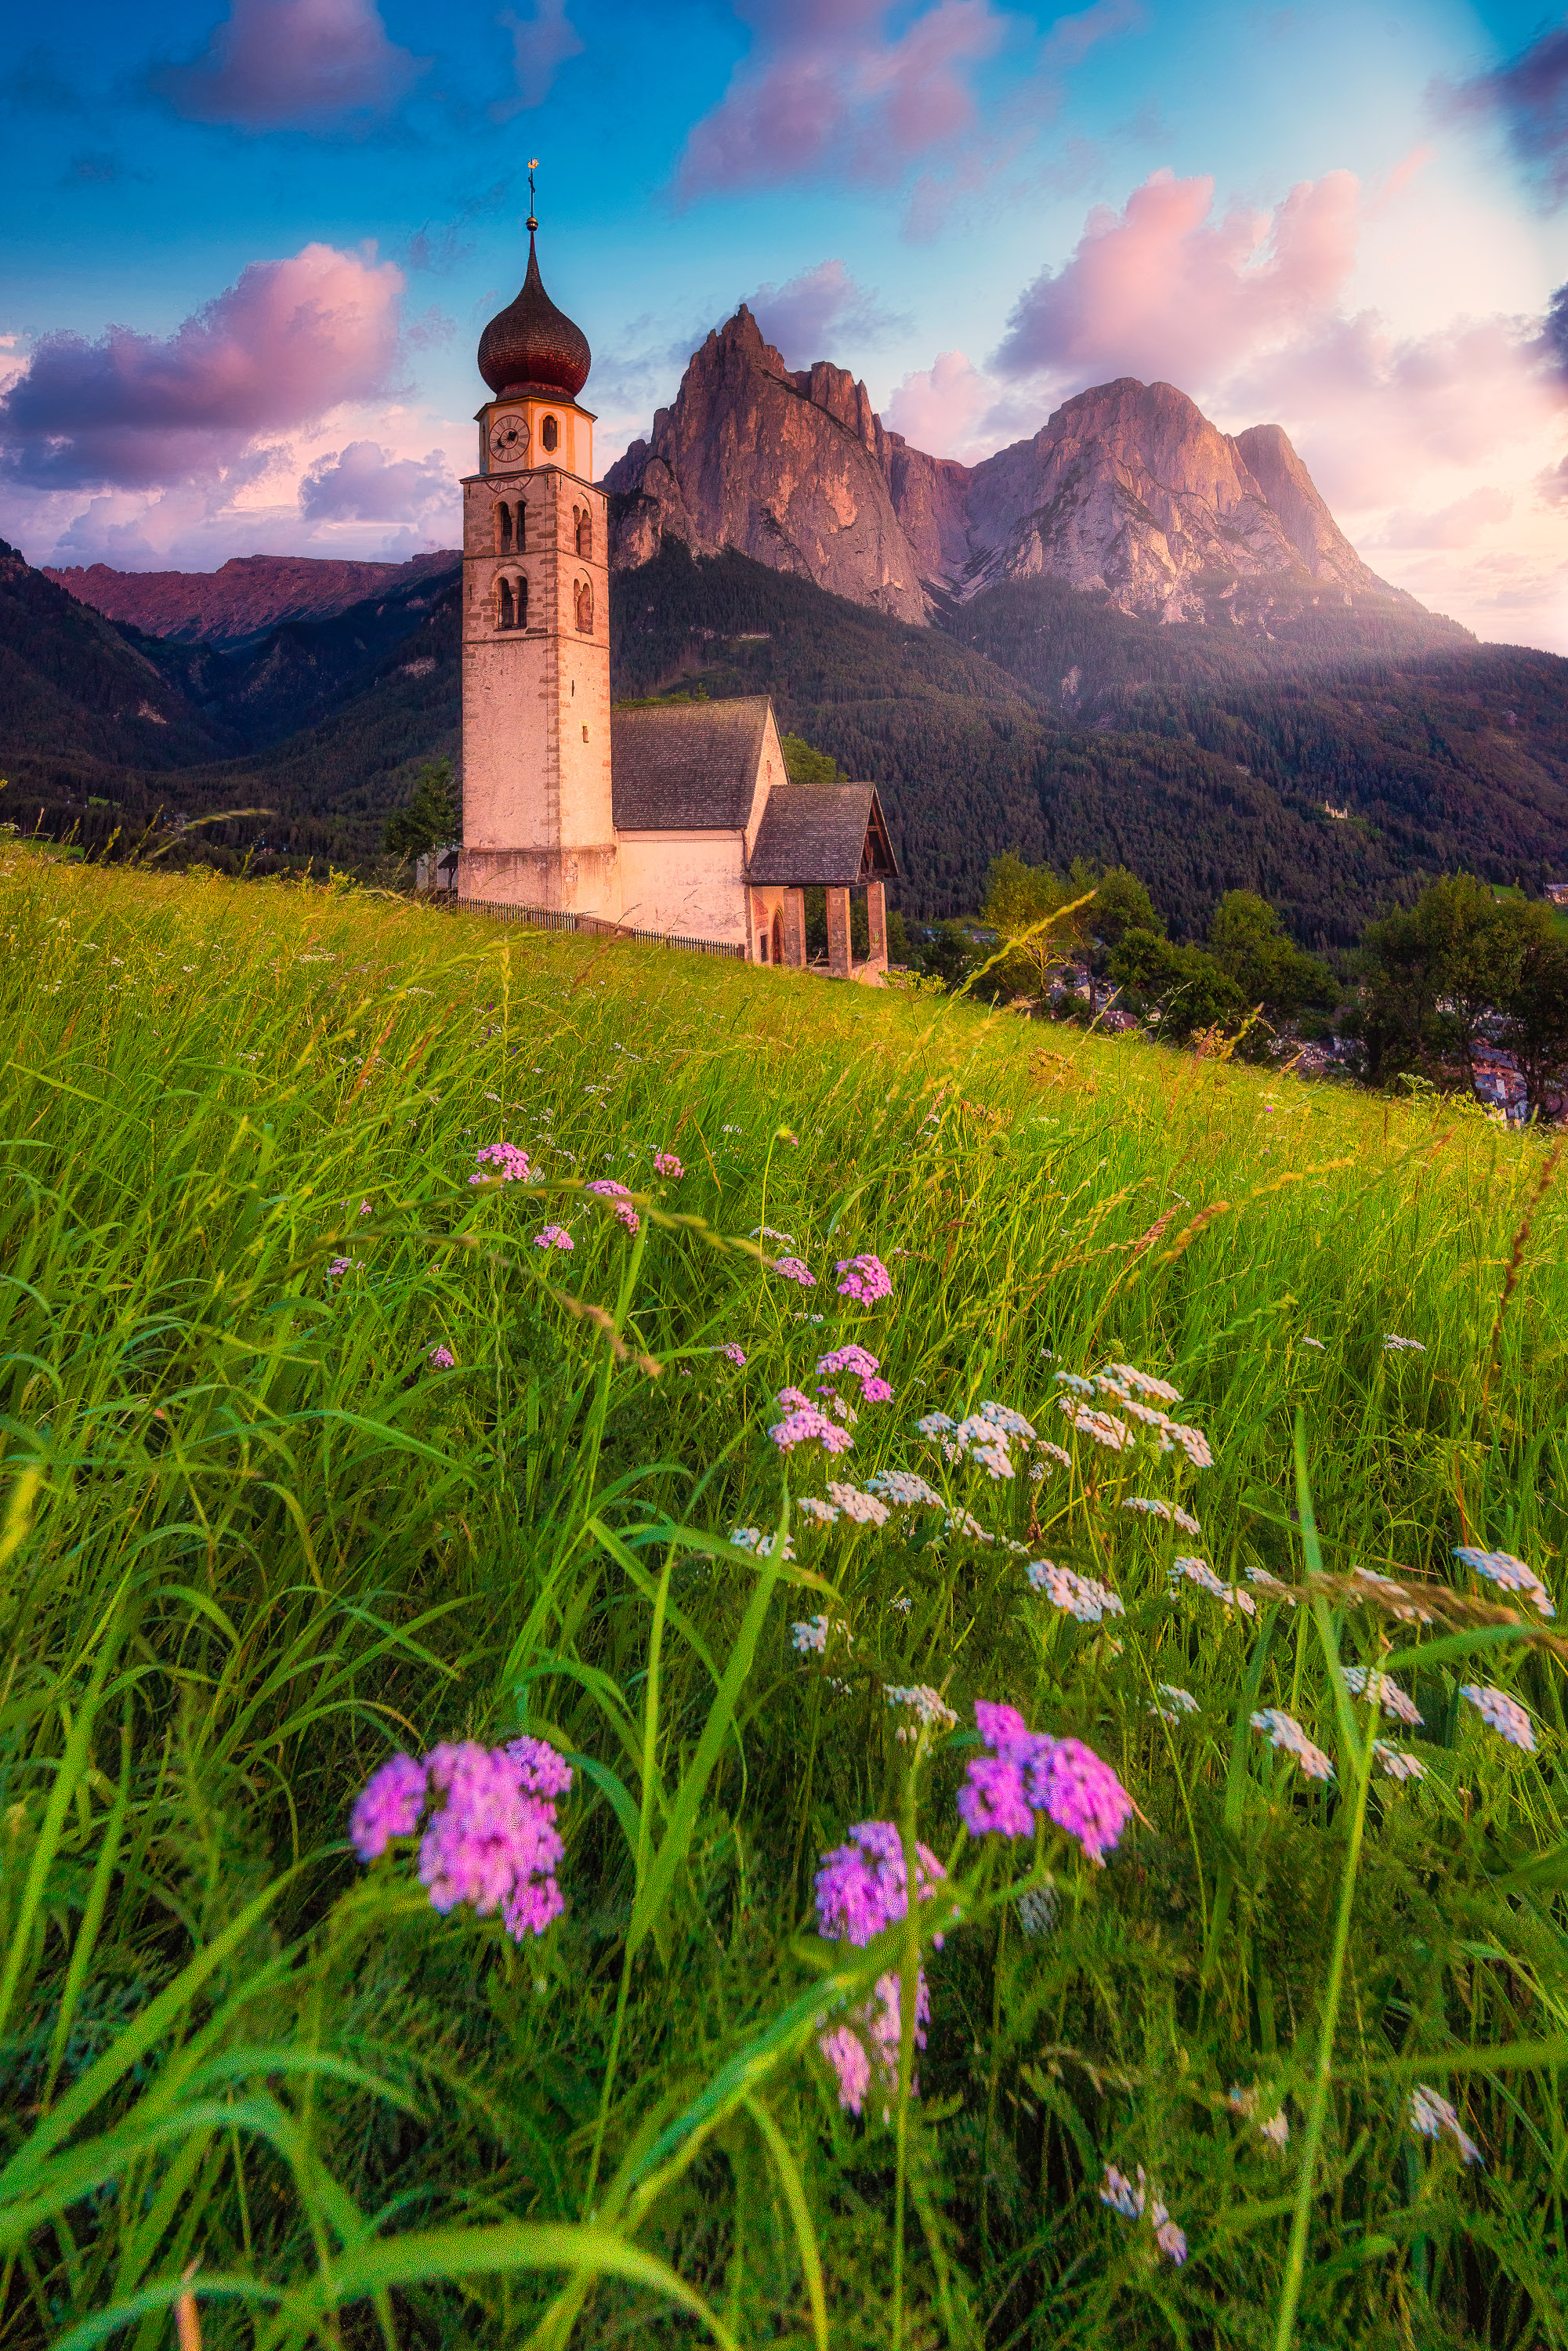

After fixing the overall exposure and shadows, I used AI Sky Replacement to replace the sky. The beauty of this tool is that it not only identifies objects in the sky and masks them automatically but also adapts the mood of the photo to the new colors.
For the church photo, I used one of the preset skies that come with Luminar, but the cool thing is that you can use your own captures!

That’s what I did for the other photo, where I used a sky I captured just a few days before. It’s a good idea to capture clean shots of amazing sunsets when you have a chance, as you never know when you could need them.

Sunrays
The Sunrays tool allows you to add a sun effect to your photos and is highly customizable. After replacing the sky in the previous image, I applied the Sunrays filter just outside the frame on the right to simulate the setting sun and keep the direction of the light consistent with the original scene.
I then moved to enhance the colors using Vibrance and selective color adjustments in the Advanced Colors section. This feature is useful for working only on specific colors — for example, the pink tones in the sky in this photo. In general, when you want to enhance colors, use the Vibrance slider instead of the Saturation slider. The difference is that Vibrance acts in a non-linear way, increasing the saturation of not-so-saturated colors first, allowing you to push colors without getting that crazy punchy look that pushing the saturation would give.
I then enhanced the Small Details in the Details Enhancer tool.
In the Creative tab, I added a bit of Mystical effect, and in the Professional tab, I used Advanced Contrast to selectively increase the contrast in different areas of the image. Finally, I used the Split Toning function to correct a color cast in the shadow areas (the forest) and push the colors in the sky a bit more.

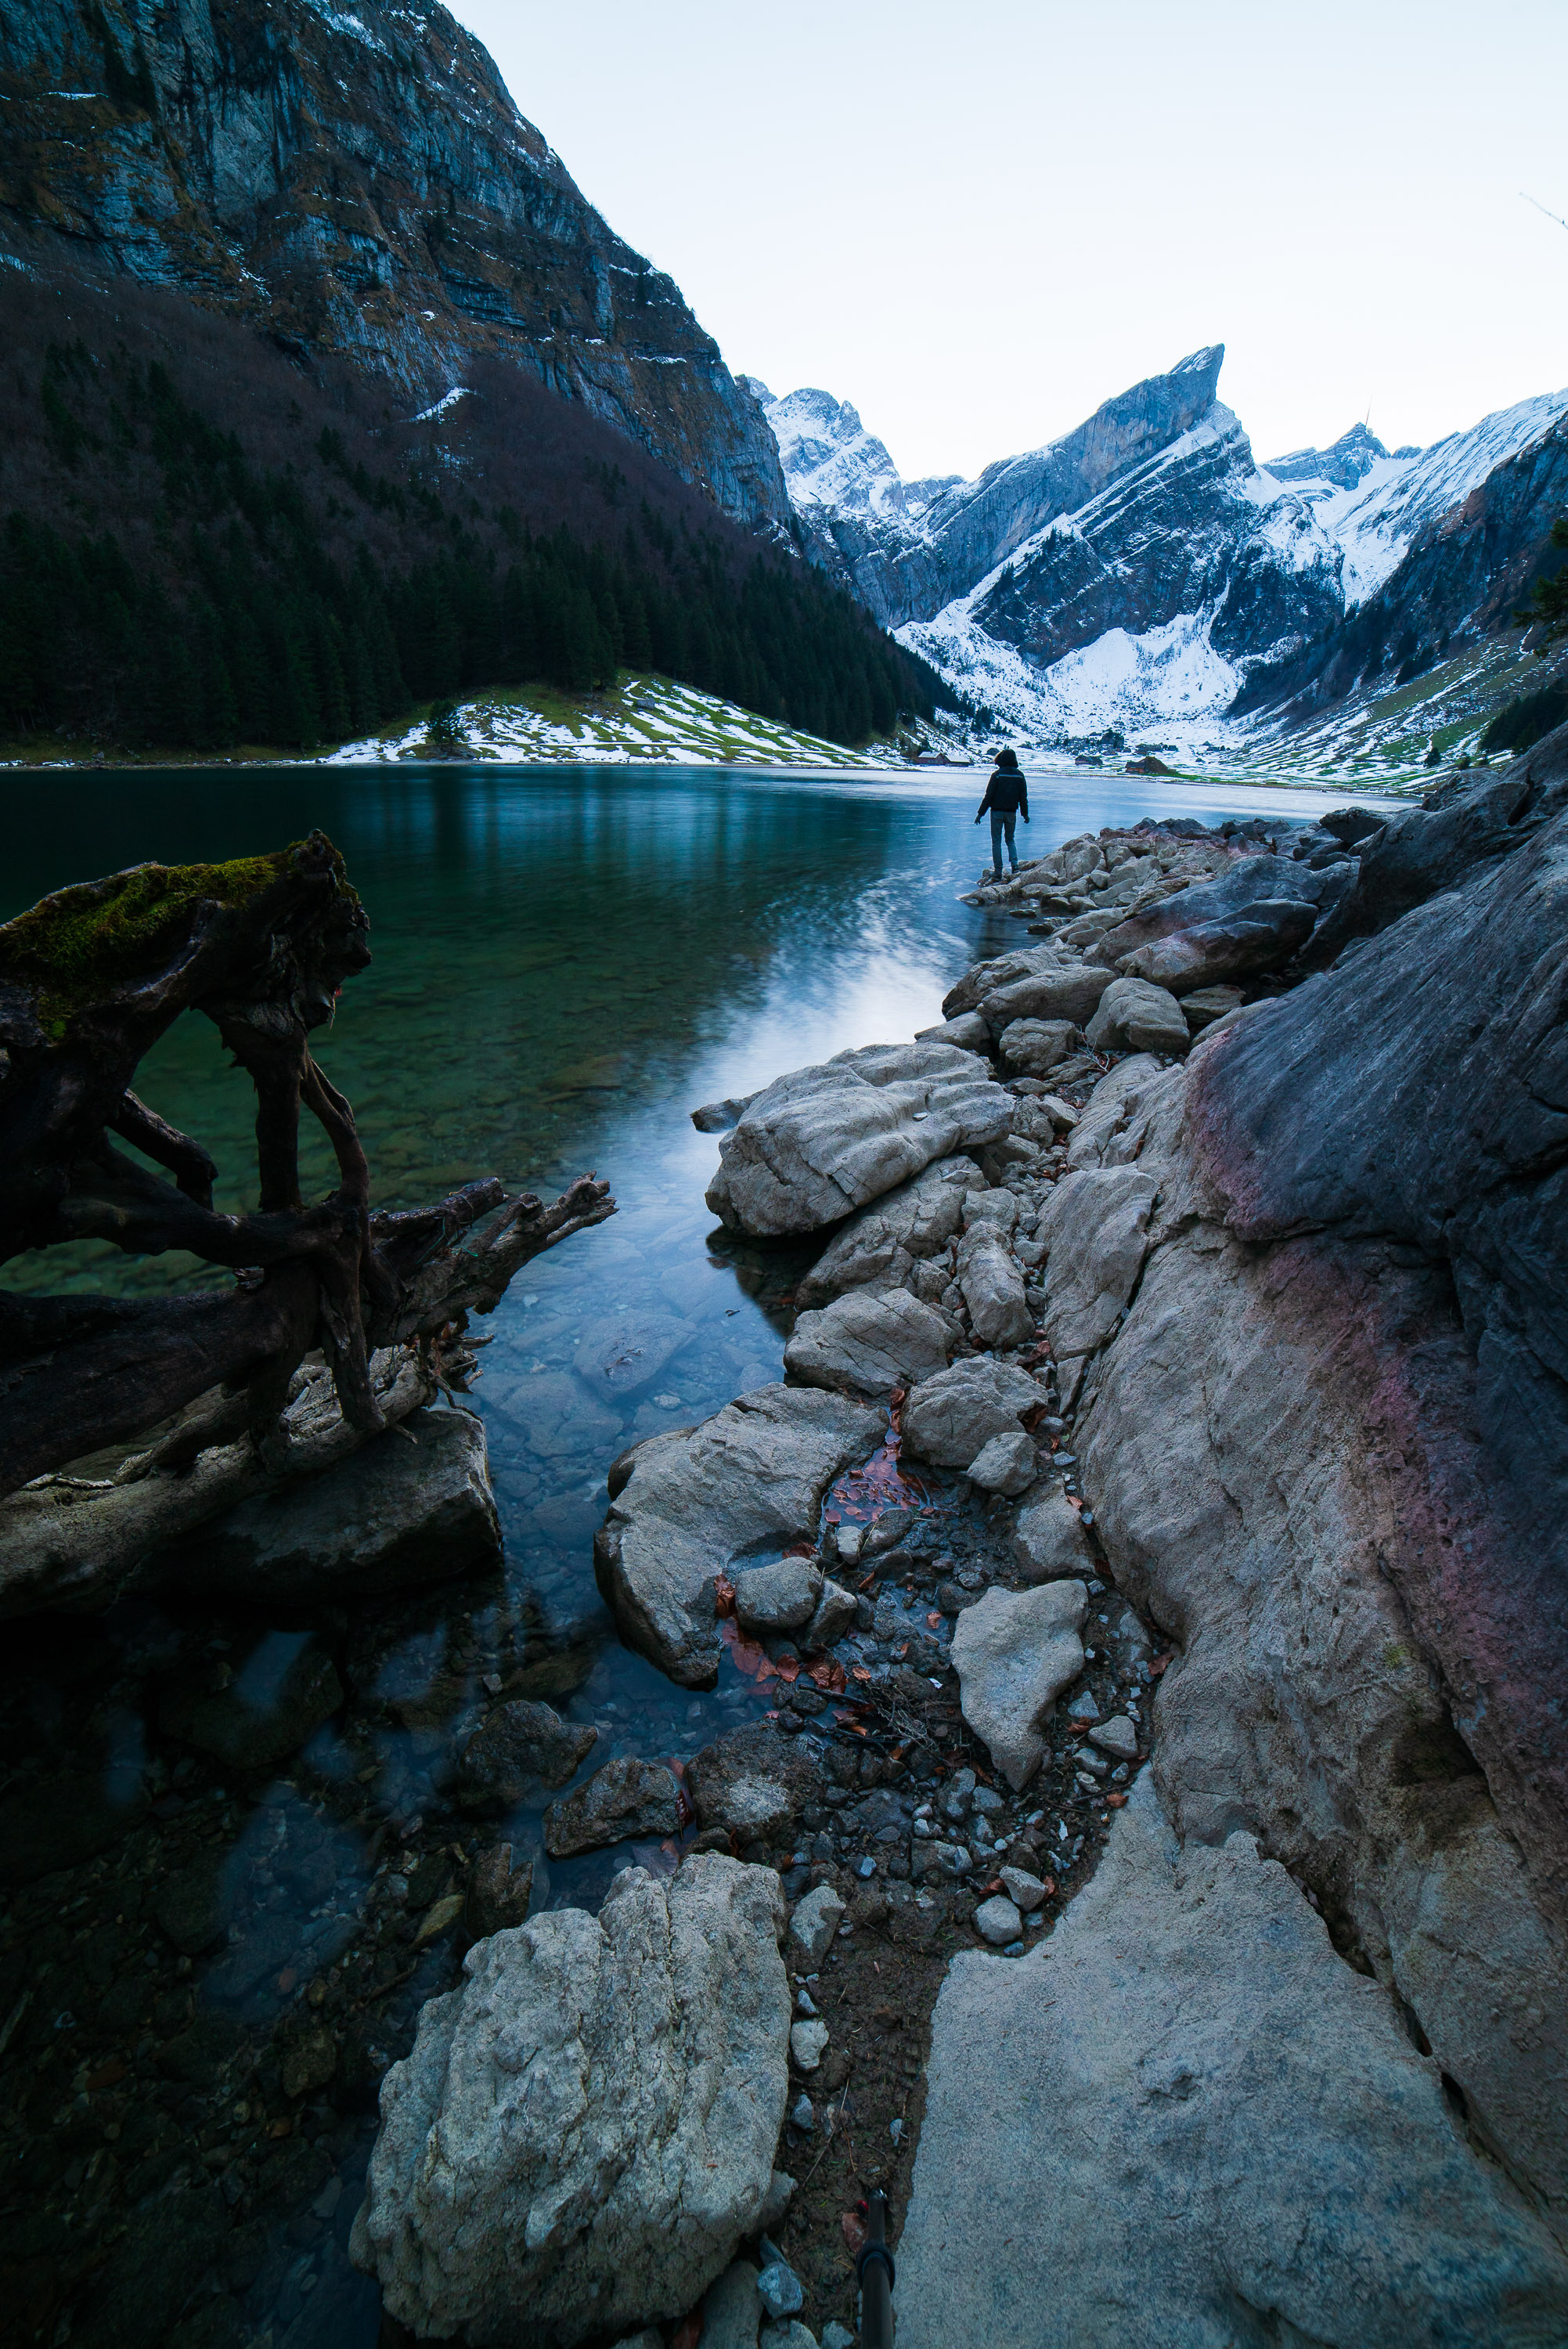
Dodge and Burn Swiss See


Oeschinensee Lake is one of my favorites in Switzerland! This small gem is surrounded by high peaks that create such dramatic scenery!
For this photo, I first adjusted the exposure overall, enhanced the colors, and made it warmer by increasing the Color Temperature in the Light filter. To give it some punch, I used the Dodge and Burn tool in Luminar 4 to increase the light/shadow contrast in the green areas and to trace the paths of the rivers going down the mountain to act as leading lines.
Dodge and Burn allows you to increase the brightness or darkness locally. This can be useful to increase the visibility/contrast of parts of an image that lead the viewer. For example, in this photo, I increased the contrast between the green areas and brightened the river going down to the lake. Keep exploring this wonderful world and push yourself to wake up early or stay out late in the field to capture locations in the best light and conditions. Master your photography skills gradually, and remember that it’s all about applying your knowledge in practice. Luminar 4 adds the final touch to make your photos great — even when you can’t get the perfect shot!
Have some photos from your last vacation that could use some editing? Now is the perfect time to download a free trial of Luminar 4 and practice erasing objects from your photos while staying safe at home.
All images by Raffaele Cabras Keller and used with permission.


Get Connected!