
If you are shooting athletes, you probably know that capturing athletes in motion is not a trivial task. Your left side of the brain wants to shoot at high speeds to avoid any blur, while the right side of the brain wants to add a more artistic look to the frame. Photographer Bee Trofort solves this balance by adding streaks of light with a small light to the portraits in a technique called light motion. See how he does this in this step by step tutorial.
What is light motion?

Light motion is a form of light painting that combines strobes and small LED lights. The strobe is used to freeze the action, and a small hand-held continuous light is used to create streaks of light. If you break this technique down, you can think about it as creating two separate exposures with one click of the shutter button.
The first “exposure” is set by setting the strobe power, the ISO, and the aperture. This will make the strobe freeze the action with good exposure.
The second “exposure” is set by dragging the shutter, i.e. setting the shutter speed to a longer duration than the scene requires. This will provide enough time to capture the light streaks.
I know it sounds like a lot, but this is actually very simple, here are the three steps to create this type of portrait.
This is simpler than it sounds. Here is a three-step recipe to mix and match strobes and LED lights.
See the Full Video Tutorial
Watch the full video tutorial on “Light Painting, Long Exposure and LED Lights To Capture Movement in Photography” below.
1. Set up a light motion “studio”

If you own a full-fledged studio, this is awesome. But if not, please don’t let this intimidate you. Any room that you can completely darken will do. This can even be your living room or a basement. In that dark space, place your gear: a tripod and camera and your strobes. Of course, the room does not have to be dark as you set up; we will get to this later.
2. Set your strobe’s exposure and your shutter’s speed
This may sound complicated, but in reality, all it means is that you need to place your strobes to compose a shot and (if you can) set your camera to rear-curtain sync. That strobe will freeze the action and give you a sharp, clear image of your model.
Now, set the shutter to anything between one and ten seconds. You will have this long to play with the lights until the strobes fire, and your subject is frozen. There is no formula for how long you need to have an open shutter. Play and experiment with the shutter speed until you find what is right for you.
In terms of aperture, there are no set rules for light painting. Remember, you can control the light brightness in two ways: by changing the aperture or by changing the brightness of the KYU-6 lights. Depending on your tests, feel free to change either.
3. Shoot Away
Once you are ready, turn the room lights off, click the shutter, and have your subject more for a few seconds until the strobes go and freeze the action. Direct your subject to move as if they are performing an action, swing a bat, “fake shoot” a ball, or anything that creates motion. Start the exposure right before the action starts and end it with the pop of the strobe.
It can be quite satisfying to check the LCD or monitor with your model. From my experience, they are always excited to see the photos.
Now you understand why you need the tripod and a very dark room. That second “long exposure” will be contaminated with light unless the room is dark, and the photo will be blurry unless you use a tripod.
Enjoy
Yea, this is not a step; just the time for you to lean back and enjoy your work. In the meantime, here are some of the portraits from Bee.
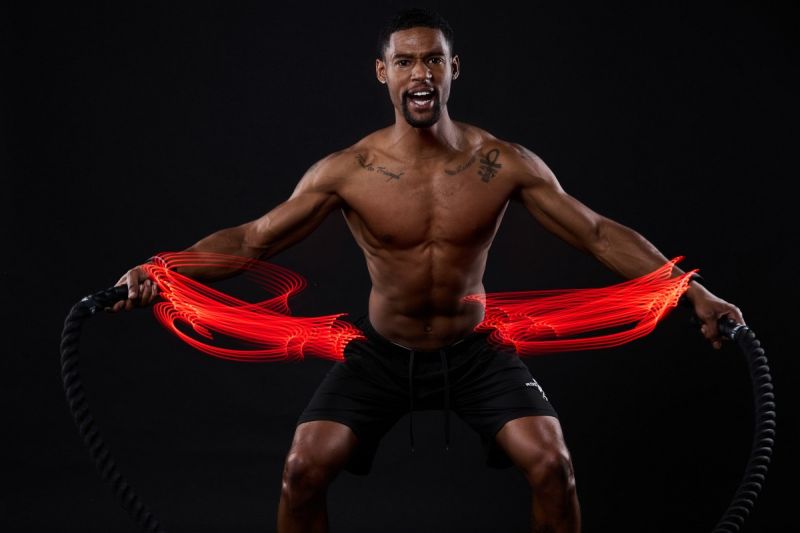
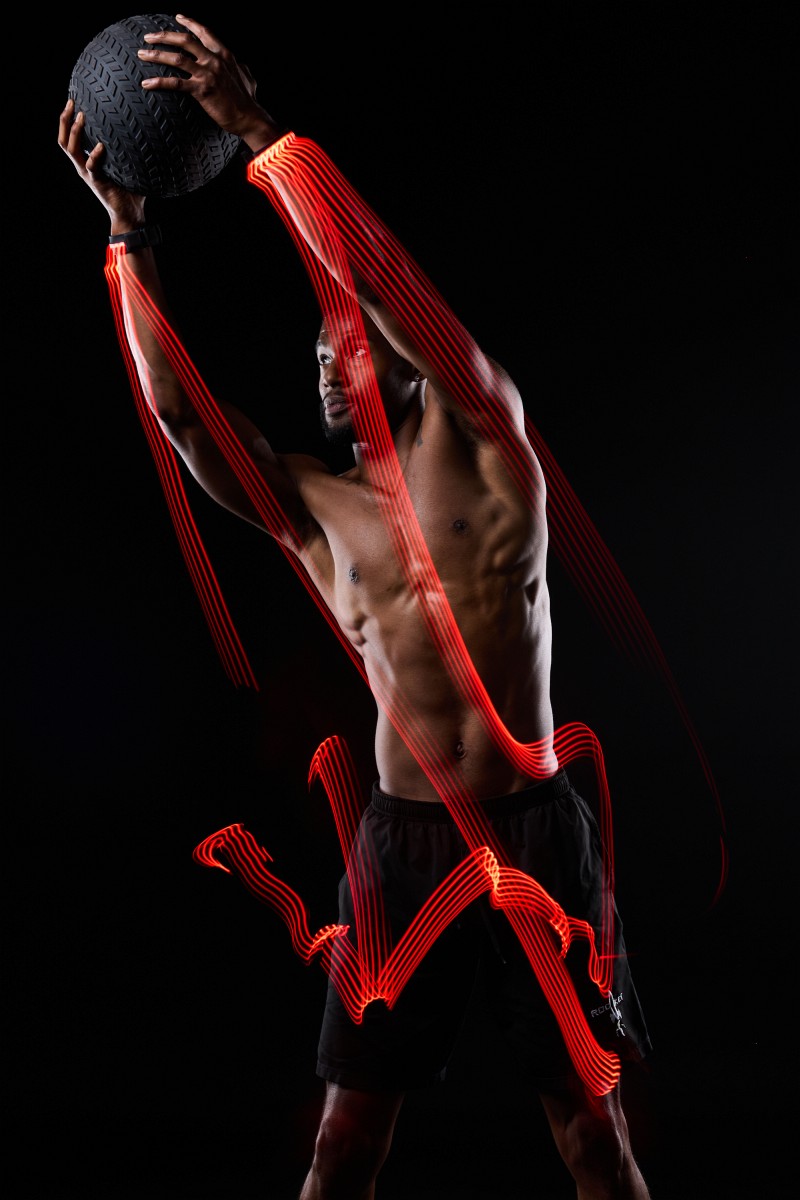
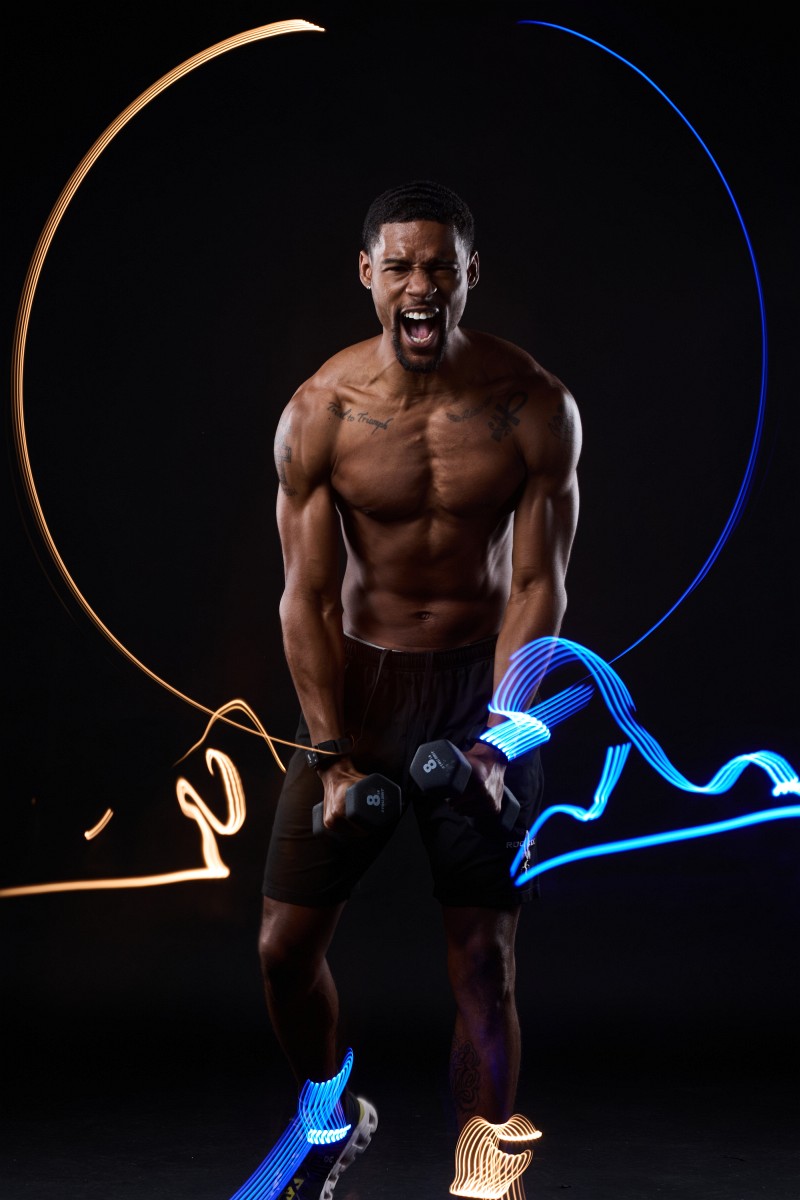
Light Painting portraits
Here is a selection of Light Painting from Bee. Now it’s your turn!


Get Connected!