
When it comes to photographing the elusive Milky Way in one of the most light-polluted major cities like Singapore, timing is critical. Most of the faint details will be washed out by the extreme light pollution and if we were to shoot the Milky Way under unfavorable atmospheric conditions, our attempt would be futile.
[REWIND: NEVER-BEFORE-SEEN ‘IMPOSSIBLE’ IMAGES OF MILKY WAY CAPTURED IN SINGAPORE]
Unfortunately, most of the tutorials online only work in locations that are at least 2 stops darker than most of the dark locations in Singapore and so, we need to do more in post-processing to unveil the elusive Milky Way and more complex workflow is required if we’re shooting at much brighter locations.
In this tutorial, I am going to show you how I shoot the Milky Way that’s obscured by the heavy light pollution in Singapore using photography equipment that you may already have and a workflow that probably works in most versions of Photoshop without purchasing additional plugins.
Equipment I Am Using to Shoot the Milky Way in Singapore
- Unmodified full-frame DSLR camera (Canon 5D Mark II)
- Wide angle lens (Canon 16-35mm f/2.8)
- Tripod
- Intervalometer
- Memory cards and batteries
Step 1
If the atmospheric conditions are favorable, locate the Milky Way using mobile apps like Star Walk or SkySafari for example. I have developed a simple app for the same purpose too and it can be downloaded here.
Step 2
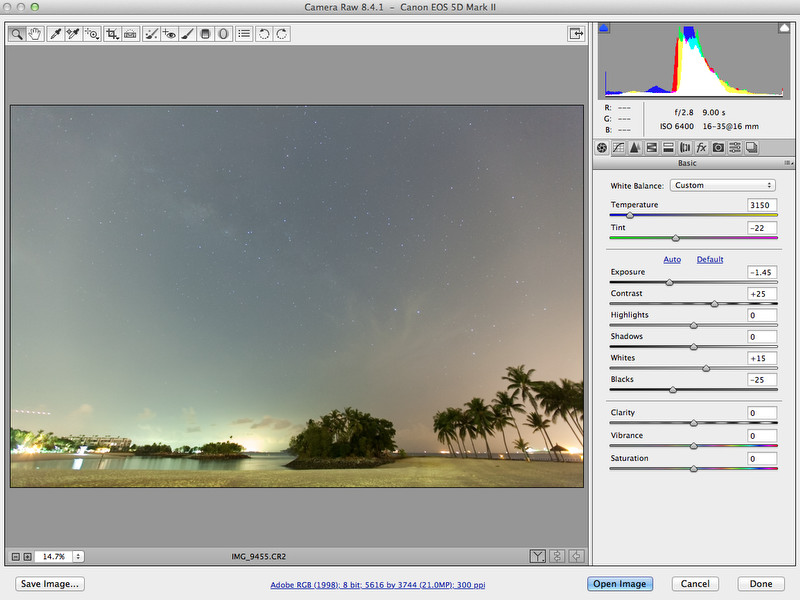
Switch to Bulb mode on your DSLR camera and set the aperture to 2.8, ISO to 6400 and focal length to 16mm. Remember to shoot in RAW format.
Step 3
I use a technique called Expose To The Right (ETTR), a concept that’s been around for more than a decade, to obtain the maximum amount of signals possible with a single exposure. You can produce an ETTR image by pushing its histogram to the far right by increasing the exposure during your shoot. I took mine at 16mm, F2.8, ISO6400 and I exposed my camera for 9 seconds.

The ETTR technique, however, has its limitations and using just this technique alone won’t work for most parts of Singapore and so further processing is required to bring out the best of what’s recorded in the RAW file. A more complex workflow is required if I shoot from a brighter location.
Step 4
Normalize the image by playing around with the sliders until you’re able to see the elusive Milky Way!
Step 5
At this juncture, if you’re shooting at a location that’s at least 2 stops darker than mine, which also means you are able to expose your camera for 30 to 40 seconds using the same settings (F2.8, ISO6400 @ 16mm), then you’ll probably be able to get away with a nice image by adjusting the sliders. But unfortunately, we need to do more to make the image pop when it’s taken in Singapore and the post-processing workflow will become more complex if the exposure time is reduced to 5 seconds or less at much brighter locations.
In Photoshop, click on Image -> Adjustments -> HDR Toning. Then play around with the Detail slider along with the rest to achieve to look you want and mask out the overexposed part of the image.
Step 6
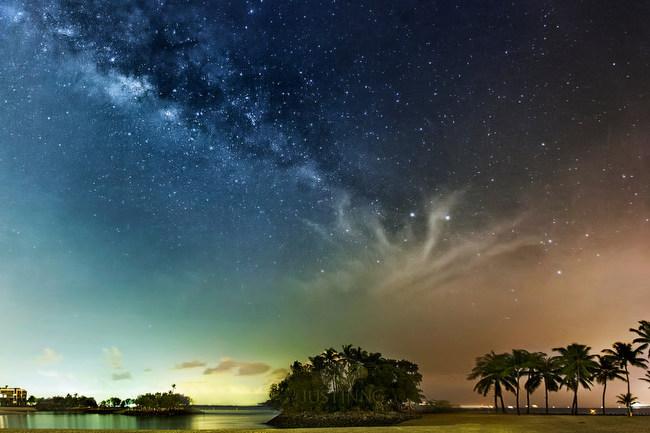
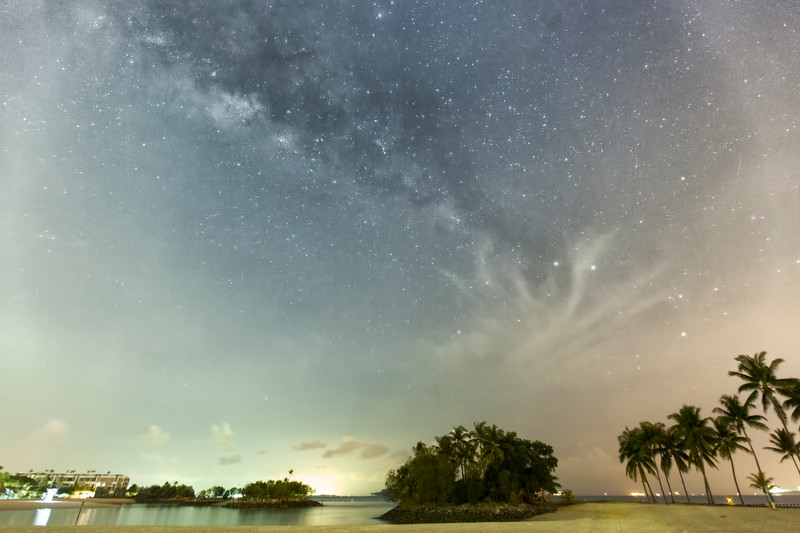
From here onwards, you can tweak the image to your own liking!

There are definitely many ways to achieve the same or better result and this is just one of the workflows that you can use without purchasing additional Photoshop plugins. As Singapore offers varying degrees of light pollution, different workflows will be required to unveil the elusive Milky Way taken at different locations.
For a full tutorial, please visit the post on my website here.
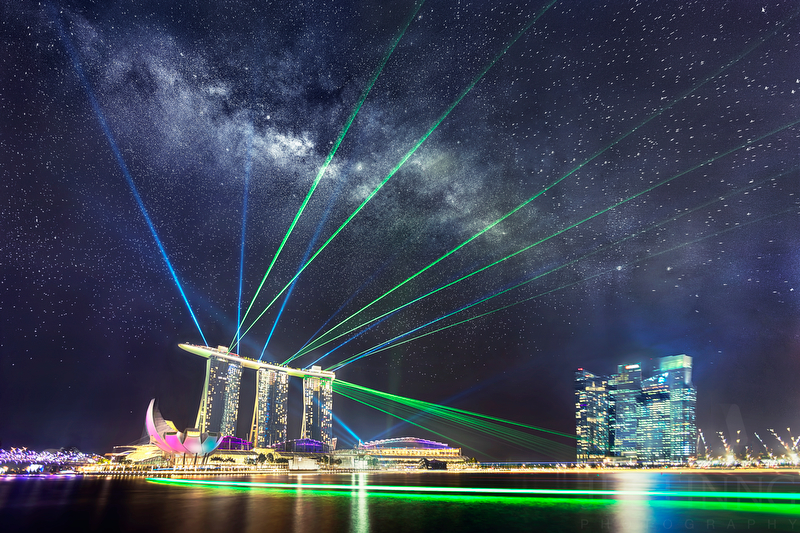
Here’s some of my images taken in Singapore. Note that not all images below were processed using the workflow presented in this tutorial.

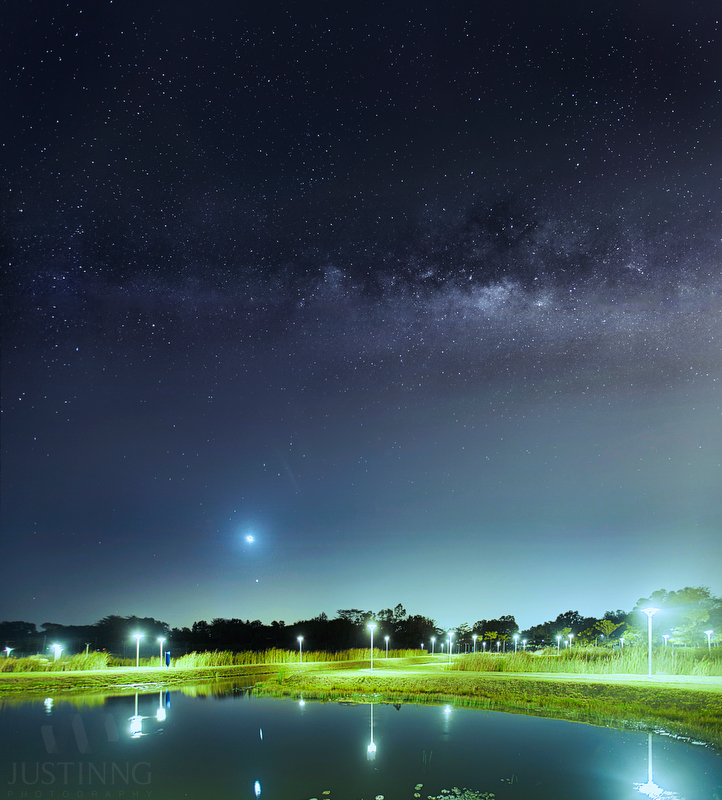


Get Connected!