
With more people looking to jump ship from that ’other’ editing software company, companies like Phase One seem to have sensed the blood in the water and are gunning for new converts. This is good for everyone because what they’ve done is made Capture One 11 its best iteration yet for both legacy users and new.
Oh, and there’s a new name. They’ve dropped the ‘Pro’ and will henceforth be known as ‘Capture One’. That is, of course, no reflection of the performance…

What is Capture One 11?
What it isn’t is a whole new program, but a refined one. So those familiar will still be familiar with most of it, but the alterations have a profound effect on how one uses it.
As with Capture One updates on a whole, the speed at which the application functions has increased, and not just in facts and figures, but perceivably. When loading large catalogues you’ll notice things get done a bit faster, and then the latency of the sliders is lower, making for a smoother, more precise movement. Again, this is empirically evident.
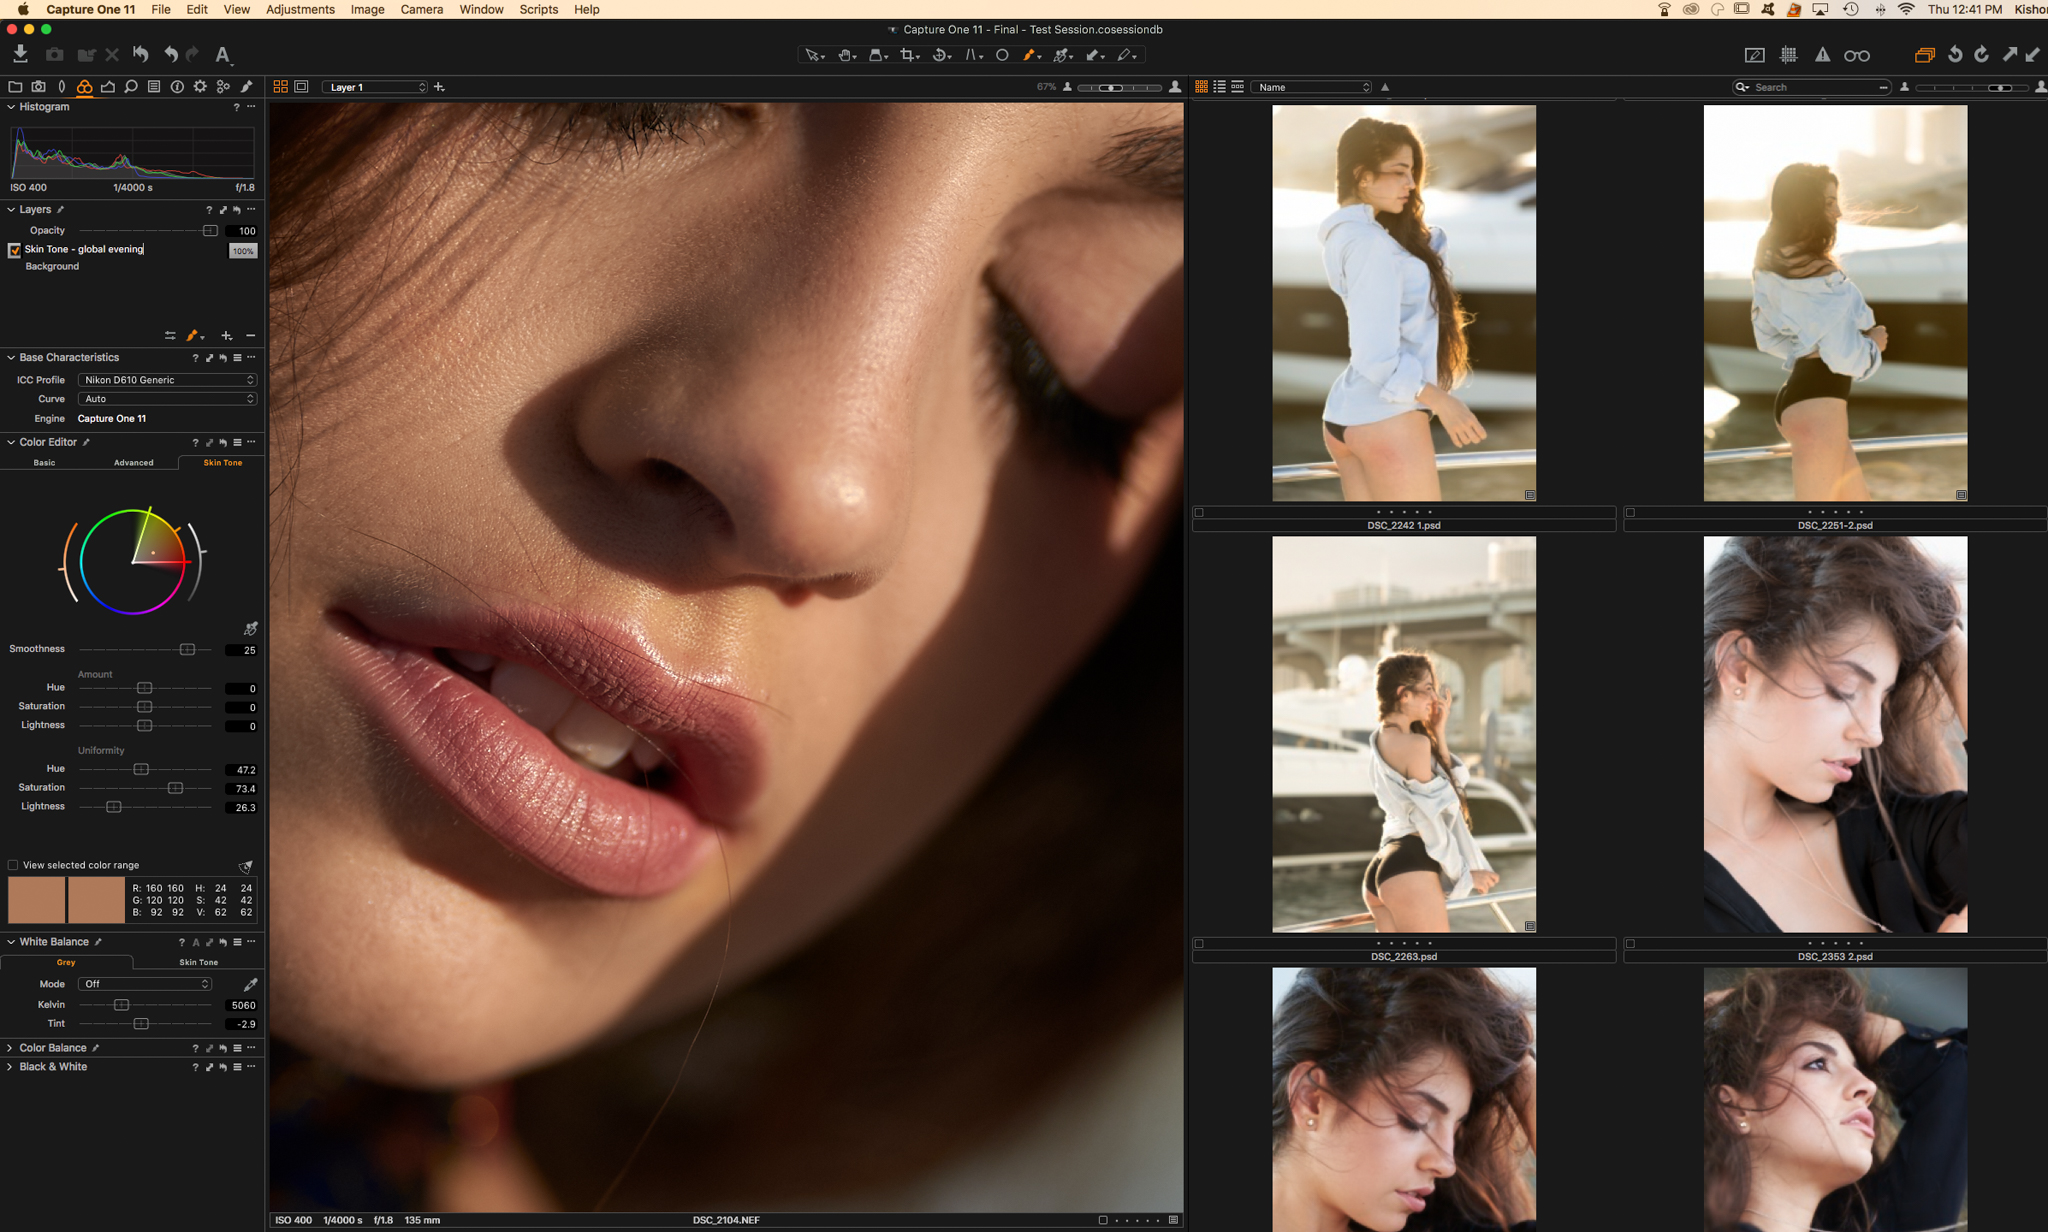
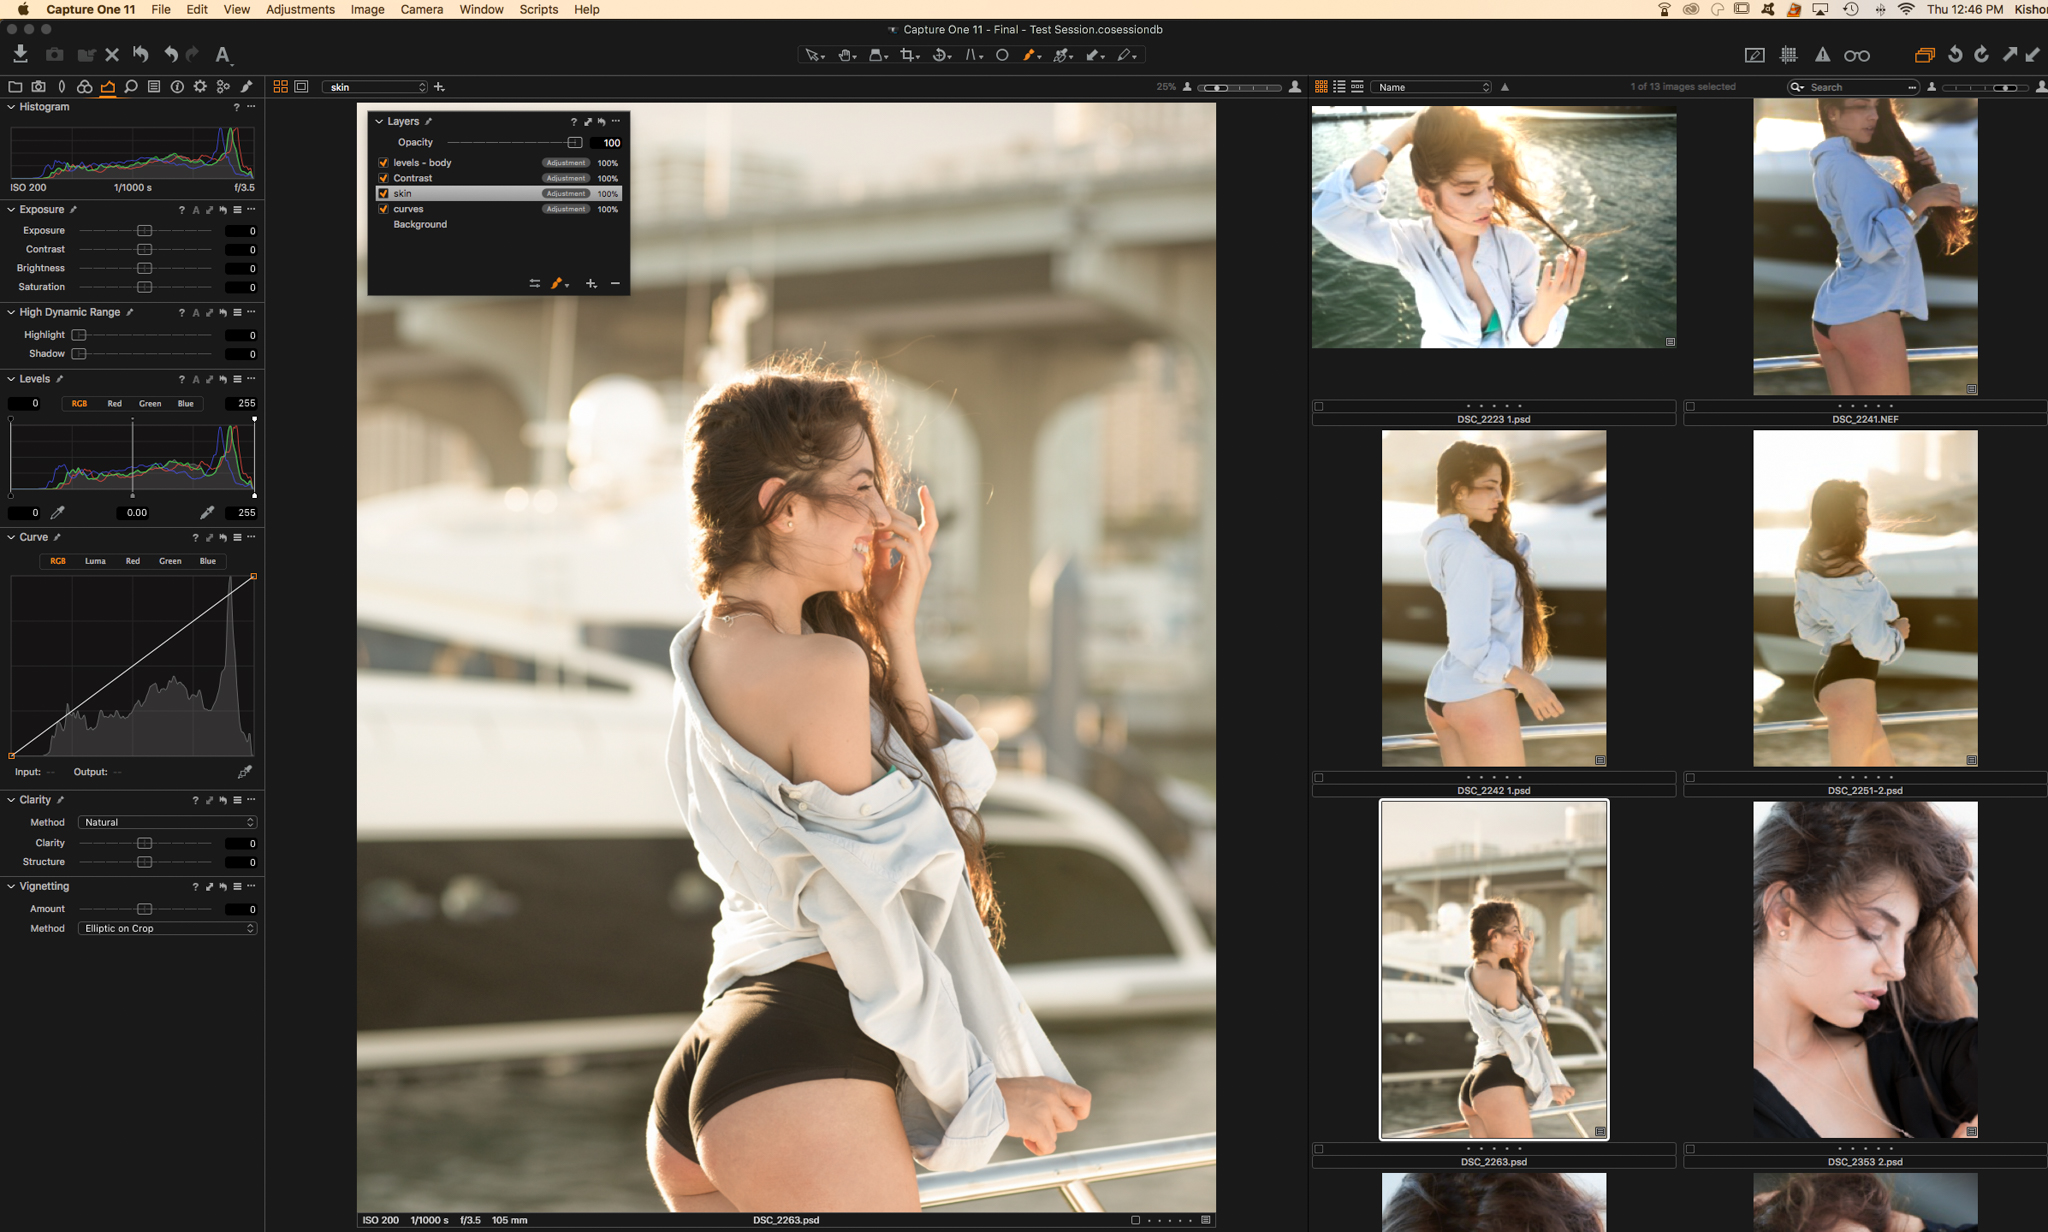
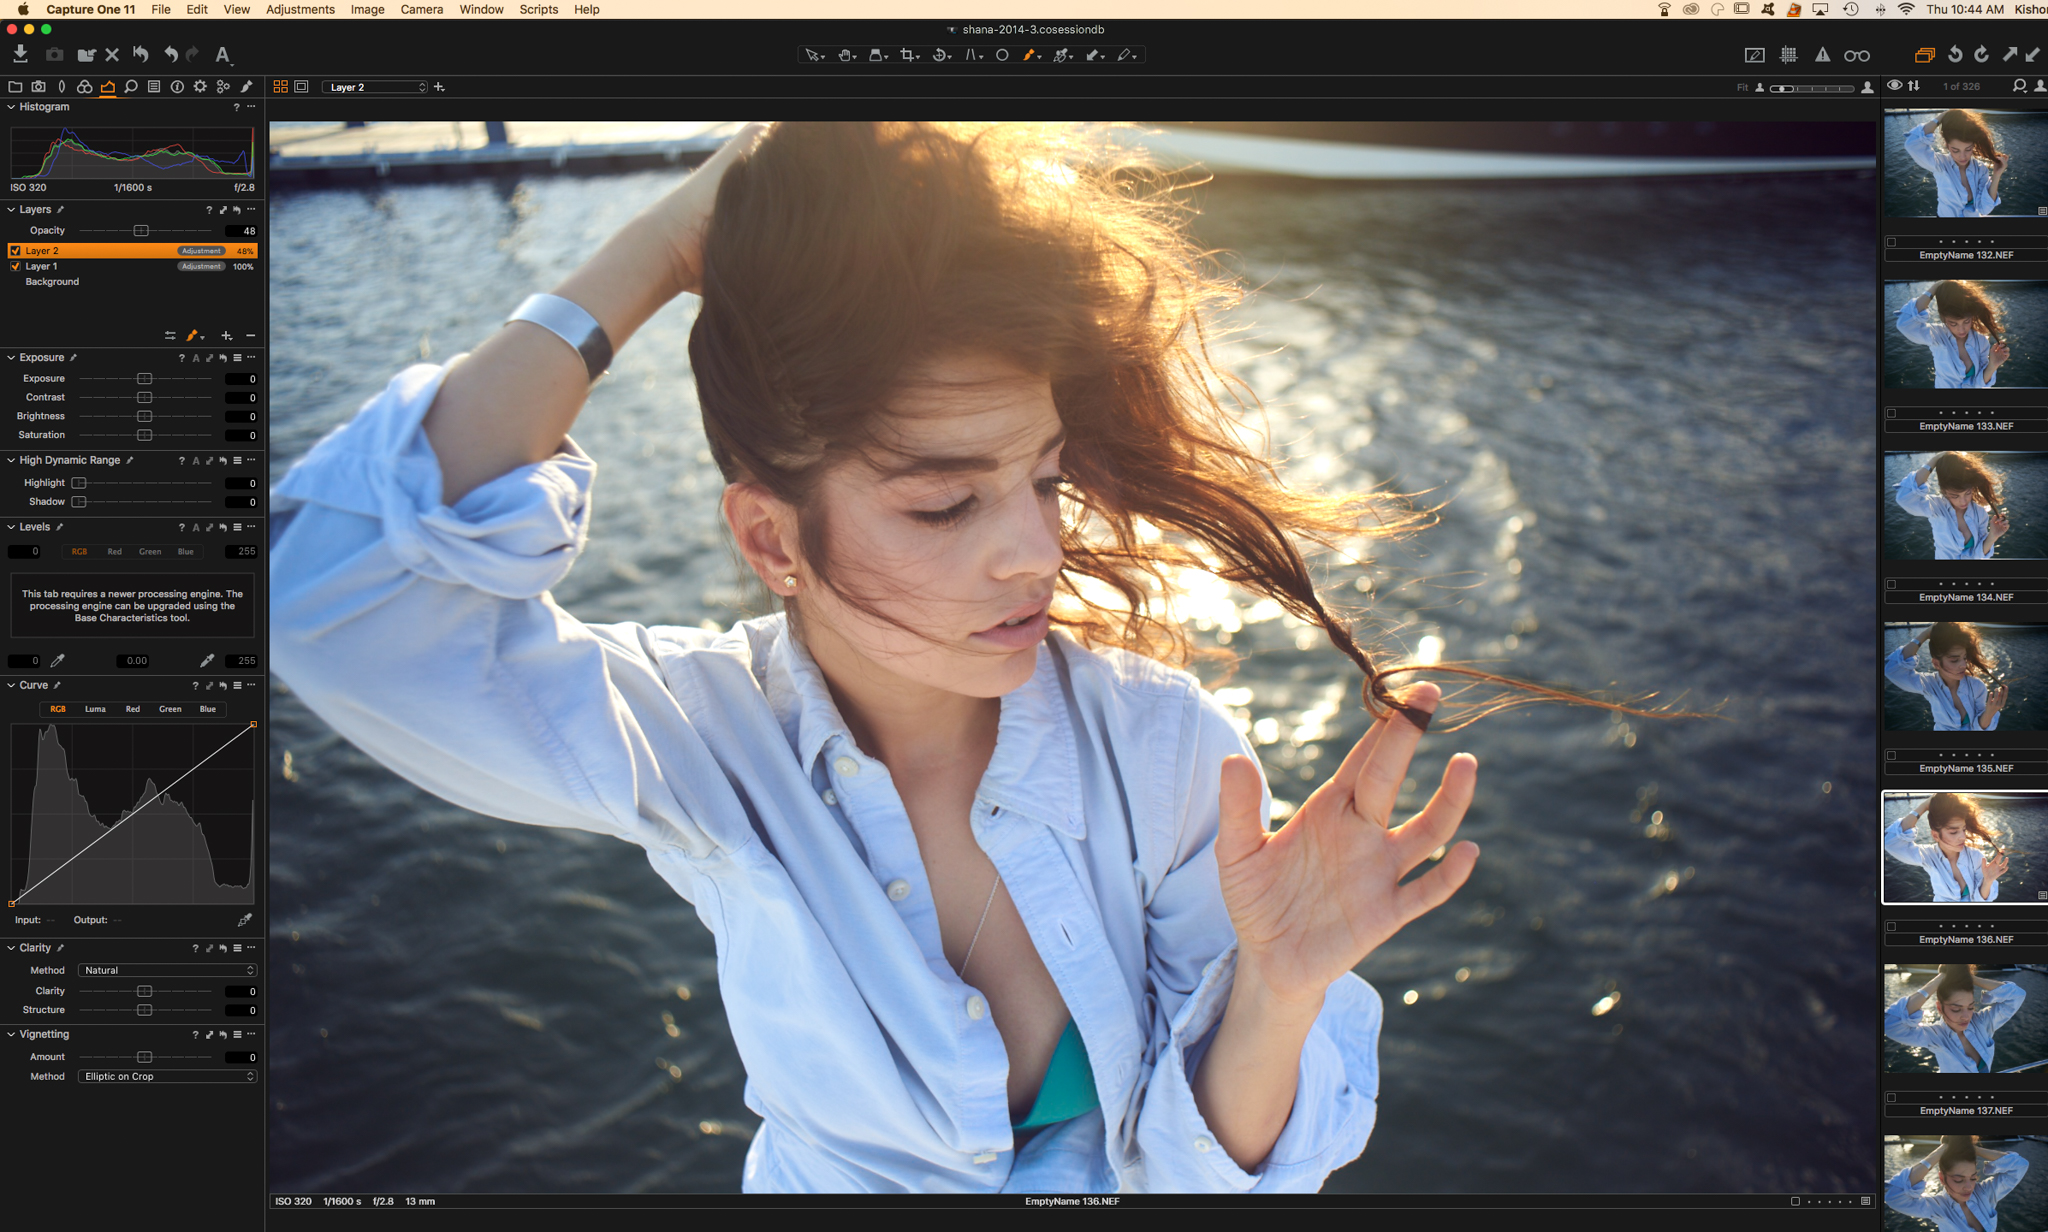
But perhaps the most critical change in Capture One 11 is its expansion of the utility of layers. It’s significantly more ‘layeristic’ than it previously has been, and that, frankly, will ultimately change how you use Capture One for the better. Because what comes with the new layer implementation is the ability to edit more quickly, with more precision than before, and it also makes for your adjustments to be altered with ease at any time. Those familiar with photoshop will no doubt know what a boon this is.
Speaking of Photoshop, while Capture One now plays nice with Photoshop and PSD files as of Capture One 10, with the new layer ability and how that opens up edits at each level and improves color grading, you may find yourself needing to depart C1 far less. Really, for much of your work you simply won’t need to go into PS unless you really require some pixel-bending and such.
[RELATED: Is It Time To Switch From Lightroom to Capture One Pro? Here’s Why It Might Be]
Layers In Capture One 11
Probably the very first thing you’ll notice as a seasoned Capture One user is that the Local Adjustments tab is, by default, gone. You can bring it back if you like, but the reason it’s not there is that Capture One 11 has essentially made almost all the tools capable of making local/layered adjustments, and the Layers section within many of the tabs makes them easy to add, mask, adjust as you like.

Masking is something else that has had an upgrade, as there now exists a Feather Mask which lets you easily soften and flesh out a mask with a slider; Refine Edge Mask which allows for easy subject isolation via masking, and Grey Scale Mask which allows you to see your mask with ease.
Within that Layers section you’ll find the Opacity slider, and this, in effect, works as it does in Photoshop. You create your layer (fill), make your adjustments, and dial in or scale back the emphasis of said adjustment as you like, and the fact it’s within many tabs makes it easy to keep track of, as each layer is reflected in the Layers section of all tabs. In addition, this means something great for Styles…
Capture One Styles Control
In case you’d ignored our posts for the past year, Capture One has made a significant push into the development of Capture One Styles (not to be confused with simple presets), and have released a number of their own Styles packs. Anyone who has used Styles and or Presets knows that a major limitation to them was that once applied, altering the look was a bit painful, and required going into each individual tool to adjust as needed. Now you don’t.
With frequency a Style would be added that was, perhaps, too strong – a bit too cooked, and to rectify that now you simply add the Style as a layer, and if it’s too strong you drop the Opacity Slider down to a point you like. Of course you can also utilize the masks and mask in some of the layers, or even combine them. This single feature alone all of a sudden makes Styles much more relevant, and it’s easy.

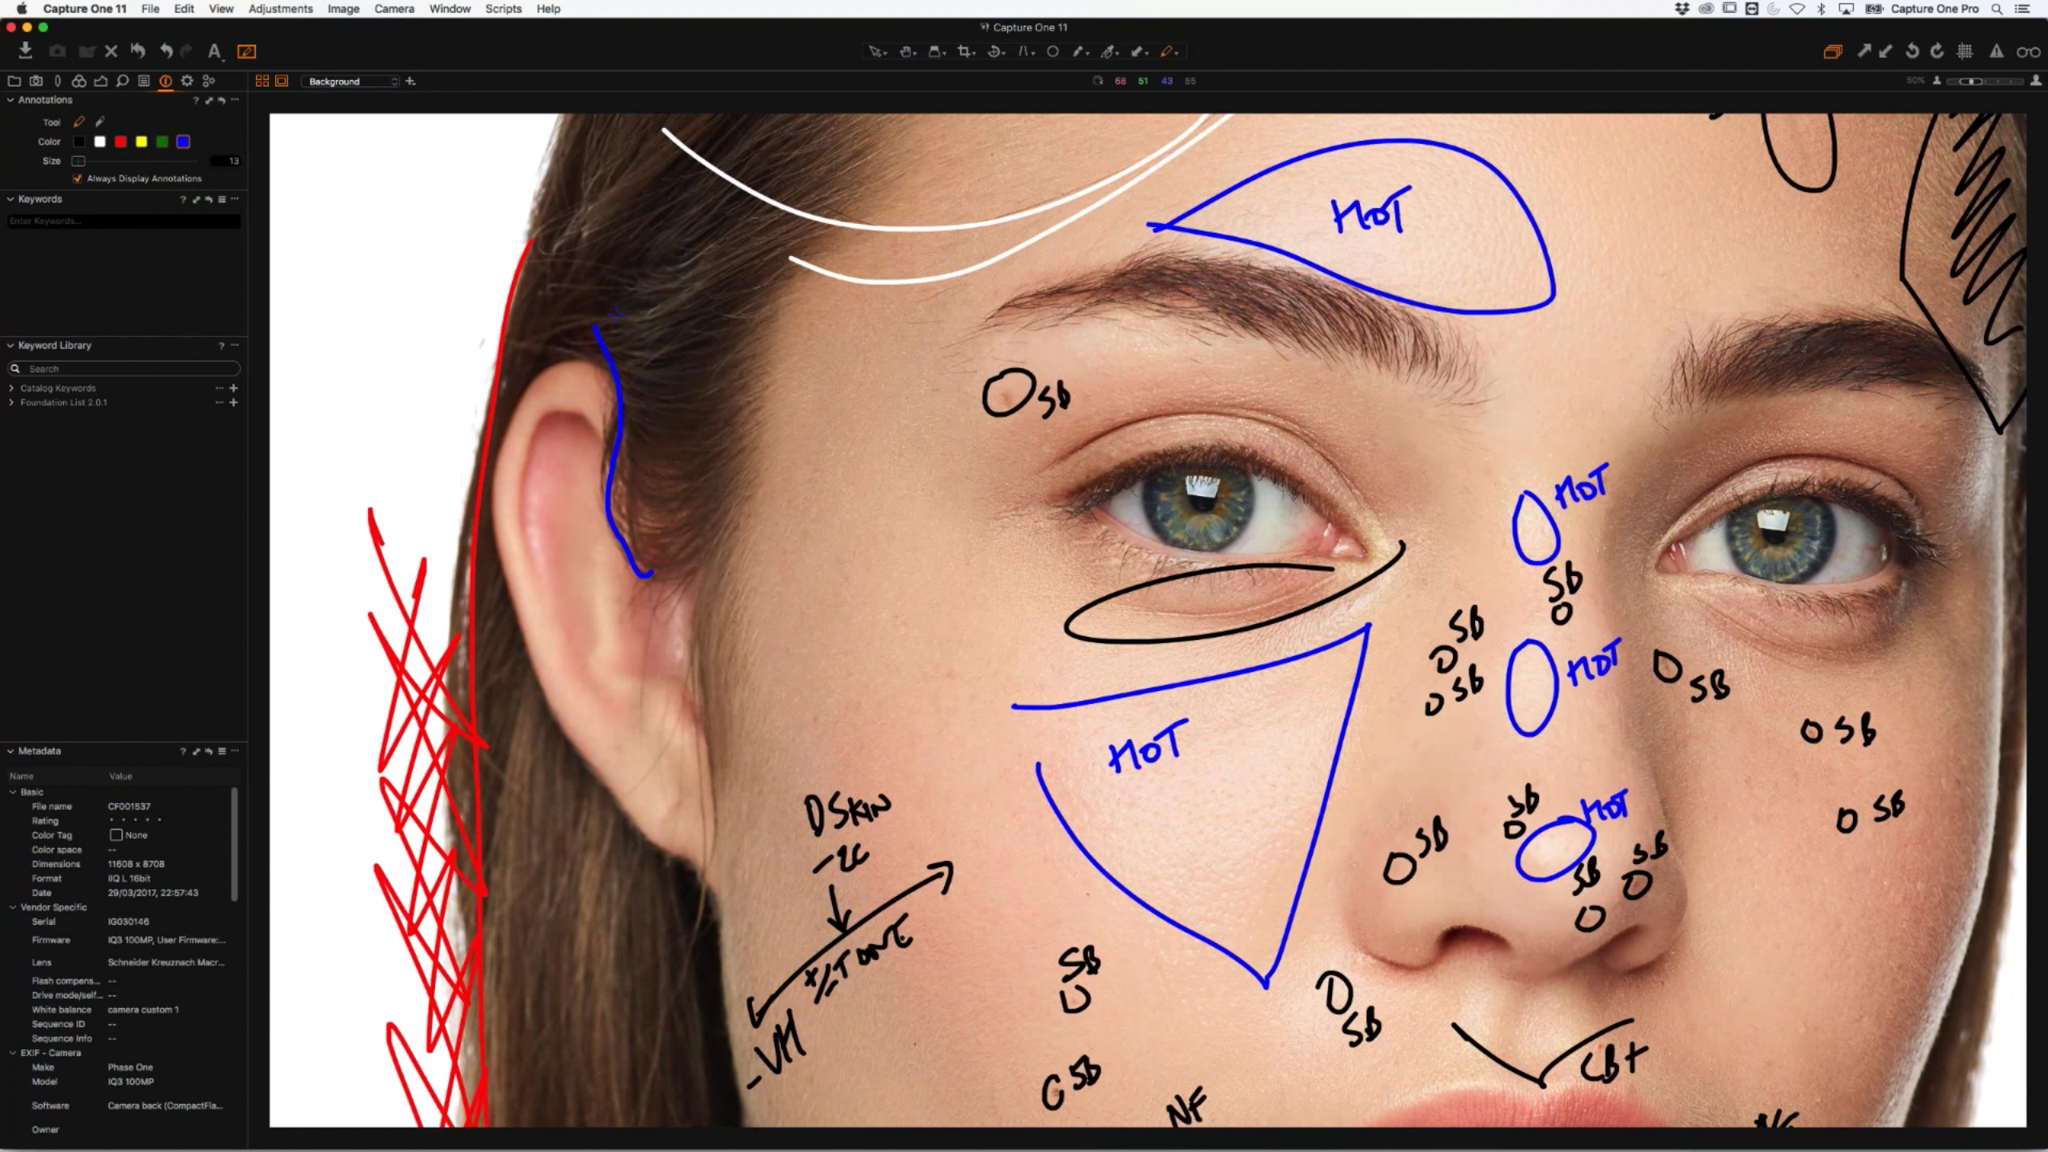
Annotations
Other major change is the introduction of Annotations and their implementation within the new layered workflow.
With annotations you can make notes for yourself, a retoucher, someone you’re collaborating with, and perhaps most cleverly of all, you can send it as a layer. So, for example, if you’re about to send it off to a retoucher you can export as a raw file still, but package it as an EIP, allowing the recipient to receive it and toggle that layer. That’s for someone within Capture One, but even if you’re sending to Photoshop you can send it as a layer as it’s sent as metadata with a PSD file.
More Changes
Duplicate Checker** – Finally
The Duplicate Checker makes sure that you don’t import the same file twice in your Catalog or Session. The robust catching-mechanism ensures that importing the difference from the last import is easy and efficient.
Overlay Tool
Use graphics or other images as overlays to ensure optimal composition of your image. Include the overlay as a separate layer in your exported PSD file for perfect flexibility.
Export Path
Crops can be respected or added as a Path when exporting to PSD files, permitting the full image to be used later for retouching.
Watermark on Layer
Include your watermark as a separate layer in your exported PSD file to have full control of further editing or removing it after processing.
Editing Speed
We have increased the overall performance of Capture One, which gives a smoother and faster experience when editing. This is especially helpful when fine-tuning adjustments.
Color Improvements
Improved handling of color makes sure layered color adjustments work to perfection. The Color Balance, Color Editor, White Balance and other tools have been re-engineered to show smoother transitions between each layer.
Lab Readout
Color readouts can now be viewed in LAB mode aiding customers who wish to measure image output to critical values.
Catalogs – Faster, stronger, more stable
Improved performance in Catalogs makes the overall experience, start-up time, and backup routines even better. Sessions are now more robust with network drives, accommodating advanced storage, and backup setups.
Conclusion
At this juncture of having used Capture One 11 for a few weeks, it appears to be a worthwhile upgrade from Capture One 10. It is, perhaps, the most significant update we’ve seen for Capture One in years, and the changes are welcomed. This isn’t Capture One 10 in a party frock.
You can find some more videos about Capture One 11 below, and download the upgrade or free trial here.


Get Connected!