
MAKING DO With What You Have
How many of you have either made the “I want to make professional and captivating images, but I can’t afford nice gear,” statement in your head, or thought something like it? I’ll raise my hand with you about some it. Not just “way back when I first started” either. Let’s be real, I have four kids and a single-income business. Life ain’t cheap, and it’s FOR SURE not easy to budget in more “gear” budget just because I want new stuff to use for work. However, one of the things I learned early on from my grandparents (who lived through and prospered after the Great Depression) was that I could make do with what I had. That “hustle and scrap” mentality has allowed me to do SO many things I would’ve never been “able” to do had I waited until I had the money, the time, could plan a trip like that, etc.
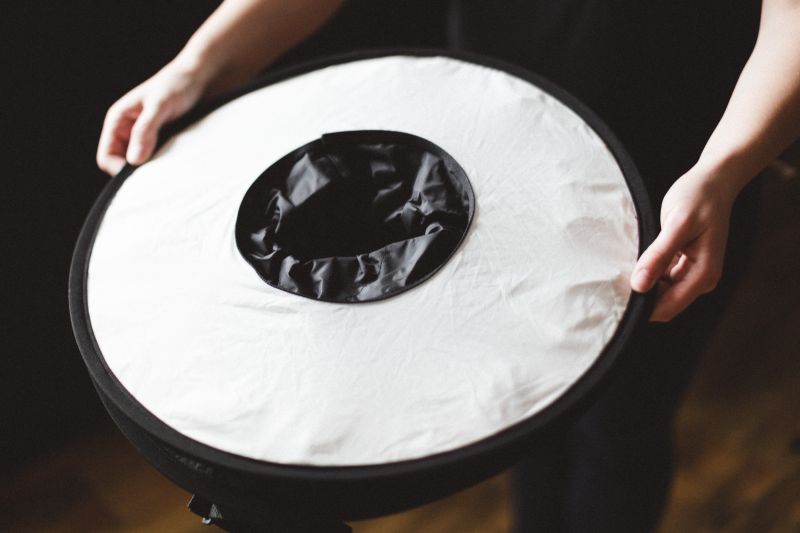
So, in the spirit of ingenuity and making do with what we have, I wanted to shoot around a bit and possibly inspire some of y’all with a little set of images I created with one light. (I have 3 of these with diffusers that I use at pretty much EVERY event/wedding/senior set I shoot in some regard – the Yongnuo 568 EX II) and one modifier (Neewer Collapsible Ring Flash). I will list all the gear I used, including the stands and triggers at the end. For now, let’s chat a quick second about the setup.
THE SETUP

I really wanted to go into this shoot with a time frame and idea of what we were going to do from the beginning, so I spent a few minutes before my model arrived simply sketching out some ideas on a piece of paper (photo included b/c I want you to see just how detailed and fancy I was). I have been trying to do this with studio shoots simply because it gives me direction and makes me feel like I’m really thinking through the shoot as a concept rather than just going in and hoping things come out (usually later saying “I wish I had _____”). After sketching out my shot setups, I put one stand with a boom and unfolded the ring light. As you can see, it’s rather compact and makes for an excellent travel buddy since you can use it in so many different ways!


 That’s pretty much it. I had two large black foam-core boards set up that I use in my little studio just to block window light, but a dark room or a dark curtain would have sufficed just as well. Here are the five setups and couple shots from each setup.
SETUP 1
Light slightly above and front on – similar to a beauty dish setup


This light is great for simple, clean shots that have a very flattering light source. It’s easy on wrinkles or bags under the eyes and makes the skin look smooth and beautiful. I started with the power a little lower (around 1/32) and then increased (around 1/8) to show how the same source could do soft or harsher light.
[REWIND: Learn all about lighting styles and how they affect photos here!]
SETUP 2
Close to subject, off to the side.
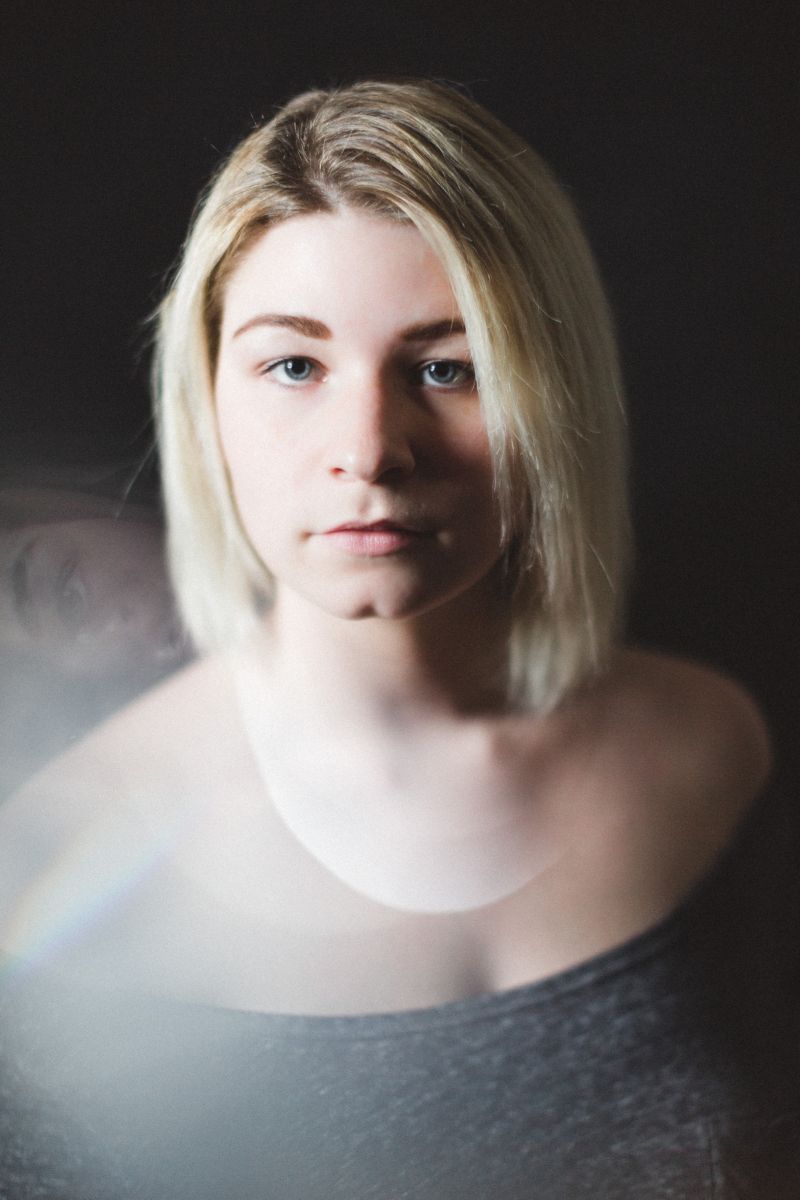

There’s a lot more contrast with the light off to the side like this. I personally feel like it can give a more “gritty” or a more “sensual” looking light. The first shot I threw a small prism in front of the lens to capture a little light and mix things up!
[REWIND: Struggling with processing images to get the look you want, we have a TON of resources to help!]
SETUP 3
Up and to the left 45 degrees (I moved it up a bit higher after I shot the setup shot).


 This is a VERY typical lighting setup and, honestly, is the “if you don’t know where to start with putting light to make it look good, do this” style for me. We generally teach people this lighting setup in our very basic classes because there are very few situations where it wouldn’t work to make things look pretty good.
(Check out how Max uses a variation of this setup to shoot professional headshots on location)
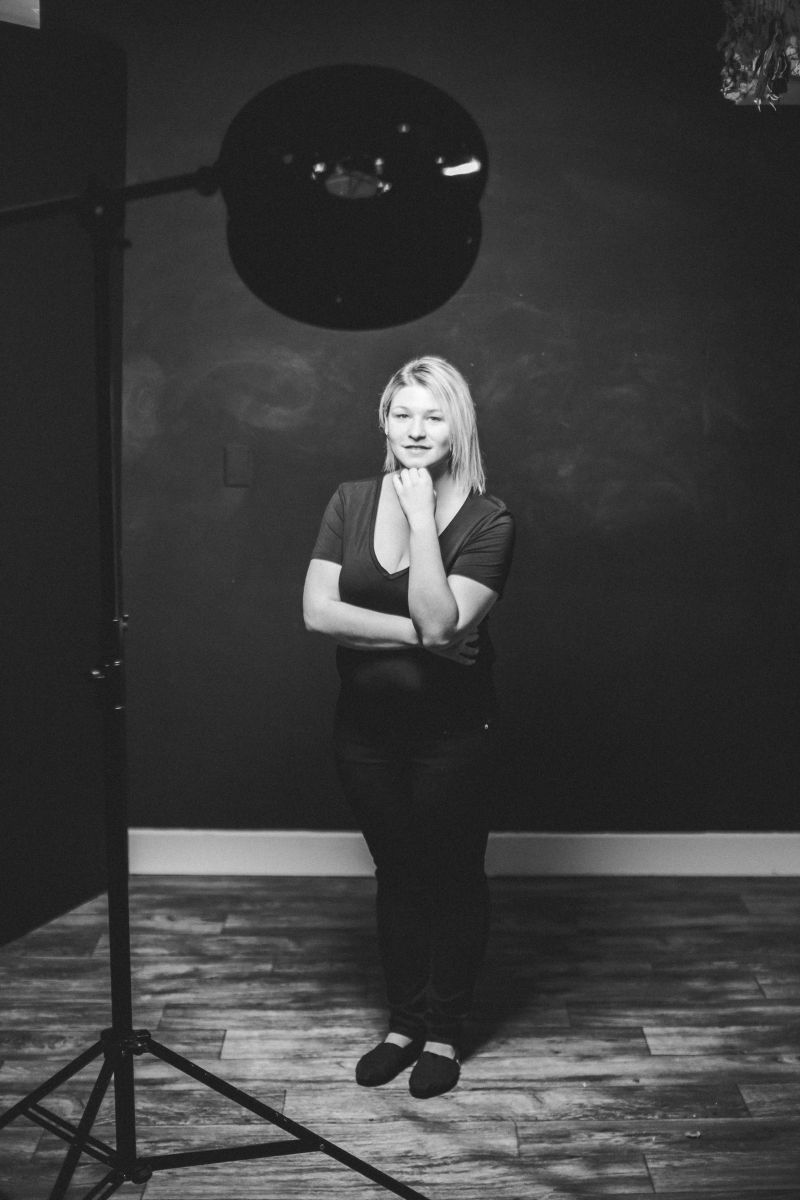
SETUP 4
Flash on camera with modifier attached.

I figured you didn’t need a setup shot for this one since it’s ON the camera! This light is LEGIT smooth and gives amazing softness when shot up close. It wraps under the lens as well as over, so you don’t get any weird shadows or hard angles. I love shooting this modifier like this (probably why they designed it to shoot this way, huh?). I prefer shooting it a bit “darker” but you can easily pump up the power for a very stylized and “fashion” vibe (especially on a white background).
SETUP 5
Light off camera, rear of subject.

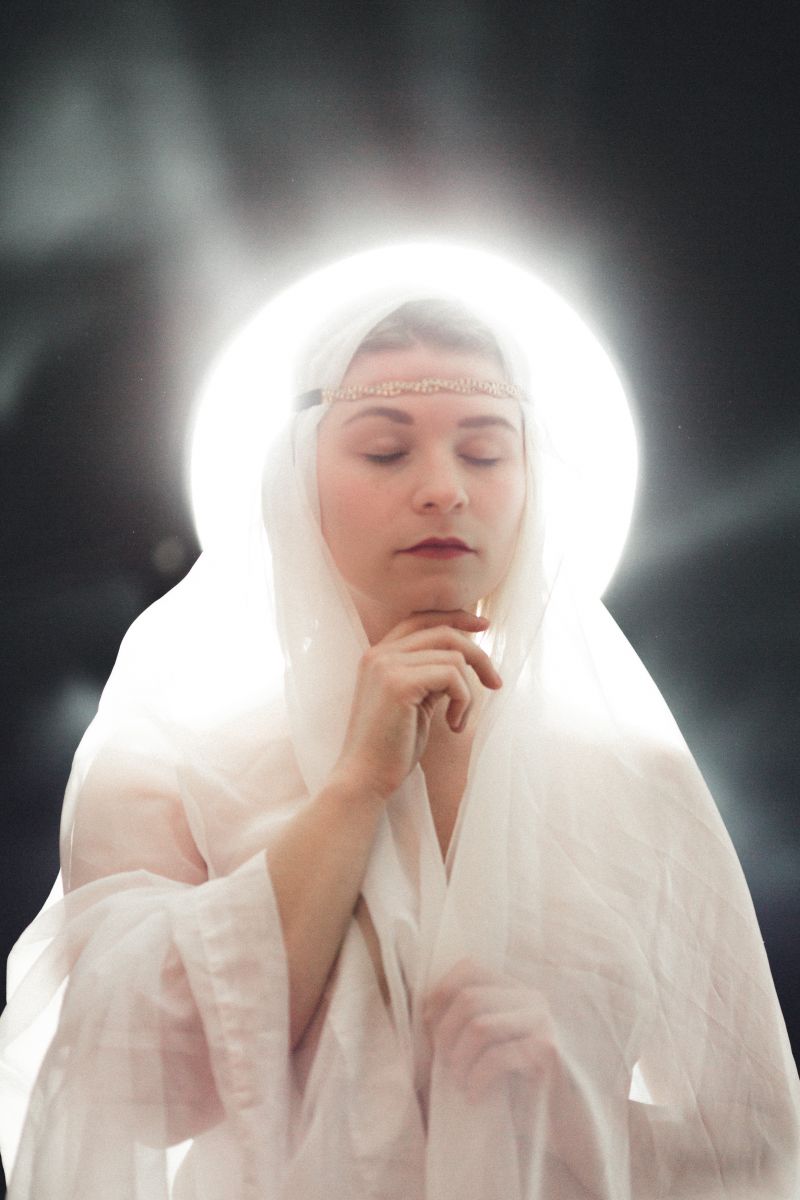
 We wanted to shoot a few fun shots as well as this last one that shows a little more “high key” look with having the flash behind the model. When I saw how the ring formed perfectly around her head when standing in front, I immediately grabbed some white sheers and formed the “angelic” or “Virgin Mary” looking shot. Even with planning things out, there’s room to play!
Conclusion
This entire setup, from the stand to the light and modifier can be purchased for under $300. If you already have a flash and stands, you can grab the modifier and some triggers for less than $150! I feel that sometimes, we as photographers get geeked out about gear and sucked into the world of believing you can ONLY create client-loved, stellar images with expensive gear and it’s just not true. You can make beautiful images with a creative mind and a simple camera/lighting setup.
Can you do some things with “pro” level gear that you would have a much harder time doing without it? Ab-so-fricken-lutely! I LOVE my pro gear and totally invest in the BEST I can buy for so many reasons. BUT, to those of you who are limited in funds, don’t feel limited by what you CAN’T afford. This is the basis for our foundational courses. In Photography 101, Lighting 101 and Lighting 201, we show you how.
Try to think more creatively with what you DO have and start making photos. I would LOVE to see what you guys are able to create with your down time and, if you wanted to see all the finals from the little session, here’s the link.
Gear Used
Camera body – Canon 5D Mark III
Lens – Canon 50mm f1.2
Flash – Neewer Ring Flash
Stand – PBL 8ft Air Cushion
Boom Arm – Limo Studio Boom Arm


Get Connected!