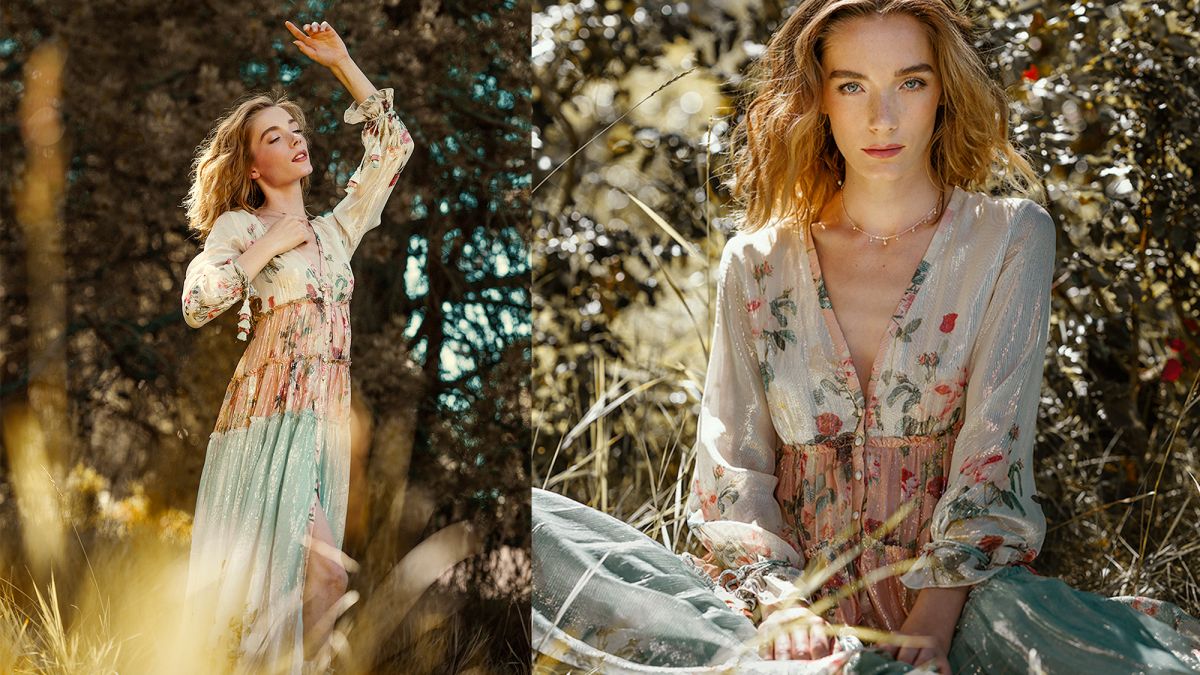
At the recent Sony Kando event, photographers from all over the world were invited to a play with Sony gear on a variety of sets and locations. They were able to test out the new gear in different lighting conditions to really get a feel for how powerful the equipment really was.
We came across Miguel Quiles’ work from the Kando event through our Master Lighting & OCF Facebook group where he shared some stunning captures utilizing and combining both natural light and flash on fellow photographer Dan Watson’s YouTube channel. You can see his 4 tips on photographing portraits outdoors with flash strobes below:
Gear Used in This Tutorial
- Sony a7r IV Mirrorless Camera
- Sony FE 85mm f/1.4 GM Lens
- Profoto B10 Plus
- Profoto OCF Softbox 2″ Octa
This video takes place at peak afternoon when the sun is directly overhead. This is obviously not the most ideal light but Miguel shares some awesome tips to both avoid harsh light and use it to your advantage.
1. Dial In Your Desired Ambient Light Exposure

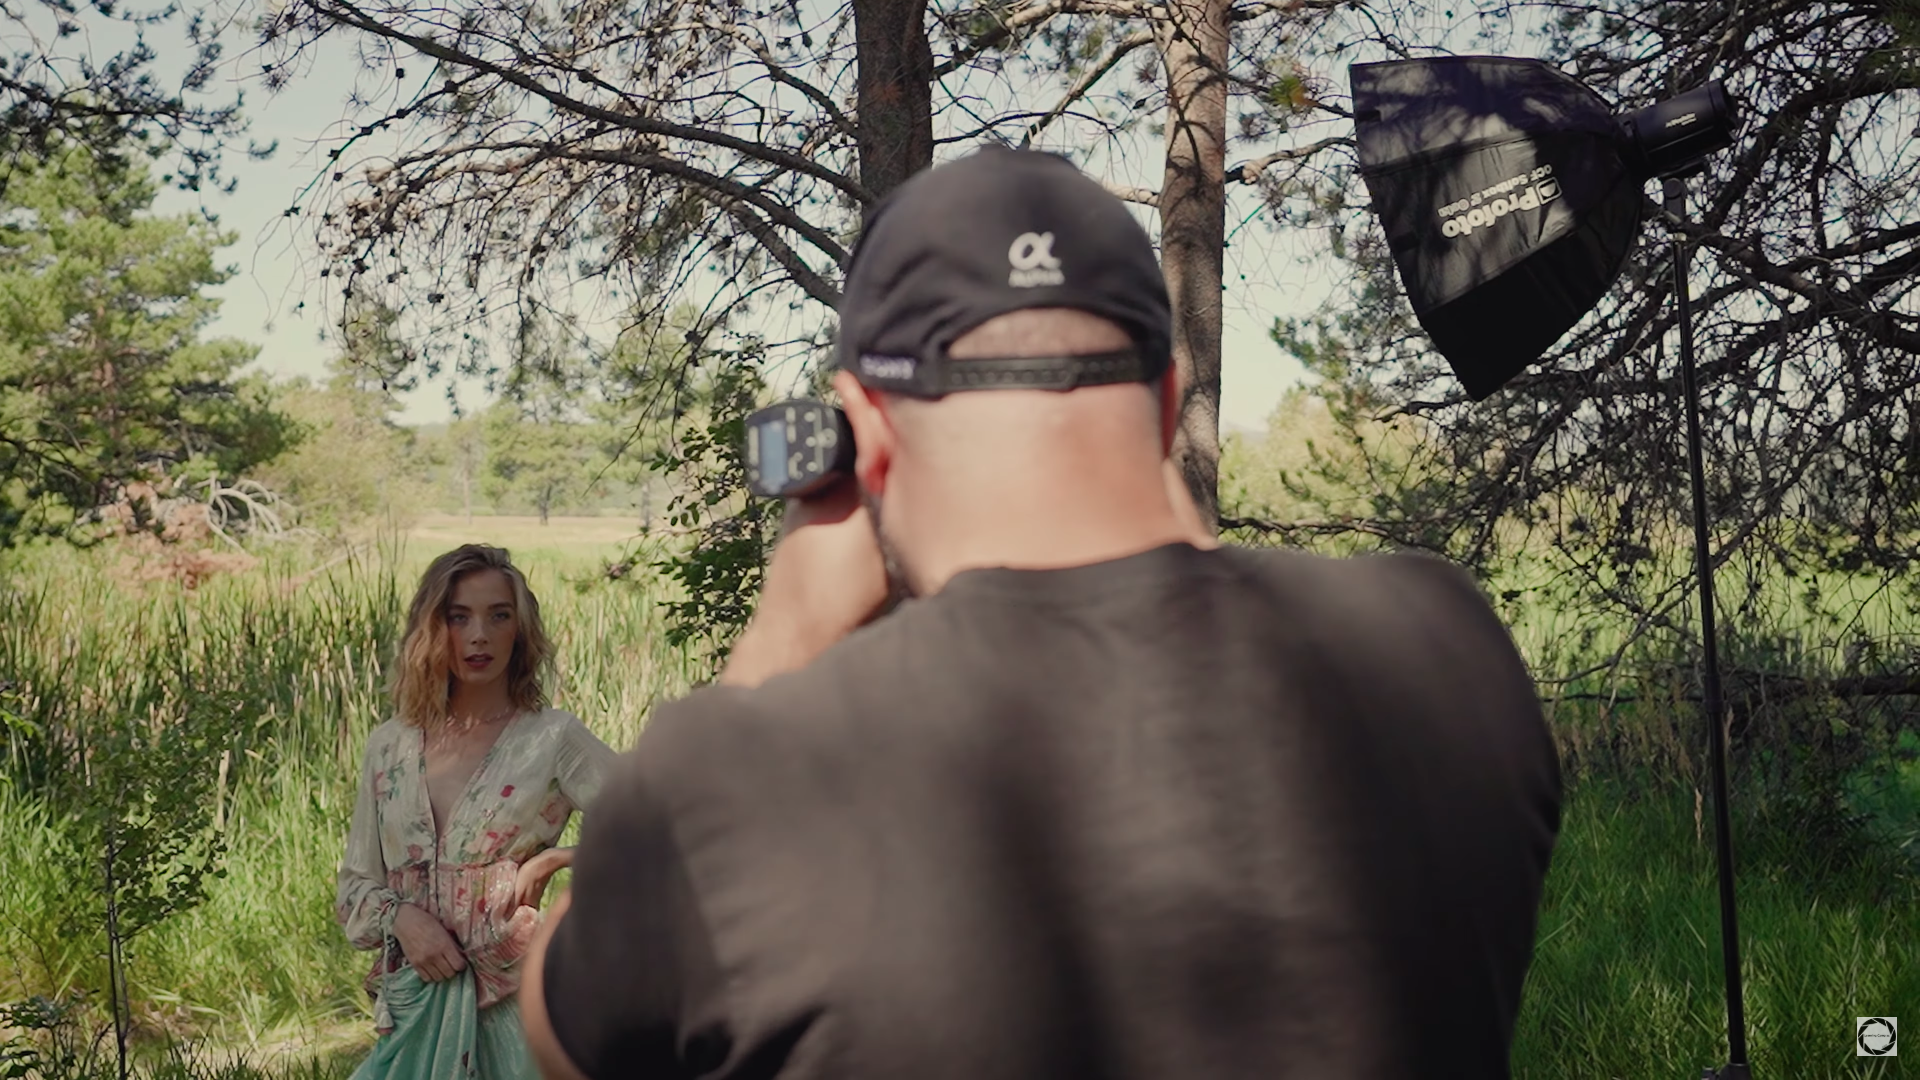
As contradictory as it might seem, the first step to using flash is to turn it off. You want to dial in your desired ambient light based on the amount of light in your scene and how dramatic you want the flash to appear. The darker the ambient light exposure, the more flash power you will need. Then, turn on your flash and make sure the light isn’t overpowering your subject. Since camera settings are controlling the ambient light, so once that’s dialed in you are just making minimal adjustments based on your location in relation to the sun and the subject.
2. Decide The Distance Of The Light To Your Subject

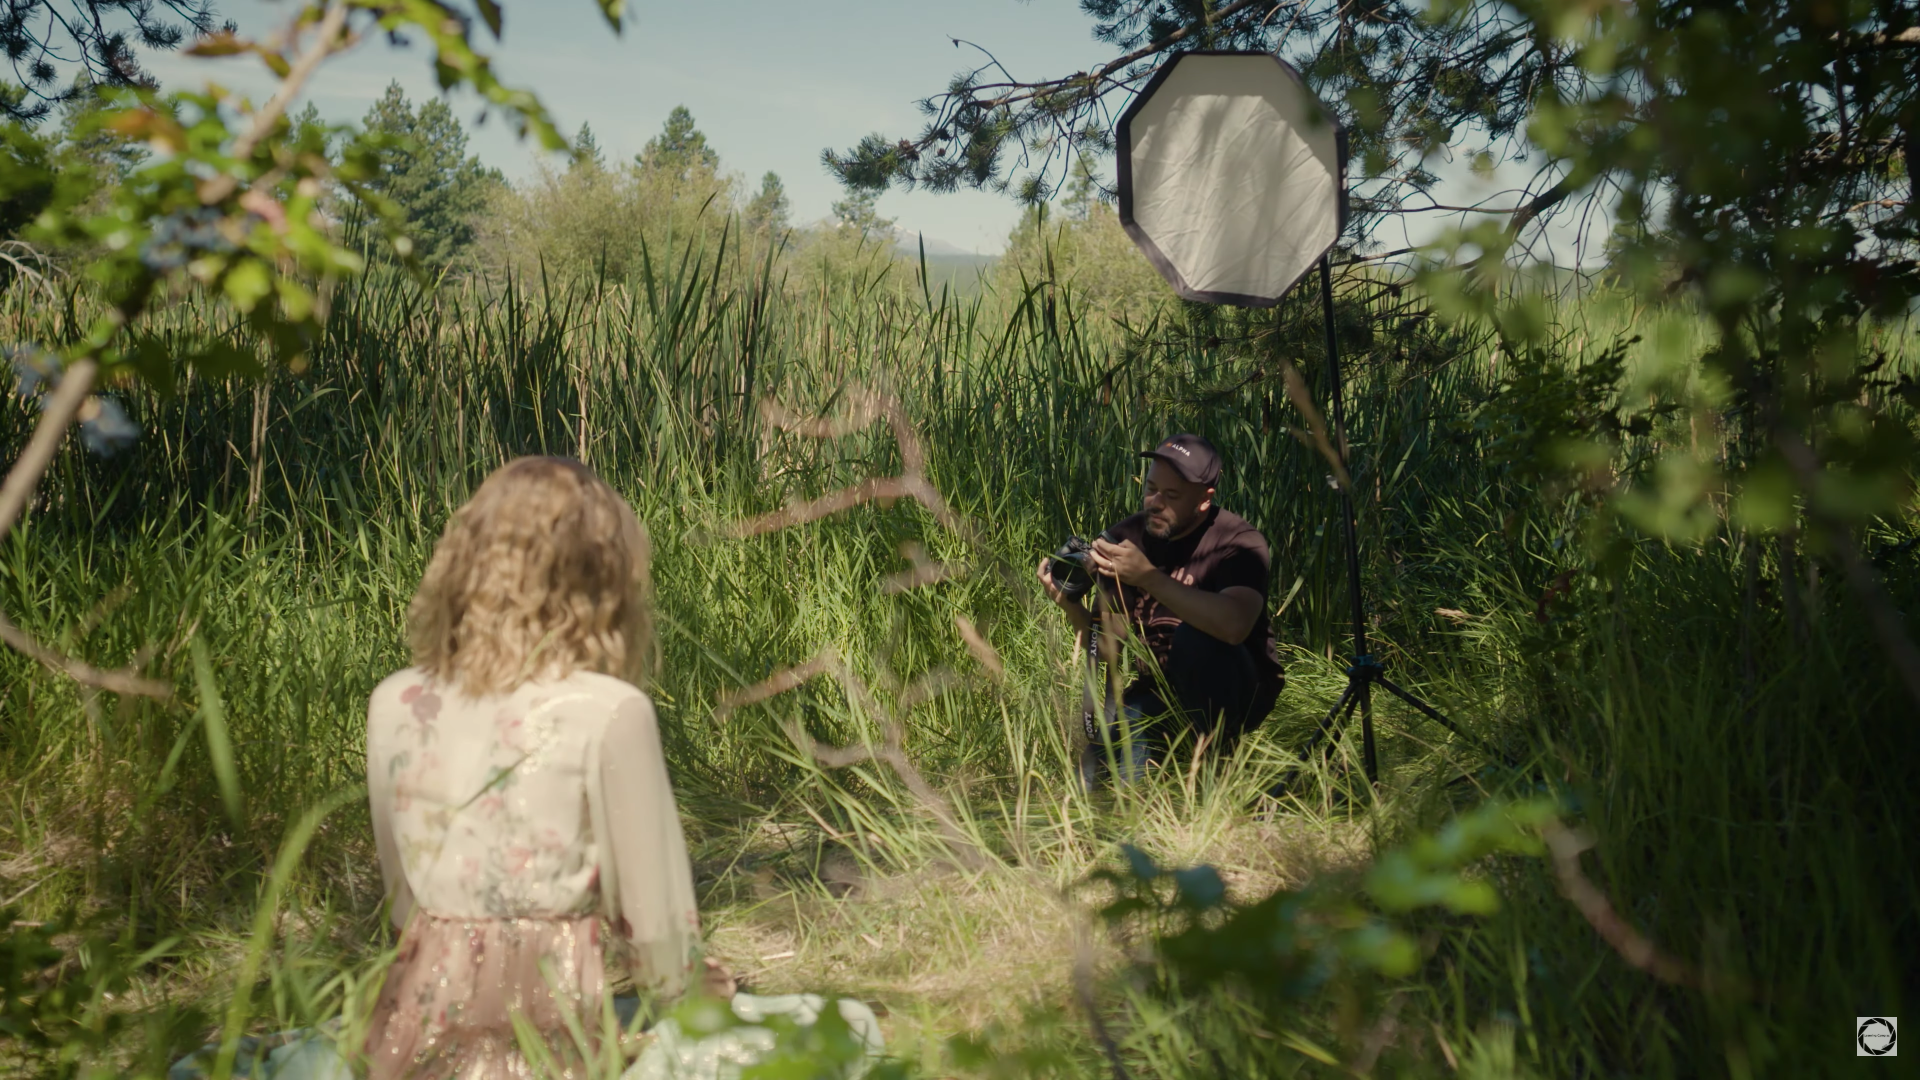
The inverse square law is a law of physics that explains a light source’s intensity in relation to the distance from a subject. In simple terms, it’s the explanation of the reason why light is brighter when it is closer to a subject and why that brightness diminishes as you move the light further from the subject. Play around with the distance of your light to your subject to ensure that the light to shadow fall-off looks natural.
3. Adjust the Height Of Your Light For A More Flattering Look
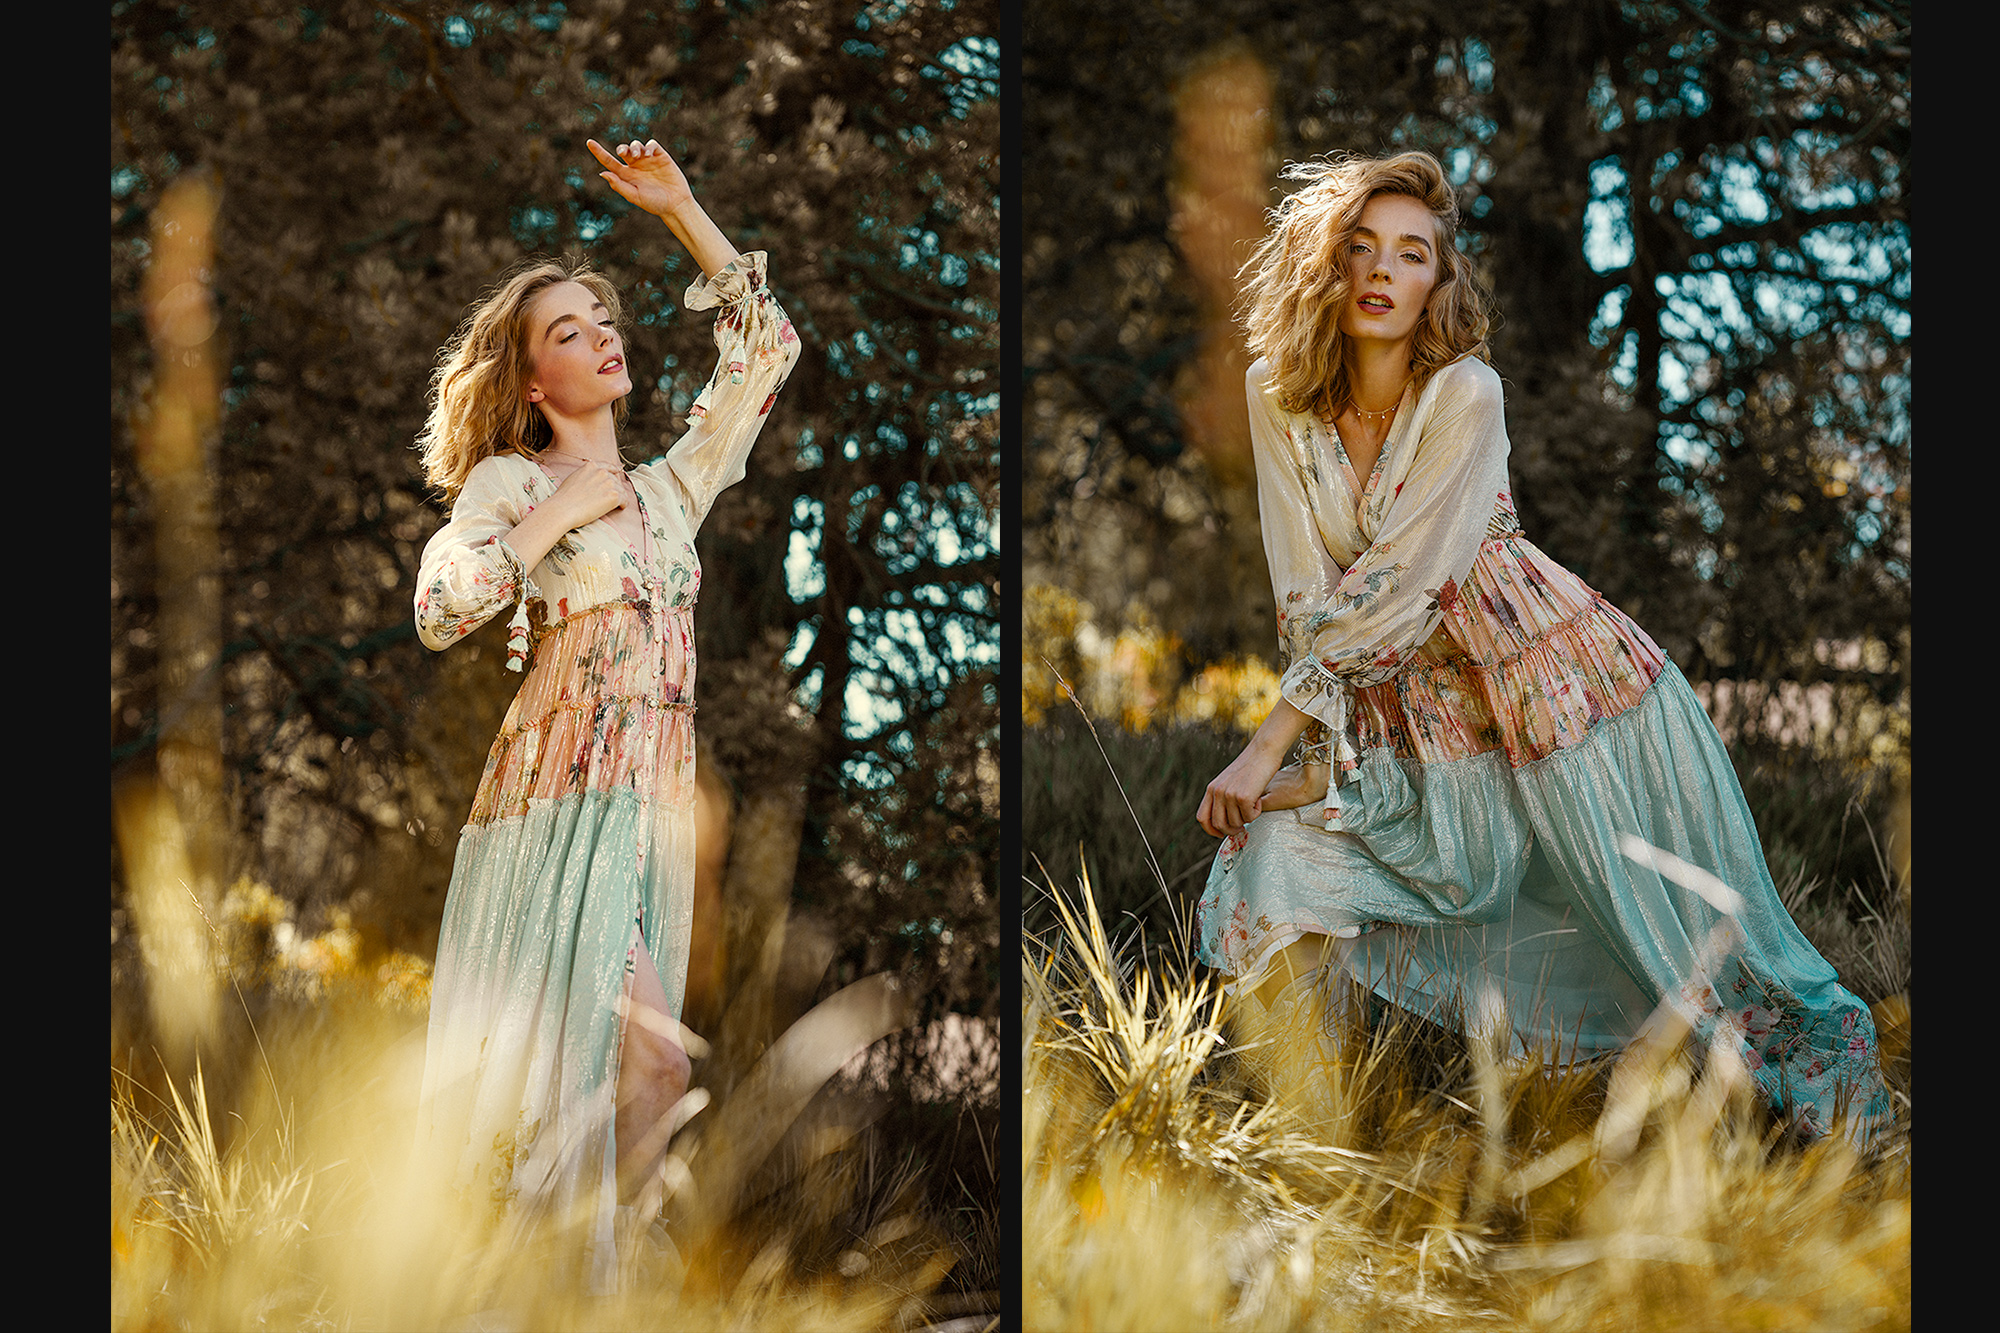

The direction or source of your light can help shape and mold your subject. The most flattering type of light is a top-down direction, which is why when we chose to shoot with natural sunlight there the most optimal hours to shoot are when the sun is lower in the sky, close to sunset. If you think about flash in the same regard, it’ll help you conceptualize where to place your light and how to angle it. Here you can see that Miguel chose to raise up his light source and beam his light down to emulate natural sunlight flowing through the scene.
4. Have a Light Handy, Just in Case


Often times we go out on shoots wanting to have the appropriate tools to get the shots that we need but are hesitant to bring too much. He suggests always having a light handy, even if you are predominantly shooting at a time when natural light is aplenty, mainly because you never know when you’ll need it. This gives you more flexibility and diversity to get shots in any situation.
If you liked this video and want more tips on photographing in natural light scenes, check out this video Miguel made to learn more! You can see more of his work on his Instagram and YouTube Channel.


Get Connected!