
Newborns are probably the most difficult subject I’ve ever photographed. While I don’t specialize in posed newborn portraiture, I’m always trying to improve my skills and have been practicing as I get the chance. My techniques for the actual session, particularly how to pose and keep the baby calm, dramatically improved after I watched the SLR Lounge Newborn Photography Workshop.
Probably the most dramatic improvement to my newborn photos, however, has been how quick and easy the post processing goes, now that I have the presets (included with the workshop) specifically designed for newborn photos. I often hear photographers lamenting about how many hours they spend “editing” a single portrait session (or even a single photo!) Newborns are especially difficult, since their skin can be blotchy, and may require a lot of retouching.
Welcome to Time Out with Tanya, where I’ve put my fast paced graphic design career on hold in favor of adventures in motherhood. I’m capturing every moment on camera and you can come along, if you’d like.
Here’s a little peak at how to edit newborn portraits using the SLR Lounge Lightroom Presets, which allow me to literally post process a photo in under two minutes. Check it out…
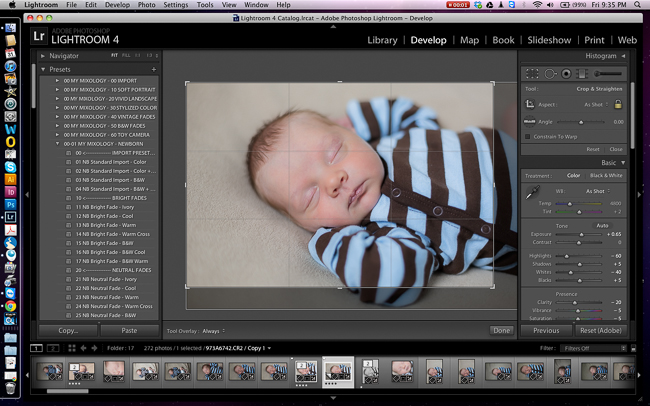
 Here’s my original RAW image imported into Lightroom (yes, I’m still using Lightroom 4. I’m not joining Adobe Creative Cloud until absolutely necessary…) This was shot with a Canon 5D Mark III and Canon 50mm f/1.4 lens. I’m just using natural light from a window at camera left and a reflector on a stand at camera right. My camera was set at ISO 320, f/2.0, 1/100 of a second.
 Next, I simply clicked on the Standard Color Import in the Lightroom Presets. If I’m not being ultra picky, that edit is enough to be done. It’s amazing! But I want to make a few additional small adjustments.
 I’ll just bump up the exposure a little bit more and I would adjust the white balance, if needed, at this point, too. The auto white balance is looking pretty good here, so I’ll just leave it alone.
 Then, I would touch up any distracting spots or blemishes using the spot removal tool. Luckily, this baby had practically flawless skin. The preset took care of the blotchiness and, since my background was free of distractions and the quality of light was nice, I didn’t have to do much touching up. Getting the photo as “right” as possible in-camera is the #1 key to being able to edit quickly.
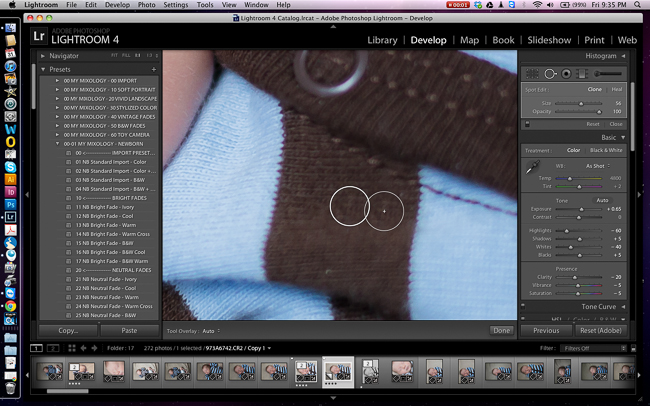
Lastly, I just cropped the image a little tighter for a better composition.
Here’s the final image…

And, a before and after.

I was able to edit this newborn portrait in under two minutes. If it’s taking you hours to edit your photos, you might try investing in or creating presets for speeding up your post processing. Keep in mind, the more correct you get the exposure and lighting in-camera, the less editing you’ll have to do later. Good luck and leave me a link in the comments to your newborn portfolios. I’d love to check them out!
CREDITS: All photographs by Tanya Smith are copyrighted and have been used with permission for SLR Lounge. Do not copy, modify or re-post this article or images without express permission from SLR Lounge and the artist.


Get Connected!