
Correct exposure and the pursuit of it, is a fool’s errand? After all, ’correct’ exposure is more a variable based on opinion and intention than it is an unvarying control. However, if we release ourselves from the trappings of a pedant, we can probably all agree for the purpose of education, and getting on with things, that correct exposure is a relatively neutral one with as much information retained as possible, with no blown out highlights nor overdone blacks. That’s simple enough, though not always so simple to achieve.
Getting it right in camera when it comes to metering seems rather banal, and simple, especially given digital’s trial & error and chimping ways. But while trial and error and chimping are mighty fine, they both rely largely on the camera’s primary LCD display, and that, I’m afraid, just won’t do because it’s not entirely accurate, and it’s small and difficult to see details. So unless you’re shooting tethered, and even then, you should have an understanding of how to judge an image’s exposure qualities other than by eye.

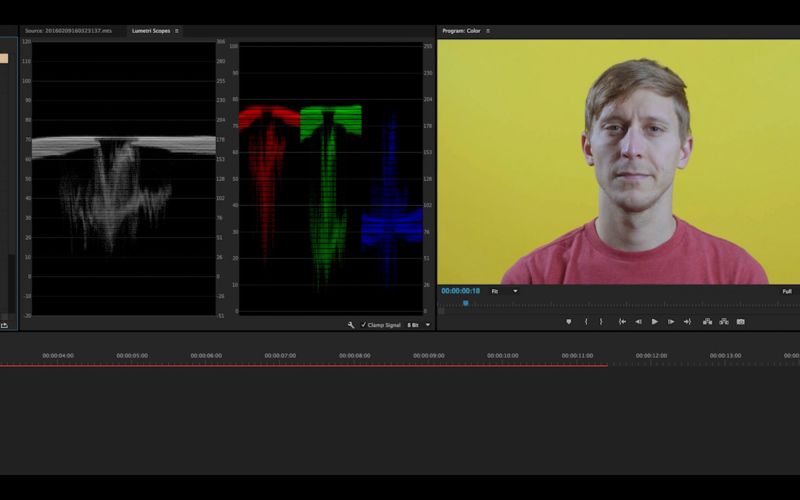
Typically, most people will use a histogram, and that’s a fine way to go, but it’s not the only one, and The Academy Of Storytellers has a good little video that goes over four ways and tools to use to help you get the correct exposure: Histogram, Zebras, Waveform, and RGB Parade. These tools are far more accurate and give a more complete view of what’s going on in your image than your eyes can give, especially on some small LCD.


The only issue is here, that RGB Parade and Waveform are scopes, typically used for video, so if you’re a stills shooter, you may not have either heard of them or have equipment that has them. DSLRs, to my knowledge, won’t show you waveform or RGB parade in the rear LCD though certain external monitors can do. However, once those images/videos get into post, in something like Premiere, then you will.
I mention Premiere specifically because, to my knowledge, neither Lightroom nor Photoshop have the ability to view scopes of an image either. You can bring up a histogram with some RGB value information, but they won’t give you any information on hue or saturation. Also, where the parade will tell you where in the width of the image you’ve got any underexposed or overexposed pixels, the histogram can’t, but rather just that you have them, somewhere.

[REWIND: THE ADOBE COLOR PICKER TOOL | WE ALL SEE IT, BUT DO YOU REALLY UNDERSTAND IT?]
The thing is, vectorscopes exist in video largely due to old broadcast level ‘rules’, and in video, there’s a need for more continuous sampling of color than there is in a single still image. In a way, curves, and levels can act like a vectorscope, but without the fluidity. Truly, I don’t understand why DSLRs don’t give you the option to cycle through some scopes like this, especially since some now are such capable video shooters, and more and more photographers are using stills and video from one shoot. Maybe time will change that as the two grow closer.
You can check out more from The Academy Of Storytellers here.


Get Connected!