
An Update To The Graduated Filters
In the previous video, I showed you guys how to create HDR images in Lightroom CC, and how to use the Panorama Tool. In this video, I want to show you guys an updated version of the graduated filters. The new Lightroom CC offers a new level of flexibility when using graduated filters, allowing you to achieve and modify your images just the way you like it.
Graduated Filters Update In Lightroom CC Allows For More Flexibility
Using Graduated Filters

Click on the rectangular box found on the right side of the screen to access the graduated filter. If you aren’t familiar with the graduated filter, I highly recommend you check out our Lightroom Workshop, where we teach you all the fundamental tools of Lightroom and more.

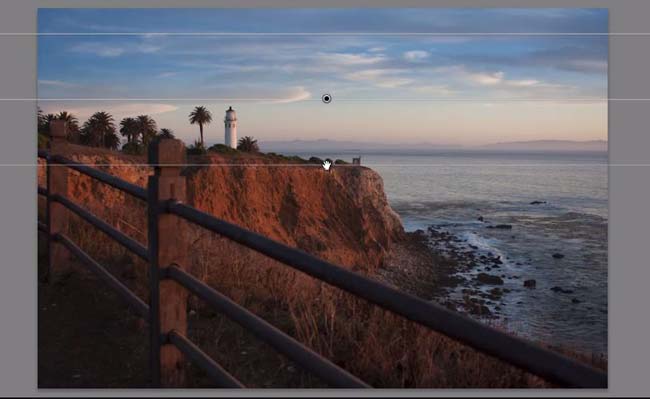
When I apply the filter, you can see that everything past the bottom line has 0% of the effect, and the top line carries 100% of the effect of the graduated filter.
Brush It Away

If you look on the right panel, you’ll see a brush button which allows you to feather away (or add) the effects of the graduated filter. This is a new tool in Lightroom that allows you to have much more flexibility in editing your images using the graduated filter! I crank up the “flow,” which dictates the amount I want it to affect when brushing away these effects.
You can also do this with the radial filter, too. In the image above, I brush and feather away the effects on the rocks and adjust it accordingly to how I like it.
More info on Graduated Filters in Lightroom
In this video, we will go over how to use the Graduated Filter Tool and how to create creative effects with this tool in Lightroom. The Graduated Filter Tool has greatly improved in Lightroom, making the Graduated Filter Tool an even more powerful and handy tool to use when editing our images. The Graduated Filter Tool allows us to create a filter effect that will apply the settings we specify over any area of an image. The Graduated Filter Tool is great because it can help us fix problems in an image, such as a problem with exposure. For example, you may have an image that is darker on the right side and brighter on the left side. You can use the Graduated Filter Tool to create an even exposure in that particular image. In addition, the Graduated Filter Tool allows us to be creative with our images because we can do many different effects with it.
Watch the Video
Using the Graduated Filter Tool
We can access the Graduated Filter Tool by simply hitting “M.” By doing so, this will automatically open up the Graduated Filter Menu in the Adjustments Toolbar. We can also select the tool by clicking on the Graduated Filter icon, which is next to the Spot Removal Tool.

As mentioned before, the Graduated Filter Tool is great for creativity. For example, if we want to make the sky in the image below to be a little bit bluer, we can use the Graduated Filter Tool to achieve a more dramatic look.

First, we need to reset our settings. Hold down “Alt” to bring up the “Reset” dialogue in the Graduated Filter Menu. When you click on “Reset,” all of your settings will be reset to 0. As you can see below, we have selected “Reset” and all of our settings are now at 0.

In our example, we want the Graduated Filter to cool down the area that we will paint over. We have set the Temperature to -20 and brought the Exposure down to -0.33. Next, we will boost up the Contrast to 20 as well as the Clarity to 20. Finally, we will bring up the Saturation to 10. See below for an example.

Once you have dialed in your settings in the Graduated Filter Menu, we are going to apply the filter across our image. Select the area where you want to apply your filter and drag your filter across. The filter will start out the strongest from the area we start from and then feather off as we pull the filter into the image a little more. In our image below, you can see that we are bringing the filter down from the top of the image to create a more dramatic look for the sky. Since we started the filter from the top of the image, the filter is strongest at the top.
To constrain the direction of the Graduated Filter Tool so that it is not diagonal, simply hold “Shift” down while you are dragging the filter. Depending on how you drag the filter, it will constrain the filter to be either horizontal or vertical.
If you do not constrain the direction of the Graduated Filter Tool, your filter will be diagonal, like the example below.

We can also apply the same effect of the filter twice, over the same area of an image. Once again, just drag your filter across the image while holding “Shift” to have 2 filters over the same area of the image. As you can see below, the sky looks even more dramatic with 2 filters applied.

If you want to adjust one of the filters, simply select one. The black button indicates which filter you are adjusting. To adjust the settings, go back to the Graduated Filter Menu and dial in your settings. As you can see below, we have selected one of the Graduated Filters and we can make adjustments in the Graduated Filter Menu.

If you want to delete a filter, simply select the button and hit “Delete” on your keyboard. As you can see below, we have deleted one Graduated Filter and only one other filter remains. You can also see that the sky is not as dramatic as the image above.

You can also toggle the Graduated Filter Tool by simply clicking the icon at the bottom of the Graduated Filter Menu. If you want to reset your filters, just hit “Reset” located next to the toggle icon. Be careful because this Reset button does not remove just the filter you have selected, but rather all of the Graduated Filters on your image.

Improvements in Lightroom 4
The Graduated Filter Tool has greatly improved in Lightroom 4, making it an even more powerful tool. We can now make adjustments to the Temperature and Tint and we also have Process 2012 available in the Exposure settings. In addition, we also have adjustments for Noise and Moiré control from both the Graduated Filter Tool and the Adjustment Brushes.


Get Connected!