
Turning a humble shed into a photography studio can be an inspiring journey for both novice and seasoned photographers. This transformation not only provides a dedicated space for creativity and work but also adds a personalized touch to your photography business. This guide will walk you through the steps to create your dream studio, ensuring that each decision maximizes the space’s potential for all types of photography.
The Importance of a Dedicated Space
Having a dedicated space for photography goes beyond convenience; it symbolizes making a commitment to your craft. It allows for a controlled environment where creativity can flourish without the constraints of time, weather, or external disturbances.
A shed, often overlooked, can be the perfect blank canvas for a photography studio. Whether you’re starting from scratch with a prefabricated or DIY shed, or converting an existing structure, taking this path should ultimately provide a cost-effective solution to owning a private and fully customized photography space.
Should I Build a New Shed Photography Studio or Convert an Existing Shed?
Depending on your situation, you might benefit more from either building a new shed photography studio or repurposing an old storage shed. In referencing an old shed, we’re not talking about a lanwmower shed that’s just big enough to house a lawnmower and some buckets, shovels, and rakes. You’ll likely need a storage shed with at least between 150-200 square feet of usable space. It should look more like a small room than a closet.
You can find several shed options from a range of sources, including home improvement retailers, online marketplaces (for both new and used products), and specialty builders. Just the same, you can expect prices to fluctuate from under $1k to over $10k, depending on the size and customizations or features included. A modern “shed” could describe anything from a basic storage unit to a livable space with all the amenities. The best route for you will depend on your budget and needs, and we’ll cover some considerations below to help you make the right choice.
Setting Up Your Shed Studio
Consider these points as you plan for and prepare to set up your shed photography studio.
Size, Lighting, and Accessibility
Evaluate the size, lighting, and accessibility of your shed, and weigh that against your needs for using that space. For example, if you photograph headshots, newborns, small products, or individual portraits, then you can usually get by with a smaller studio. A small shed should work well for these genres. But then there’s the question of lighting. A small space with few or no windows will not only dictate what you can fit into the area but also how you’ll need to light it. You then have to ask yourself an important question. Does the shed provide enough room to comfortably fit your subjects, lighting gear/setups, and other items you might keep in a studio (desk, computer, etc.)? Understand its limitations and possibilities so that you can effectively plan your layout and modifications.
Cleaning and Decluttering
A clean space is a blank canvas. If you’re making over an existing shed, start by decluttering and cleaning the shed. This will help you set the stage for a professional studio environment. Also, as you plan the layout, keep “decluttering” in mind. Avoid overfilling the space in the first place with gear, props, couches, and so on.
The exception would be if you have everything out and visible with a purpose. Such is the case with Casey Neistat’s studio, which you can tour and get ideas from in the video above. It’s not a shed, but you can see how Casey uses small spaces effectively, even if it isn’t the “cleanest” way of setting up a space.
Insulation and Weatherproofing
To ensure comfort and protect your equipment, consider insulating and weatherproofing your shed. This step is crucial for creating a suitable environment regardless of the weather outside. An environment that is too hot or too cold can prove detrimental to both your equipment and yourself, not to mention any clients that might use the space. You can find tutorials on how to do this online, or you might consider hiring professional help if it’s too far outside your wheelhouse.
Electrical Wiring and Outlets
Plan for sufficient electrical outlets and safe wiring to accommodate lighting, computers, and other equipment, ensuring your studio meets all your technical needs. Some areas do not allow detached structures to house electrical wiring. Of course, this could drastically change the functionality of your shed photography studio. Not having power can limit the type of photography you create as well as when you can create it. You’ll need to check your local building code requirements.
Locks and Security

Depending on how you decide to use the shed photography studio, you may or may not plan to leave your gear in the studio long term. If you don’t use a lot of gear, for instance, and rely more on natural light with just a few modifiers, then storing gear won’t be a huge issue. If you plan to fully set up your studio space and store all of your gear in it, however, you’ll need to ensure that the space is locked and fully secure. You might even consider adding a camera or two as an added deterrent and helpful security measure.
Designing Your Studio Space
Having an opportunity to design a studio space built to your specific needs can be one of the most satisfying experiences ever in your photography journey. Of course, the task is not without its challenges either. This space should prove multifunctional and allow you to set up and use the space efficiently. You’ll want to balance practicality with aesthetics.
Here are some design considerations for designing your perfect shed photography studio, including “studio gear” that you might want to add to your arsenal.
Choosing a Backdrop

Select backdrops that suit your style and the variety of shoots you plan to conduct. Consider versatility and ease of change when making your choice. Backdrop expenses can range between $100 to over $1,000, especially for premium options. That doen’t even include the additional cost of a background stand. However, creating a studio setting in a shed doesn’t have to drain your wallet. The key lies in finding a backdrop that serves its purpose effectively and affordably, transforming your space into a legit studio.
[Related Reading: The Best Product Photography Backdrops and How to Use Them]
Selecting Props

Props, including furniture, plants, and more, can greatly enhance your shoots. Choose pieces that are versatile and align with the wide range of themes you envision for your photography.
Incorporating Storage Solutions with Functional Design
Efficient storage solutions are key to maintaining an organized studio. Invest in studio gear (including a desk) that keeps your equipment accessible yet unobtrusive. In the video above, photographer and content creator Benj Haisch fully maximizes a 200 sq. ft. shed to great effect.
Case Study Backyard Shed Fashion Shoot
The following case study provides an example of using a shed for portraits without having to fully convert it into a shed photography studio.
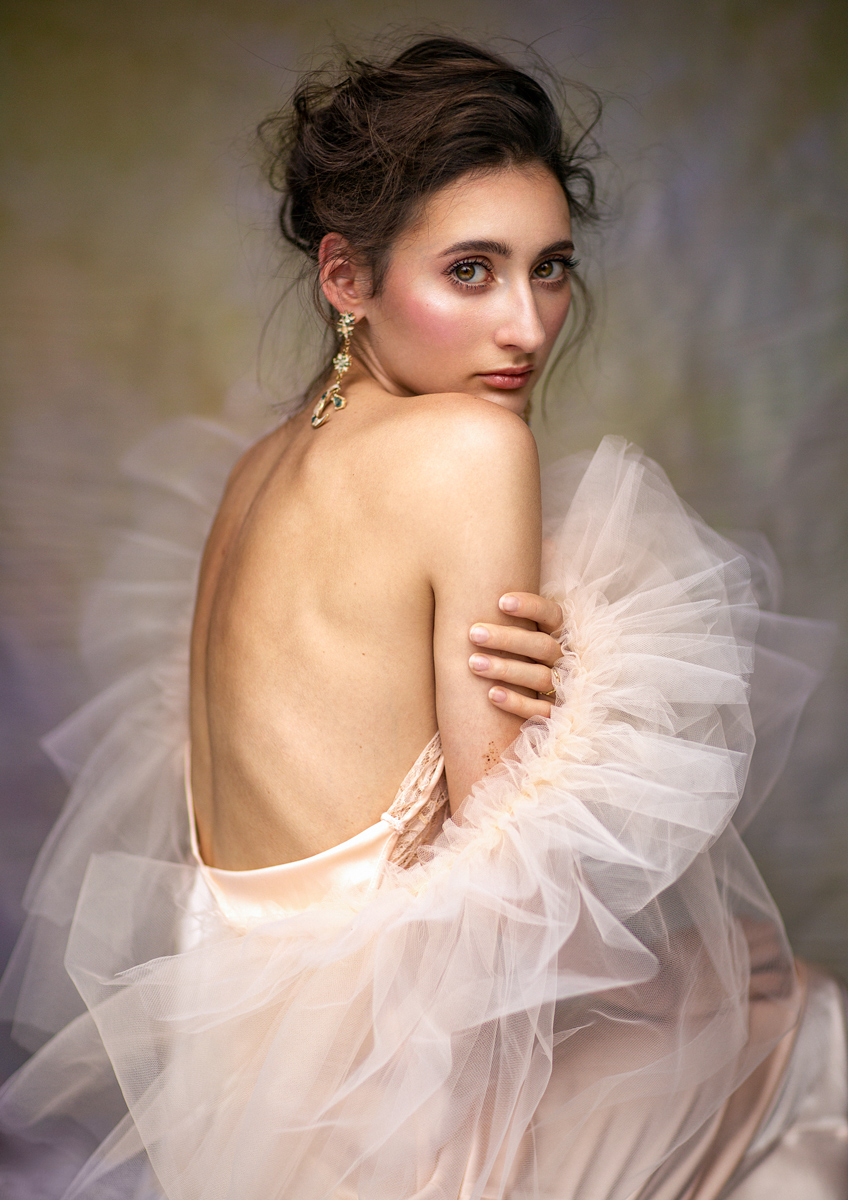
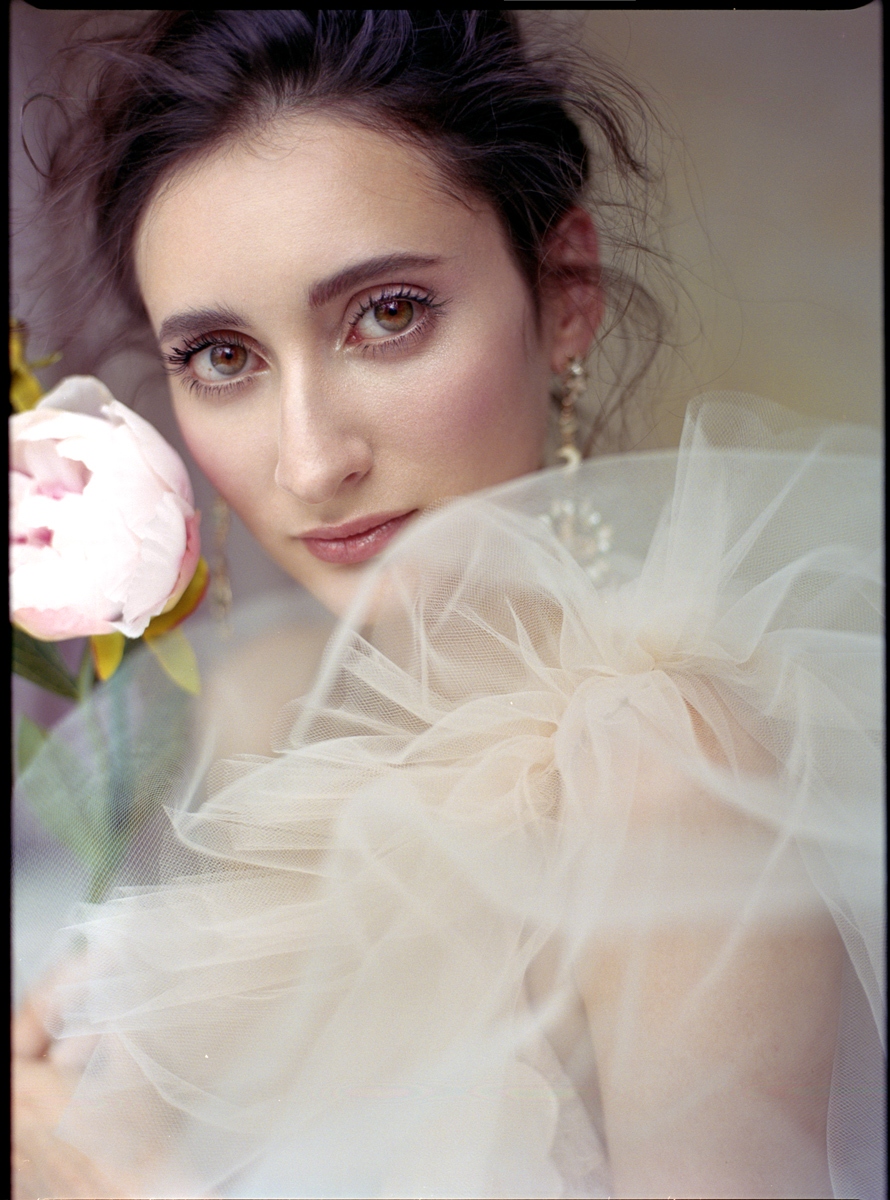
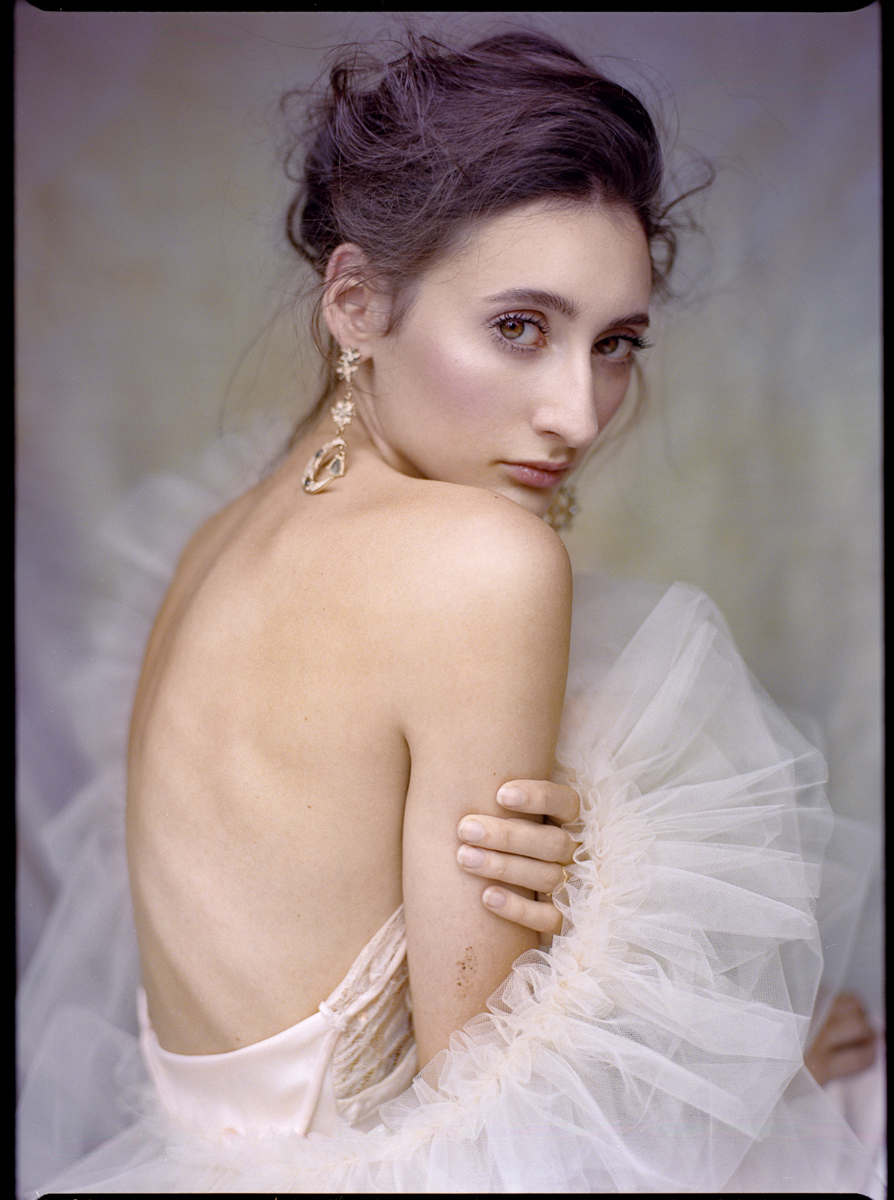
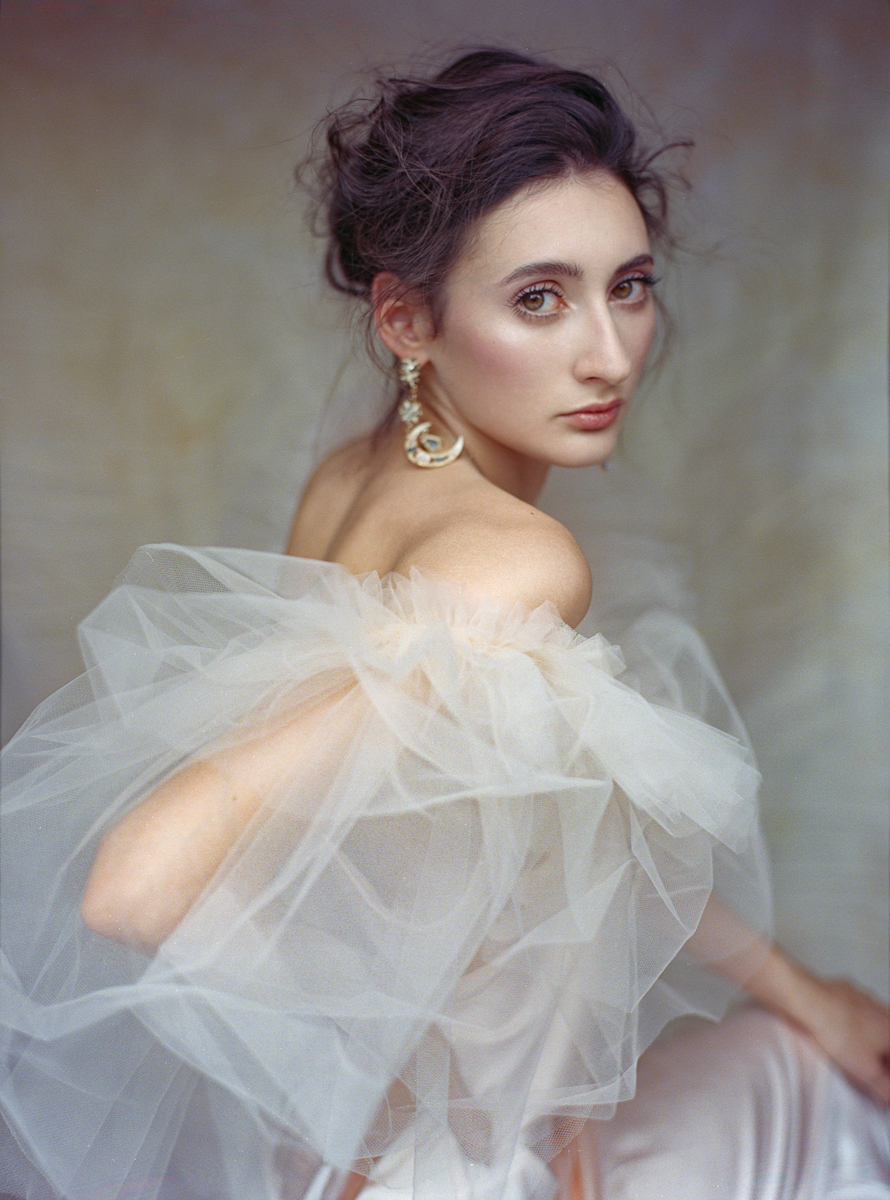
Fashion portraits can take many forms from big budget to literally NO budget, and some of those shoots, how they were done, may surprise you. In this video from Irene Rudnyk (based in Calgary, Alberta), she walks through how she created a soft-lit fashion editorial session using nothing but daylight and the shed in her backyard.
Now, some of you may not have a shed to replicate this, but the same sort of setup is typically seen in studio using multiple v-flats. We can use v-flats to carve and cut out the light so that there’s only the light from in front of the model softly falling onto the them. Heighten the effect with a nice and dark background. That said, the same sort of setup can be reached pretty much anywhere. Use a doorway to your home, the garage, or even just a cubby or awning of a nearby shop or storefront.
Videos like these demonstrate that you don’t need a million dollar studio and insanely expensive budgets to create incredible work. All you need is a good idea and a solid foundation of how light and your camera(s) work! (Well, that and a few props/tools like a reflector and small stepladder.) The gear used by Irene in this shoot is her Canon EOS 5D Mark III, Canon EF 85mm f/1.2 L, and a Mamiya 645 film rig with 80mm f/1.9 lens loaded with Portra 400.
Here are some of the shots taken by Irene during this session


See more of Irene’s work below.
Final Thoughts
Transforming a shed into your dream photography studio is not just about creating a space; it’s about forging a sanctuary for creativity and professional growth. By following this guide, you should be able to design a studio that not only meets your needs but also inspires you and your clients with every shoot.
That said, setting up studio can prove costly up front in terms of building the structure or even filling it studio gear. Also, maintaining a studio is not for everyone, no matter how small the space. Like other outdoor structures, shed photography studios will also require maintenance, especially in certain climates. Siding can separate from the structure, paint can become chipped, and so on. If you have no interest in maintaining a space, you might be better suited for renting a space for specific shoots when needed. These are all important points to keep in mind as you decide how to navigate this part of your photography journey.


Get Connected!