-
Term: Backlight
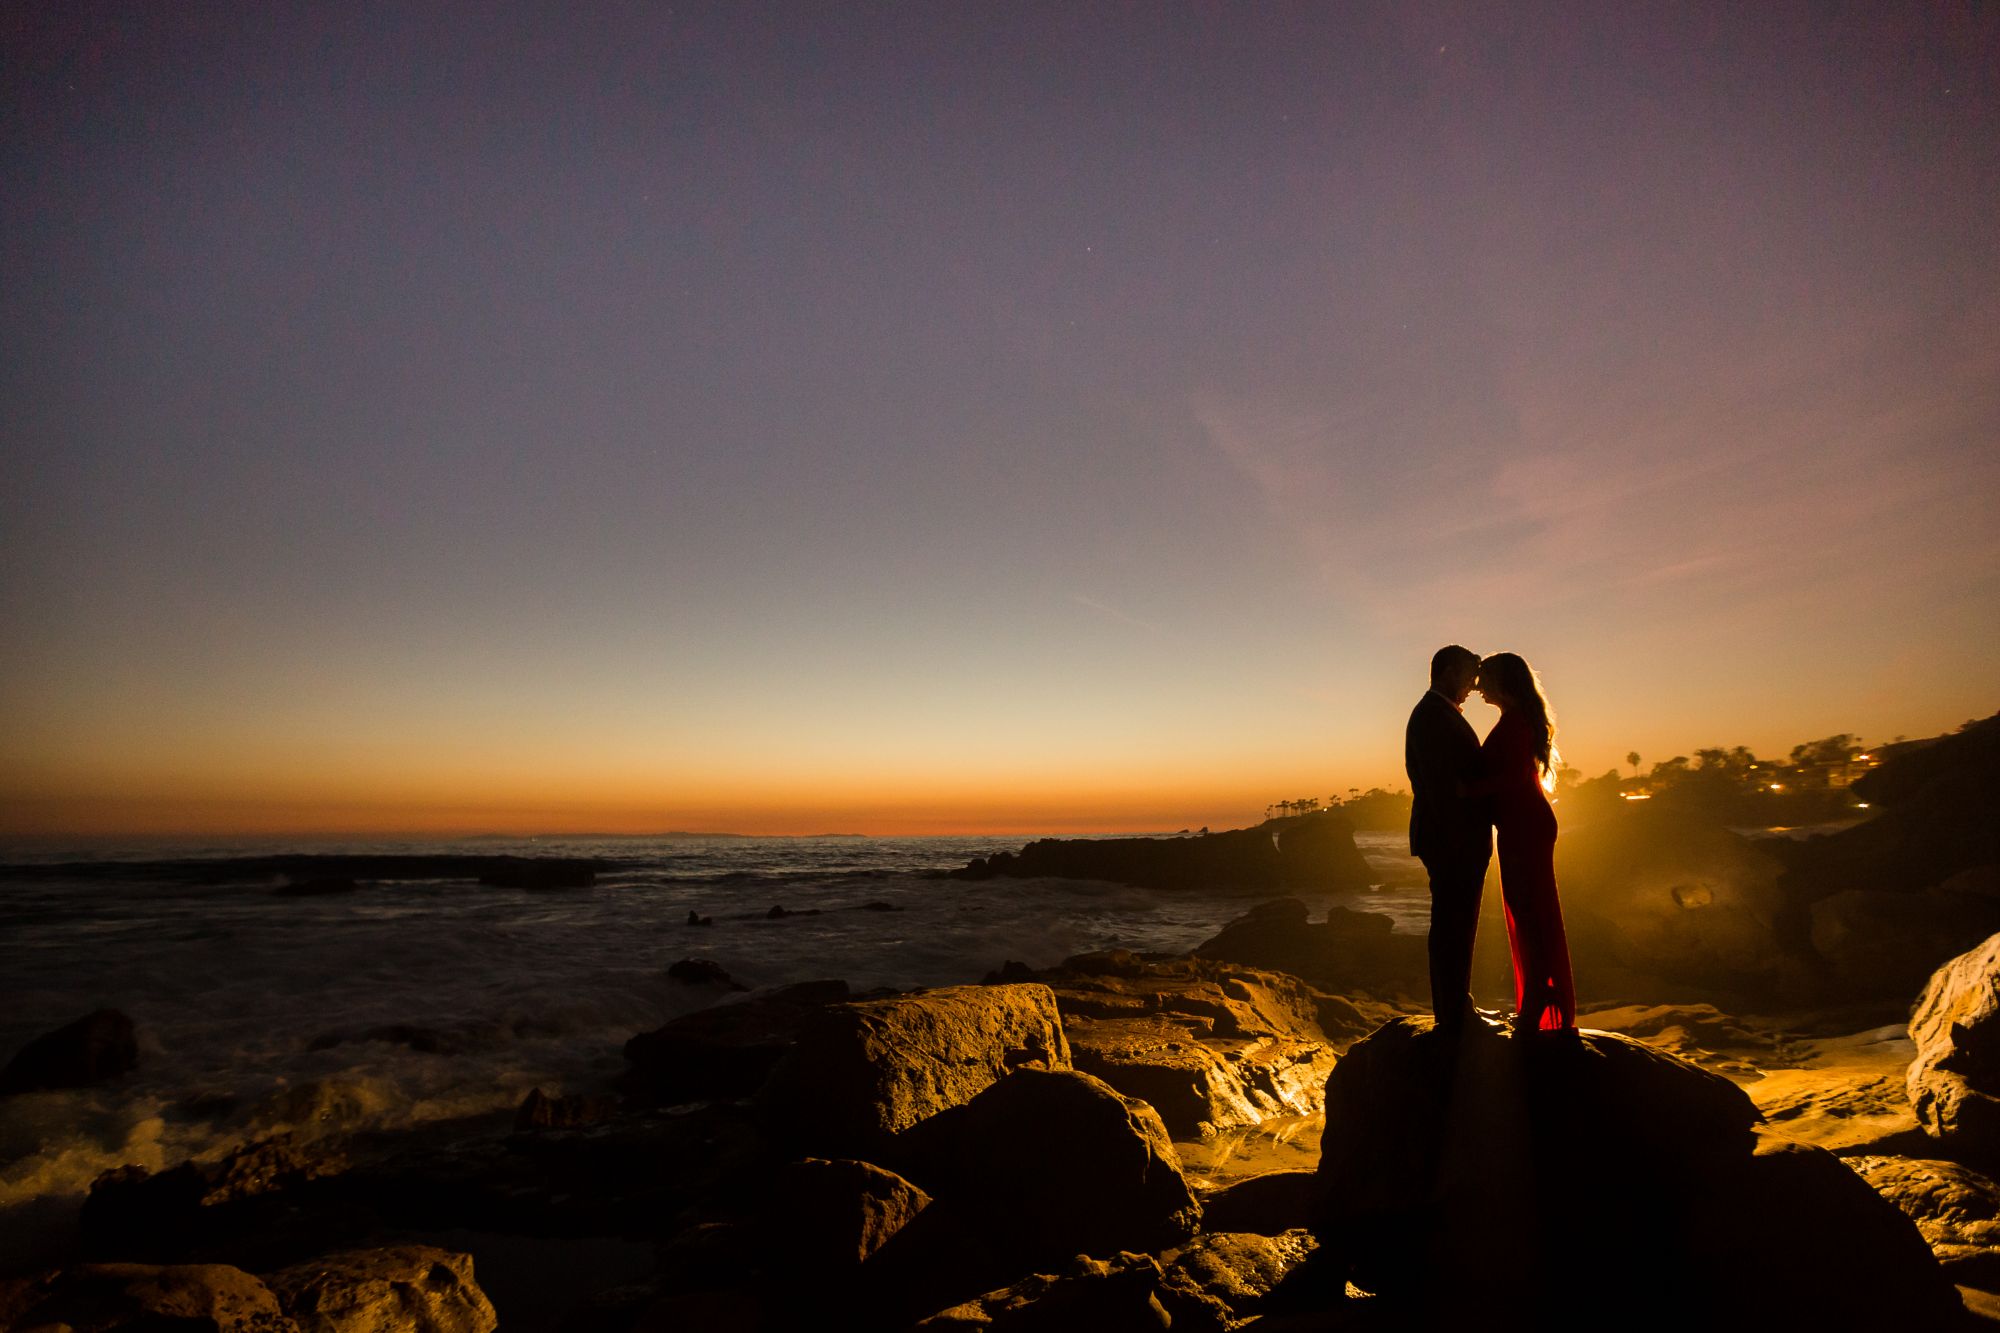
Description:Backlight in photography refers to a lighting technique where the source of light is positioned behind the subject, shining towards the camera. This can create a dramatic effect, highlighting the shape and silhouette of the subject while creating a contrast between the subject and the background. The backlight can be natural, such as the sun, or artificial, such as a studio light. The use of backlighting can add depth and dimension to a photograph.
Backlight
Technical Explanation of Backlight Photography
Backlight, or back lighting, is any light source that comes from behind your subject. However, backlighting is a more general term, and can be used to describe a broad range of lighting from rim light to a “kicker” light. Whether it is technically correct or not to use the term backlight to describe any and every form of lighting that comes from behind is not as important as simply understanding what another photographer is referring to.
Backlight can definitely come from any light source, including the sun on a bright day, or a wireless flash on a dark night.
The goal of backlighting, from an artistic and technical standpoint, is usually to help separate a subject from a background, and bring emphasis to that subject in dark conditions, having a backlight can be especially helpful, and sometimes it can actually serve as the ONLY major light source in a dramatic silhouette photo.
In post-production, dealing with backlighting can be difficult, if your subject is in deep shadow, however both silhouette images and brightly exposed images can work, if the editing fits the mood of the scene, pose, etc.
Why A Backlight Can Save You In Any Scene
When faced with challenging scenes or short on time, pulling out a pocket strobe and placing it behind our subjects creates something pretty spectacular. Here are a the steps to using a flash as a backlight for impactful Images
Find your composition
Since the actual technique is relatively simple, these tips are going to help you think creatively to get the most out of what is otherwise known as a silhouette. In the first example, when faced with a rather mundane hotel room, we first imagined what the room would look like underexposed, and then set our ambient exposure to the desired settings to create a backlit photo using this screen door. You can see the full tutorial on how we arrived at the final image on the right in Photographing the Couple.
Place your subjects

Silhouettes are much more interesting when the subjects are placed against the brightest portion of the scene. If that doesn’t exist, then create a highlight with your backlight. If you are using your backlight to bring light into a darker part of the scene like the sample above, then find a unique composition that draws the attention to that point like we did with this mural.
Place your strobe behind your subject
Finally, it’s time to add in our light. Here are the three most important characteristics to consider when perfecting your backlight:
Distance: How far will the light be from the subject(s)? The further away you place the light the more light spill you will have.

Power: How strong will your light source be? You can zoom your strobe to use the light as a bounce/fill or you can power up to create flare lines.

Color: Will it be gelled for creative or corrective effect? Depending on your in-camera white balance setting, you can gel your flash to match your existing light or work against it.
Related Articles to Backlight Definition
Cloudy Day Photography | How to Get Great Pictures with Overcast Skies
Check out these ten cloudy day photography tips for getting great pictures in less-than-ideal weather.
Creative Photography Ideas | How to Shoot “Water Hats” on the Cheap!
Here’s a fun & affordable creative photography idea that’s perfect for shooting in midday sun.
How to Take BETTER Photos in Harsh Sunlight (Get CREATIVE Outside)
Follow photographer Murtaza Siraj through a complete photo shoot & learn to find natural light patterns for creative effect under harsh, midday sun!
Optical Zoom VS Digital Zoom – What’s The Difference?
These days, almost every camera with a built-in lens has some sort of a “zoom” label on it. However, not…
Five Cloudy and Rainy Day Photography Techniques
The next time you find yourself scheduled to shoot in foul weather, use these five cloudy and rainy day photography techniques.
5 Simple Recipes for Great Portraits Anywhere w/ Behind the Scenes!
With a little creative effort and insight, however, you’ll find that you can actually capture great portraits in any location.
Build A Portrait Studio for $1,000
In this write up we’ll go over how you can create amazing portraits anywhere with a lighting kit that can fit into a suitcase, and costs just around $1000
When SHOULD You Blow Out the Highlights?
In this article/video, we’ll show you how and when to use natural light for high key portraits that balance imperfect lighting with a refined, authentic look.


Get Connected!