
One of the first things you have to understand about editing your raw photos is, what software should you choose?
Adobe offers multiple ways to edit your raw photos; however, they’re basically all the same. How is this possible? There are different options in how you view and organize your raw photos, but when it comes down to the actual editing, making adjustments like contrast, curves, etc., Adobe is using the same raw “engine” to make those adjustments.
Simply put, the interface is different, but the final result when you save/export a raw file from Adobe will be identical if you apply the same adjustments.
The two main applications Adobe offers are Adobe Bridge and Adobe Lightroom. These days, there are multiple versions of Lightroom, but yes, indeed, they all still use the same Camera Raw processing engine.
What is Camera Raw? What is Adobe Bridge?
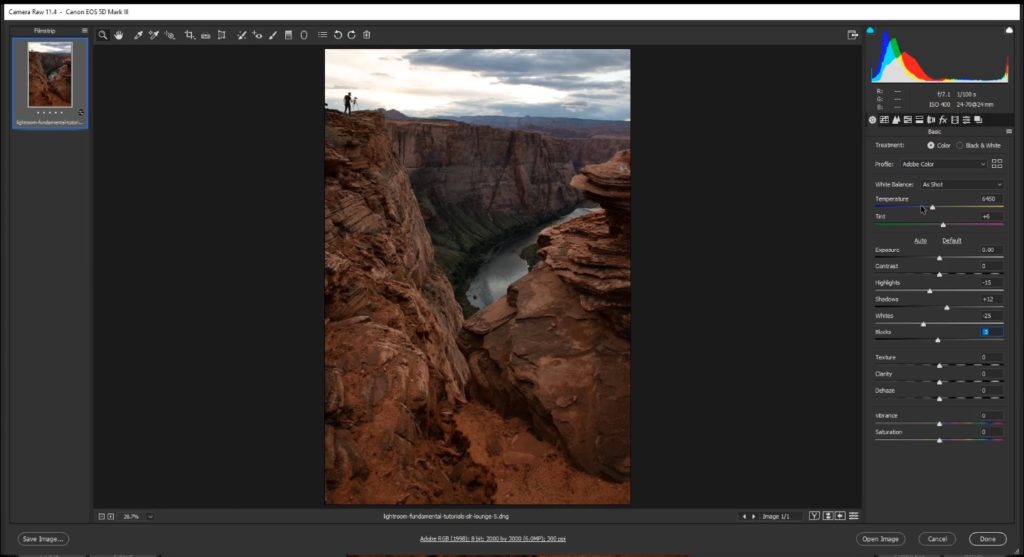
Before we go any further, let’s clear up one thing: Adobe Bridge is Camera Raw. Well, sort of. To be precise, Adobe Bridge uses the Camera Raw interface to process files, once you double-click on a raw file.
By default, double-clicking on a raw file in Adobe Bridge will actually launch Adobe Photoshop and use the Camera Raw interface through that separate application. However, you can actually configure Adobe Bridge to not launch Photoshop at all, and simply use its own Camera Raw engine to edit (and save/export) images 100% within Bridge.
Bridge, therefore, actually qualifies as both a standard browser application and a shortcut to the Camera Raw editing interface.
The Advantage Of Non-Destructive Raw Editing

Since both Bridge and Lightroom use the Camera Raw processing engine to edit your raw photos, they both gain the same advantage known as “non-destructive editing”.
This means that when you’re editing your photos in Lightroom or Camera Raw, you’re not actually editing the original file. You’re just viewing a preview of what the file would look like, if it were actually edited!
In fact, you can even edit JPG and TIF images in both Lightroom and Camera Raw, if you configure your Adobe Bridge preferences correctly to also edit JPG and TIF files.
Keep in mind, of course, that whether you’re editing raw or JPG/TIF image files, your non-destructive adjustments will always become “destructive” the moment you actually export or save that original file to a new JPG or TIF file. To be clear: the original file isn’t harmed, but the newly generated JPG or TIF file will experience some level of destructive editing.
Differences Between Adobe Bridge (Camera Raw) And Adobe Lightroom


Basically, the core difference between Bridge (Camera Raw) and Lightroom is the way in which you view and organize your photos. Even though the interfaces look very similar, they have one very big fundamental difference! That is, the Lightroom Catalog (LRCAT) organization system, versus the lack thereof with Adobe Bridge.
Advantages of Adobe Bridge vs Adobe Lightroom
The advantage of using Bridge is, there is never any confusion about where your photos are actually being stored. You simply use Bridge to browse the folders on your computer, (much like Windows Explorer or Apple Finder) …and your raw, JPG, and other images will appear!
Direct Folder Browsing In Adobe Bridge

In other words, you never need to create a catalog or “import” photos into that catalog. With a catalog system such as Lightroom, you must first import your raw images into that Lightroom catalog before you can view, organize, or edit them.
This is time-consuming, and it also creates the risk that your actual, original files may accidentally go missing, and you wouldn’t know it unless you looked closely at the files’ status in the Lightroom Library module, or if you actually try to export a high-res JPG from your original raw file.
Therefore, Adobe Bridge can be useful for quickly browsing old archives of photos, when you don’t want to take the time to import them all into a Lightroom catalog and cause organizational clutter.
Then again, there is one huge advantage to taking the time to create a Lightroom Catalog/LRCAT! Read on…
Advantages of Adobe Lightroom vs Adobe Camera Raw & Bridge

The advantage of using Lightroom is, in fact, that catalog system that seemed to be a disadvantage at first.
In reality, having a catalog of all your photos can be a huge benefit in the long run, if you take the time to import all of your raw photos into that Lightroom catalog.
Why? Because within your Lightroom catalog, you can easily filter them by date, camera, camera settings, and various flags such as keywords, color labels or 5-star ratings.
Lightroom Library Filtering

This can be very useful if you have many years’ worth of photos, and wish to find certain photos from throughout those years that have something in common such as a location you visited more than once, or of course you can create an “all-time best-of” portfolio, using 5-star ratings, or a whole new “virtual” collection of photos that only Lightroom can see.
You can do all of this sorting and organizition from within Lightroom, and never actually move the photos around on your hard drive.
Lightroom Previews

Another major advantage of having a Lightroom Catalog is that you can create previews of all your raw files, and then continue viewing and even editing them even when the original files are not available.
This is especially beneficial if you have many months or years worth of raw photos stored on one or more external hard drives, and you don’t want to always carry your external hard drive(s) everywhere you go.
Just generate “Standard Previews” in Lightroom, and you can view your photos at any time. Or, if you’d like to be able to edit your photos remotely and even export low-res versions for using on social media, just generate “Smart Previews” in your Lightroom catalog, and you’re good to go!
If you generate Standard and Smart Previews for all the files in your Lightroom catalog, you will only ever have to actually attach your external hard drives if you’re going to export an image in high-res, or physically move a folder of original raw photos on your hard drive.
(NOTE: If you use Lightroom to import, organize, and edit your files, try to refrain from ever moving your folders of original raw files outside of Lightroom; ALWAYS use Lightroom to physically move folders from one drive or storage location to another! Otherwise, Lightroom will not know where the folder went, and you’ll have to relocate it from within Lightroom.)
Camera Raw and Lightroom vs Photoshop
Last but not least, let’s discover how the non-destructive raw processing of Lightroom and Camera raw differs from actually taking a file into Photoshop.
Non-Destructive Versus Destructive Edits
As we described earlier, any editing that you perform in Adobe Camera Raw, whether through the Bridge interface or the Lightroom interface, is considered “non-destructive”. This means that you’re not actually affecting the original file, whether it is a RAW, JPG, TIF, or PSD file format. You can only ever create a new JPG, TIF, or DNG file from that original file, which is when the “destructive” adjustments are involved.
When you take any image out of Bridge or Lightroom and into Photoshop, however, your editing will become more destructive. Photoshop opens the file directly, and when you save that file again, and each time thereafter, you’re making those Photoshop adjustments permanent.
You can minimize the destructiveness of your Photoshop edits by using duplicate layers, adjustment layers, and advanced things like Smart Objects, and then save the resulting image file as a TIF or PSD file with the highest quality settings.
In general, though, it is usually best to perform as much of your color-correction and tonal manipulation as possible during the raw conversion. In other words, only take a raw file into Photoshop if you actually need to use one of the advanced adjustments that the Camera Raw engine cannot offer, such as complicated color tweaking, or local retouching/cloning types of adjustments.
Presets in Adobe Camera Raw vs Lightroom


One question that we get asked a lot is, what about presets? Are Lightroom presets the same in Camera Raw? The short answer is, YES! Unfortunately, gaining access to those same presets can be difficult. This is because the various versions of Lightroom and Camera Raw use different file types for the different kinds of presets, from global presets to local adjustment brush presets.
Camera Raw currently uses .XMP files for all presets, global and local, while Lightroom uses .XMP files for global presets, but still uses .LRTEMPLATE type files for local adjustment brushes. Also, the location where these presets are installed can vary depending on which version of Lightroom you have, which creates even more confusion.
Camera Raw vs Lightroom Conclusion

We generally recommend using Lightroom for as much of your workflow as possible. The advantages of having a catalog are extremely powerful! For most photographers’ workflows, Adobe Bridge and Camera Raw will only be useful in unique, advanced circumstances.
Premium Video Tutorials

You can find our full workshop on Mastering Lightroom here.


Get Connected!