-
Term: Adobe Bridge
Description: Adobe Bridge is a powerful asset management system created by Adobe to help users manage and access all types of digital media in their creative workflow. It provides users with cutting-edge tools for finding and managing large numbers of files; plus, customizing workspaces and viewing data-rich metada about their media. Its features give users the flexibility to search for files by name, expansive tagging capabilities, customizable color labels, built-in image editing capabilities such as resizing, as well as an array of other options that enhance the user-experience while handling digital content. Using Adobe Bridge helps streamline workflows allowing users to easily find, organize, edit and share their digital media.
Adobe Bridge
What is Adobe Bridge?
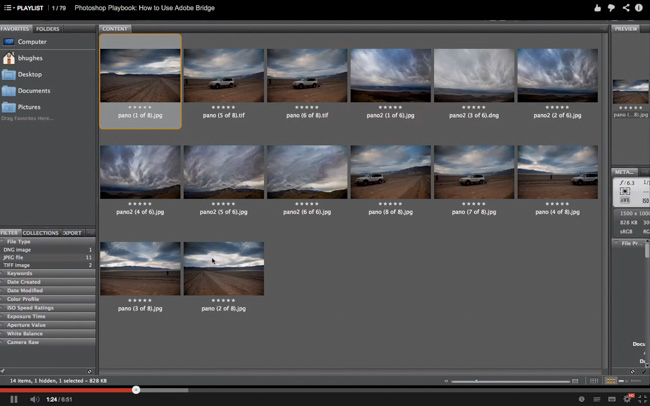
Adobe Bridge, at its core, is a complex and powerful media manager for visual people. Like a focus ring, it allows you to defocus what’s not wanted, and see clearly all your media assets on your hard drive or network without needing to catalogue or database it all. But it’s also so much to it, and so much more.
For a lot of Adobe users, and until about a year ago for even myself, Adobe Bridge was largely neglected. With Photohop’s pixel-bending capability, and Lightroom’s easy organizational structure and even simpler editing structure with a Camera Raw engine, Bridge seemed to fit into the picture Meg sits in Family Guy – seemingly adopted. But the step-child of a program has come of age in recent incarnations, and can be an indispensable tool.
Sure, I can hear some of you now scoffing at that, readying your comments about how long you’ve been using it, but truly, there are more who don’t, and probably should. Adobe has released a bit of a teaser video that does a good job highlighting how Bridge can be used, and why it deserves some attention.
Bridge used to be installed alongside other applications, but now comes as a standalone, and that in itself is a nod to its utility. This decoupling means the delivery of the application can be independent, as can be its use. So without other programs, you can use Bridge as a centralized location that grants access to pretty much all the media assets you have. With cross platform 64-bit support and now support for high resolution screens, it’s perfect for browsing, inspecting, culling, and applying edits. Thumbnail views of almost all filetypes are shown including PSD, RAW, and INDD is also a plus. But take a look at this video from Adobe that will introduce, or re-introduce Bridge to you with some of its great features, and for things you probably didn’t know it could do.
Top Adobe Bridge Tips
For those of you who use Adobe Bridge, (even if you also use Adobe Lightroom for some of your work) here are our top five tips for maximizing your workflow in Adobe Bridge and Camera Raw!
Many of these tips may also be applicable to previous versions of Adobe Bridge, for those of you who have CS5 or CS4. The main difference between Adobe Bridge CS6 and all previous versions is, of course, the new process version that has completely revolutionized RAW (non-destructive) processing techniques. While this makes Adobe Bridge CS6 (and Adobe Lightroom) extremely powerful, it does mean that things like presets are NOT compatible between the programs. (The SLR Lounge Preset System, for example, is created for Adobe Bridge CS6 and Lightroom 4 ONLY, because it relies on the 2012 Process Version to function)
If you process high volumes of RAW photos, we highly recommend a Bridge or Lightroom workflow that is maximized for speed. Both of these programs use what is called “non-destructive editing”, and allow you to batch edit large volumes of images at once.
While many photographers use Lightroom as their primary workflow tool, Adobe Bridge CS6 is extremely useful for many different reasons, and here at SLR Lounge we use both programs side by side!
The Video
1.) Open ACR Without Photoshop
The first thing you want to do is configure Bridge so that it can use the Adobe Camera Raw interface without needing to also open Photoshop. To do this, go into your Adobe Bridge Preferences and look in the General tab, as below:
Once you check the box for “Double Click Edits Camera Raw Settings in Bridge”, you will be able to use Bridge independently of Photoshop for browsing archives, grabbing a quick RAW photo here and there, etc. If Photoshop doesn’t have to “fire up” each time you need to process a random image in Camera Raw, you’ll save computer resources and your overall workflow will be much more smooth!
2.) Edit JPG & TIF Images Alongside RAW Images
Another very handy option is for those of you who ever have to deal with editing JPG and TIF images. As advanced as RAW image processing has gotten over the years, many people still color correct their JPG, TIF, and PSD images the old-fashioned way- in Photoshop! In addition to being restrictive and time consuming, this is a “destructive” editing method, as opposed to RAW processing which uses non-destructive editing.
There are many options for editing JPG and TIF images, but for example if you only need to edit one or two JPG images here and there, it would be incredibly annoying to have to create a Lightroom Catalog every time you need to process a random JPG or TIF photo.
So in Adobe Bridge, go into your Camera Raw Preferences (which are separate from your General Bridge Preferences) and set the options for JPEG and TIFF Handling to “Automatically open all supported…”.

Now, whenever you need to perform color correction to your JPG photos, and you would prefer to use the non-destructive RAW interface that you are used to, all you have to do is double-click on your JPG or TIF images in Bridge.
(Alternately, if you hardly ever need this function but would like to access it from time to time, turn this option back off and then simply right-click your photos and use “Open in Camera Raw”…)
3.) Enable Automatic 100% Previews for Rapid Browsing and Culling
One of the awesome things about a RAW, catalog-based workflow is the incredible speed with which you can browse, cull, and process your images. Indeed, just like how Lightroom has “render standard/1:1 previews” in it’s Library options, Adobe Bridge also has 100% previews and high-quality thumbnails!

Designating both “Always High Quality” and “Generate 100% Previews” will cause your computer to always perform these actions every time you open a new folder. Once the previews have all been generated, you will be able to breeze through your photos and even view 100% previews instantly for checking sharpness / focus. You may need to clear your cache every now and then if you have a smaller hard drive and you edit tons of photos, but in general it is usually not a concern.
Of course just like Adobe Lightroom, it takes a considerable amount of time to generate 100% previews for thousands of photos, for example maybe from a wedding, so we recommend letting this process run overnight before you do your editing.
4.) View Images From Multiple SubFolders At Once
Here is one trick that many Bridge users don’t know about, and that is the “Show Items From Subfolders” option. To enable this option for a folder, click on “View” in the main menu and then click “Show Items From Subfolders”.
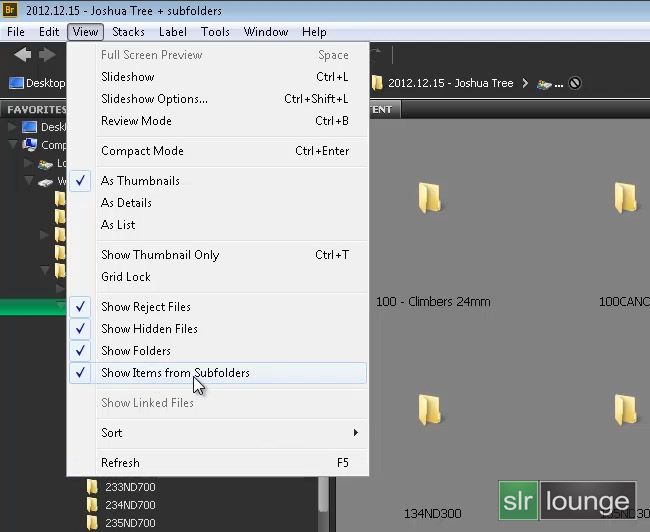
Doing this allows you to view all of the images from a single “Parent Folder”, without having to move all of your images to a separate folder. This is extremely practical for certain people like timelapse photographers where you really want to organize your photos into separate folders, but you also want to be able to view them all together sometimes.
Note that enabling this feature is a one-time, temporary action that un-does itself as soon as you click on any other folders. If you move from one folder to another you will have to re-enable “Show Items from Subfolders” over again.
5.) Use “Select All” in Camera Raw, Then De-Select While Editing
This last one is a little difficult to grasp at first, but the best way to explain it is that you simply want to avoid performing the same adjustments twice. If you’re working on a high volume of photos that were shot in similar lighting conditions, then most of your editing can be done in batches.

Use the “Select All” tool in Adobe Camera Raw, (or just hit CTRL-A or CMD-A) …and start editing your first photo. Once you’ve got your first photo perfect, CTRL-click that first photo to de-select it from the group of all photos. This will automatically bump your main image preview to the next image. If the next image is nearly identical to the previous image, (such as in this case) …then you don’t even need to edit it! Just CTRL-click that image as well, and move on to your next image. As your lighting or exposure changes throughout the images, maybe you’ll have to bump one or two settings up or down, but the main idea is that you’ll always have the adjustments from your previous image applied.
This is akin to the “Paste Previous” option in Adobe Lightroom, which is of course one reason why many high-volume post-producers choose Lightroom. However if you don’t want to clutter up your Lightroom catalog with hundreds or thousands of images that are very similar, such as from a timelapse or a stock catalog, this is an awesome way to go.
Conclusion & More!
As much as we love using Adobe Lightroom, a catalog system has a few key areas of inconvenience that are solved beautifully by a straightforward browser app such as Adobe Bridge. So it is a very good idea to integrate Adobe Bridge into your long-term workflow, and these five tips will great convenience and speed!


Get Connected!