The trifecta of posing, lighting, and camera settings need to meld together to create a flattering portrait. Let’s discuss the three most common kinds of subject placements/positions in relation to a light source that can help determine which works best to create a well-executed portrait.
Direct/Flat Lighting
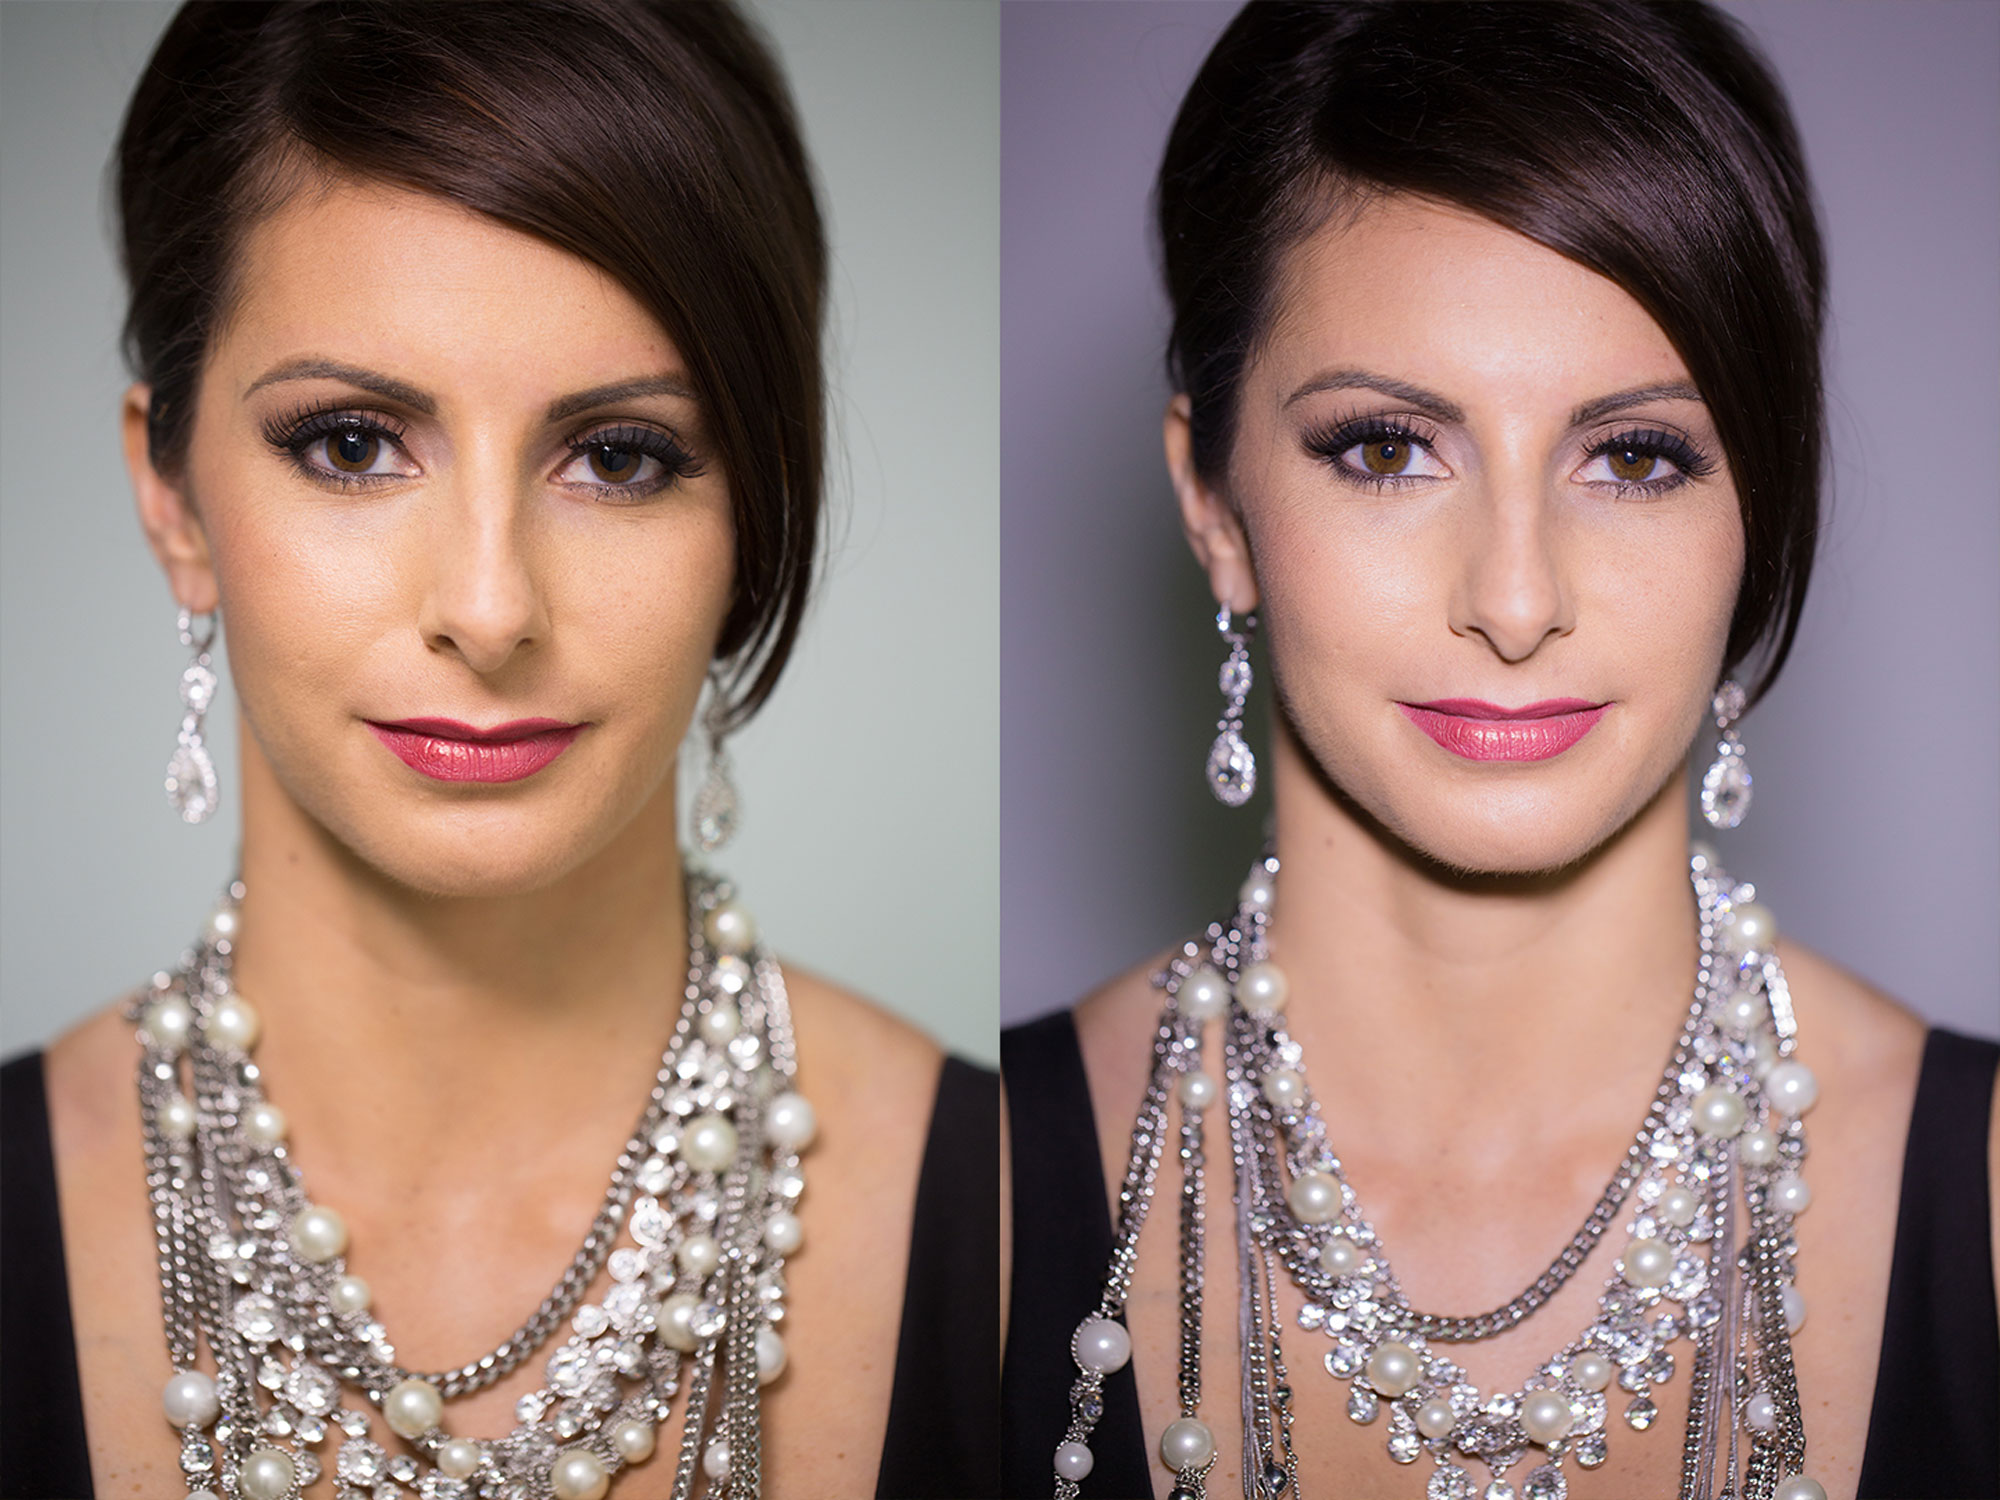
Now, there are many different symmetrical light patterns such as paramount, clam shell, square, etcetera, but the first and easiest to understand is flat light. When light fills the entirety of the face, including the shadowed and contoured areas, it unfortunately doesn’t provide much dimensionality. It does, however, diminish the visibility of wrinkles and imperfections, and creates an even flat light that is ideal for beauty and fashion photography. For subjects who lack symmetry in their facial features, this lighting technique will work well to lessen that asymmetry.
Short Lighting
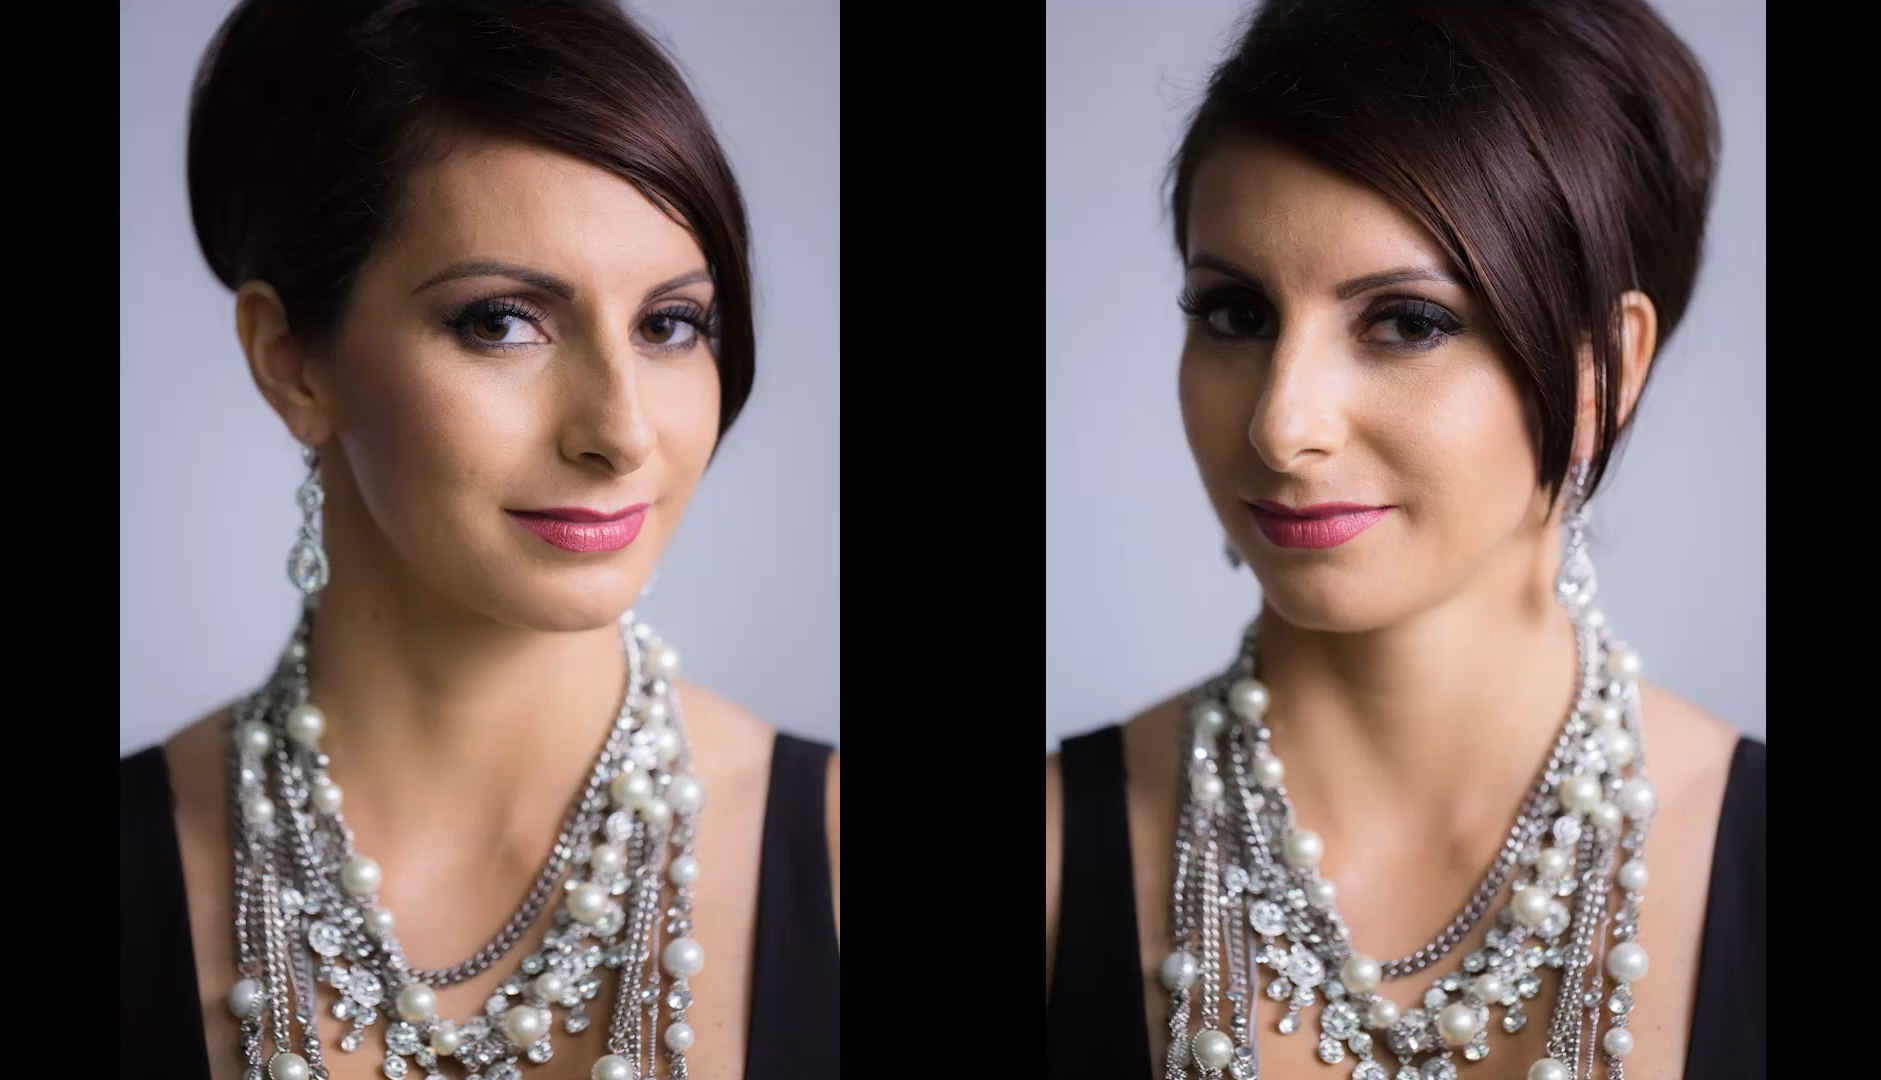
If you turn the side of your face that is closest to your light source even further in the direction of the light, you are lighting the short side of your face.

Try understanding this technique with your smartphone flashlight placed diagonally from your face, similar to how it is shown in the image above, in a top-down lighting position. See how the shadows fall when you turn the side of your face that is closest to the light source, the short side, towards the light. Notice that there is a slimming effect when the short side of the face is lit, adding in a natural contour to the cheekbones, underneath the brow bone, and around the nose. Those with already narrow face shapes don’t necessarily warrant this lighting to help shape their face, so instead, utilize one of the other mentioned light positions.
Broad Lighting
[REWIND: How To Use Lighting & Contrast To Photograph Beautiful Skin | Julia Kuzmenko]
Using the same flashlight trick, turn the side of the face that is further from the light source towards it, and you can see that more surface area is lit and less is in shadow creating a wider appearance. The broad side of the face, as you can see on the right in the photo comparison above, has a heavy shadow appearance and is overall not as flattering as the shot lit with the short lighting technique.
When you are positioning your subject in relation to where your primary key-light source is, consider the overall effect you desire for the image. A slight change in your position, your key-light or subject’s position can yield a variety of results. However, it is up to you to determine which is the most flattering for your particular subject.
Join PremiumFind more useful on-camera flash lighting techniques & tricks check out Lighting 101 in the SLRL Store or stream it free along with Lighting 201 as a Premium member!


Get Connected!