
When I photograph Deer, I get close, very close. It used to be a little un-nerving, but having done this many times over the years, I have become not only good at getting to this distance, but confident that my presence is in no way disturbing. If you caught my last article, you’ll know that I use pretty unconventional gear for wildlife photography (a full frame camera and 70-200mm lens). Professionally, I shoot portraits and currently, I cannot afford to add a longer lens, and perhaps a crop censor body, to my kit. This limitation may cause some to shy away from this type of photography. For me, it means I have to get creative with my composition, but also my methods for approaching the Deer. This article will give you some advice on how to approach Deer as well as some safety tips to consider while you do so.
[REWIND: WILDLIFE PHOTOGRAPHY: WHAT GEAR DO YOU REALLY NEED? {DEER HUNTER SERIES PART 1}]

It’s extremely important for you all to note that I photograph Deer in Richmond Park, London. Richmond Park is one of London’s largest and most popular parks. Hence, these Deer are far more used to the company of people and thus are generally a lot more predictable than totally “wild” animals. Some of the advice I will give is applicable to any kind of wildlife photography, but be clear that when dealing with “wild” animals, approach with even more caution.

Again, for those that caught the last article, you’ll know that I’m currently on a quest to re-capture an old image of mine. Sadly, I was not successful this month, but all of the images here were what I captured along the way.

Wildlife Photography Safety Tip 1: Be Mindful Of Your Surroundings
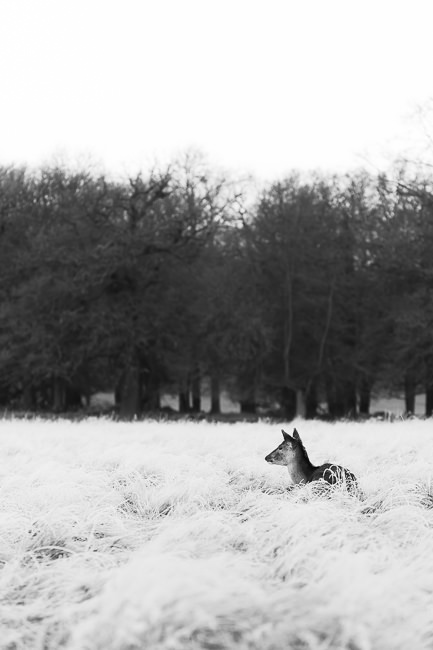
Despite sounding like Liam Neeson in Batman, this has to be my first tip. You may be very excited about what’s going on in front of you, but in your haste to get there, you’ve missed some fawns hiding in the long grass. Now you’re in between them and the stags, not a very safe place to be.
This is just one example which could potentially get you in trouble. Not only are there safety risks with not observing your surroundings, but you may miss a fantastic opportunity. I always keep one eye on what I’m shooting and one on my surroundings. Something I learned from a great documentary filmmaker.
Wildlife Photography Safety Tip 2: Keep Low And Move Slowly
You may occasionally feel like some kind of clumsy ninja, but it really does make a huge difference. One of my aims is to appear as non-threatening as possible. As we all know from watching nature documentaries, animals tend to make themselves as large as they can when trying to appear formidable. Whenever possible, try to do the opposite, that way you’ll seem like less of a threat.

As well as keeping low / making yourself as small as possible, keeping your movements slow and steady will also help you to be perceived as less of a threat. As odd as it may be, try putting yourself into the shoes of a Deer, or any other animal for that matter. You’re pottering about, enjoying your day when some odd person turns up and starts pointing strange objects at you. You’d probably find that scenario quite un-settling. If that odd person then quickly moved this strange object toward you or quickly turned their head in your direction, you can understand why that might appear threatening.
For the last two shots, I was no more than 2 – 3 meters away from that large stag. By using the techniques mentioned so far, and those to come, I managed to remain an unobtrusive presence and felt perfectly safe. This guy seemed to quite enjoy the attention! The sun had just risen and created this really cool split lighting effect when he turned his head.

Wildlife Photography Safety Tip 3: Don’t Look Directly At Them
This is a really simple tip and doesn’t need much explanation. Someone staring directly at you is often intimidating. The same is applicable when staring at animals, it un-nerves them. Walk directly toward a stag, while staring straight at them and raising a large camera to your face and one of two things will happen. Most likely they will move (or run) or worst case scenario, they will charge toward you. The latter is pretty unlikely, but nonetheless, I would not want to take the risk or cause them to feel so threatened that they felt this was their only option. An animal should never be made to feel unhappy simply for the sake of a photograph.
When approaching animals, do not look directly at them. Try and make it seem as though your focus is not solely on them.
Wildlife Photography Safety Tip 4: Walk At An Angle
Again, pretty self-explanatory. Walking directly toward something could be perceived as threatening behaviour. As photographers, when we see a shot that we want to capture, our immediate instinct is to get where we need to be ASAP. In my experience taking the direct path will often cause your subject to become agitated. More often than not, by the time you are there, your subject is so nervous they’re gone…moment missed. It takes a little practice, but when you see a shot you want to capture, try to visualize a less direct route which appears less threatening.

Wildlife Photography Safety Tip 5: Occasionally Stop And Sit Down
Hands down, this is my favorite technique. Not only does it make you appear less threatening, allowing you to stay safe, but it also allows you to get in close and capture some great moments.
I read an article on this technique years ago and I wish I could remember where so I could properly credit them. I have since heard it repeated by many people and honestly feel it is one of the best things you can do. Combine this with every other technique and you will be like that sneaky photography ninja I referred to earlier.

The beauty of this technique is it forces you to slow down, to mind your surroundings, to move slowly, etc. All of which combine to make you as non-threatening as possible. As you move toward your subject and sense that your presence is being noticed, stop and sit down for 3 or 4 minutes. Once those minutes have passed, you will no longer be perceived as a threat and you can move just a little bit closer.

Wildlife Photography Safety Tip 6: Keep Hidden
This is the ultimate safety tip and non-threatening behavior. If you can, keep hidden. For the shot above, I stayed behind a tree waiting for the moment when I heard the antlers crashing together. I then slowly moved around the tree and got my shot. This is one of the reasons why having a longer lens is so good. You can stay at a distance perceived as safe to the animal and have the ability to hide behind more objects, given the larger scope of distance you are given.

Conclusion
If you keep these six tips in mind the next time you’re photographing animals, you’ll stand a much better chance of getting your shot. One little bonus tip is to know your subjects. I harp on and on about this, but I really want you to understand its importance. The advice I have given is for Deer in a particular environment. Other animals in other environments will react differently to your presence and you may find these techniques need to be tweaked.
Keep these concepts in mind and you should be able to come up with your own technique for whatever animal it is you are photographing.
- Think non-threatening
- Be mindful of your surroundings (think Liam Neesan / Batman)
- Know your subject
I imagine that few of you have my sense of humor, but just in case I thought I would leave you with this image.

If you have any of your own tips for Deer or any other animals, please leave them in the comments below. I’d love to hear them.


Get Connected!