The following is an excerpt from our HDR Tutorial by SLR Lounge. This workshop dubbed “the gold standard of HDR education” by FStoppers contains over 13 hours of tutorials, RAW files for you to follow along, and dozens of full prep to post examples. We cover bracketed HDR, in-camera HDR, single-shot faux HDR, single-shot bracketed HDR, panoramic HDR and more! Click here for more info.
Introduction
In a previous article, we talked about what the optimal shutter speed is when shooting HDR photography. Now, we are going to discuss the optimal aperture setting in HDR photography. When shooting HDR images, we want to capture as much detail as possible. Each camera lens will have an aperture “sweet spot,” where you can get the most detail and sharpness. However, the lens’s “sweet spot” may not always be the optimal aperture setting when shooting HDR images. In this article, we will discuss what exactly a “sweet spot” is, as well as the general rule of thumb for the optimal aperture setting when shooting HDR photography.
Watch the Video
The “Sweet Spot”
When shooting HDR photography, the optimal aperture setting will actually depend on the overall scene and look that you are going for. However, with every lens, there is an optimal aperture setting that will yield maximum sharpness. This is known as the “sweet spot.” Since every lens has a “sweet spot,” we recommend you look through online resources that will tell you the exact optimal aperture setting for your lens. At apertures below the “sweet spot,” you will start to lose detail due to a thinning depth of field. At higher apertures, your images will start to lose detail due to diffraction, which reduces a bit of the sharpness in your images. As a rule of thumb, a lens’s “sweet spot” will be at around 3-4 full stops above the maximum aperture setting. For example, if your lens is a 2.8 lens, your “sweet spot” will be somewhere around F/8 to F/11.
The Starburst Effect
As mentioned before, the optimal aperture setting is really going to depend on the actual scene and overall effect that we are going for. For example, sometimes we will need to use a wider aperture because we need the extra light, even if it reduces a little bit of sharpness in the image. A closed down aperture at F/16 and beyond will cause diffraction. This may not necessarily be the lens’s “sweet spot,” but we are shooting at F/16 because we want to create a certain effect.
[Rewind: What is HDR?]
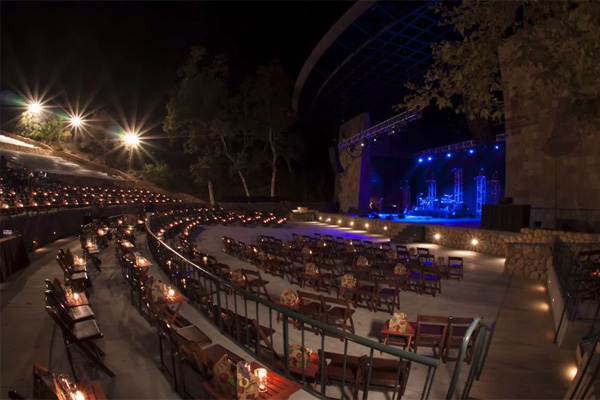
Shooting with higher apertures at F/14, F/16 and beyond will create starburst patterns in the lights in our images. Therefore, if we want to create the starburst effect from the sun in our image, we will use one of those aperture settings. That setting will then become the optimal aperture setting for our image, instead of the lens’s “sweet spot,” because the starburst effect is the overall look we want in our image.
Below is an example of what the starburst effect looks like in the lights.

Considering the Overall Exposure
When shooting HDR photography, it is important to consider the overall exposure of the image. This can often outweigh whether or not you are shooting at the lens’s “sweet spot.” Whenever you approach a new scene, you should think about the composition you are going for and whether or not you want to create a starburst effect in your images. If these considerations are not that important to you, then just shoot at your lens’s “sweet spot” because that will maximize overall detail in the image. However, if these considerations are important, then you do not need to choose the lens’s “sweet spot.” Instead, choose your own optimal setting that will give you the overall look you want to create in your image.
Conclusion & Learn More!
Shooting at your lens’s “sweet spot” will maximize the quality and detail of your HDR images. However, your lens’s “sweet spot” may not be the optimal aperture setting when you want to create a starburst effect in your HDR images. Instead, shoot with a higher aperture to create starburst patterns, which will make that higher aperture the new optimal aperture setting.
For more HDR education, be sure to check out our HDR Tutorial by SLR Lounge. This comprehensive “gold standard” guide will give you a mastery of HDR photography, from the scene considerations to the actual shooting to the post production. Click here for more info.


Get Connected!