
Welcome to Time Out with Tanya, where I’ve put my fast paced graphic design career on hold in favor of adventures in motherhood. I’m capturing every moment on camera and you can come along, if you’d like. Sign up for my weekly email here so you’ll never miss a Time Out.
In Part 4 of our No Studio? No Problem! Series, I’m sharing photography lighting tips for shooting in tight spaces. Whether it’s in your client’s home, office or outdoors in a rocky cave or elevator, you don’t have to be at the mercy of bad lighting just because you can’t fit your giant soft box in the space. Read the other articles in the series, No Studio? No Problem! Part 1: Mobile Photography Studio Kit, where I list all the gear I use on-location, and Part 2: Shooting in the Master Bedroom, and Part 3: Shooting in the Living Room.
Look for the Light
If you only shoot with natural light, or there happens to be beautiful natural light available in the space where you’re photographing, look around and find the best light possible. In this example, I was shooting in a small barn on a client’s property. It was dark in the space, but there happened to be some nice soft light coming in on one side. So, I put the kids up on a hay bail in that one little spot and used the available light. You really don’t need a lot of space to create a portrait, and I prefer to use natural light when photographing kids, since they move around so much and get distracted by flashing lights.

This image was edited using the SLR Lounge Lightroom Preset System, which saves me so much time and I love it.
Bounce the Light
I recently created a series of photos for a Medi-Spa for their marketing materials. They wanted action shots of treatments being performed in their office. Treatment rooms are small and filled with equipment, so I knew I wouldn’t have room for a lot of light stands and softboxes to be set up.
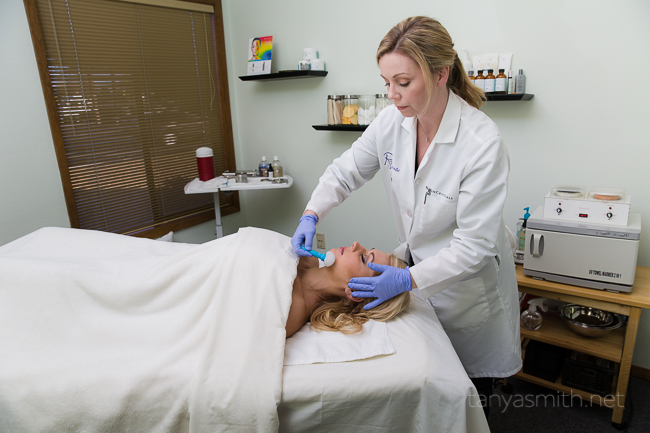
Enter my trusty Speedlite (I use a couple Canon 430EX Speedlites, and, while they get the job done, I’m dying to try something more sophisticated and powerful, like the Canon 600EX-RT Speedlite Flash). I simply attached the little stand that comes with it and set it up on a small table in the room. I pointed the light toward the ceiling in the far corner, away from my subjects. Here’s an example from the other side of the room. You can see my Speedlite is pointed toward the opposite side of the room, reflecting back onto the faces of the models.
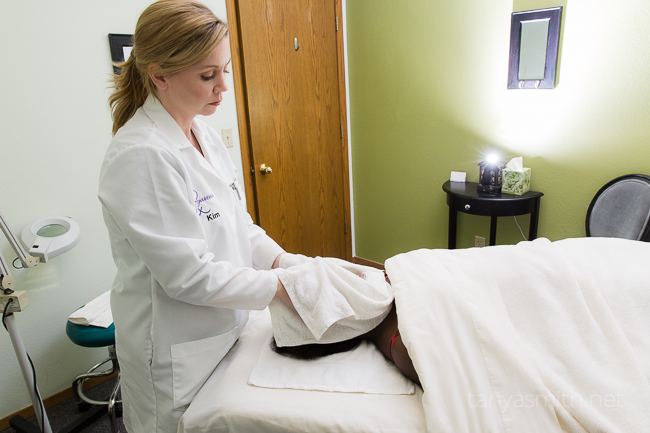
When bouncing light, just make sure the color of the walls isn’t casting a funky color onto your subject. Luckily the walls were a nice light green and the ceilings were white in this room. In another room the walls were bright blue, so I had to use my white reflector to get rid of a blue cast on the skin of my model. Here’s a final image they chose to use for their brochure. Not bad for one simple light set up.

Modify the Light
Of course, there are hundreds of ways to modify your light source. Use a reflector, softbox, sheet, curtain, etc. One of my go-to tricks for modifying light in a small space is to use a plain old plastic grocery bag. I can’t take credit for this idea, though, I learned it from Matt McDaniel of Matty Photography. Read my interview with him, How to Quit Your Day Job: An Interview with Matty Photography, to see an example of how he used a free grocery sack to modify the light inside a quarter-million dollar car for a Mercedes-Benz photo shoot.
This technique comes in handy in really small spaces, like the inside of a vehicle or closet. I’ve even used it for table top photography in my little office, when I didn’t want to drag out my Octobox modifier. Here’s a rare peek inside my non-pinterest worthy office space (This is reality folks. If you want to see what I wish my office looked like, click here follow me on Pinterest. Follow SLR Lounge here.)


If you’re looking for a small modifier that looks a little more professional, you might try a 12 to 16 inch softbox that will work with your Speedlite. I have a Lastolite Ezybox, but I always forget to use it…
Strategically Place the Light
Here are a few other tools that might help you out when photographing in tight spaces. If you can’t get a light stand in there, try a GorillaPod. You can hang your flash or LED light from a ledge, wrap it around a rock or pole with this versatile tool.


A Super Clamp by Manfrotto, is another little tool I recently discovered. You can clamp your light or your camera to just about any pole, table or shelf with this thing. It weighs a ton, though, just so you know.

Conclusion
The key when shooting in tight spaces is to creatively use your resources. Ask yourself, what light is available? How can I modify it or create additional light to fill my needs within this space? This is part of the fun and challenge of being an on-location photographer. How do you shoot in a small space?
For more information about creative lighting, check out the SLR Lounge Lighting 101 Workshop DVD, available in the SLR Lounge store. Click here to view more details.
CREDITS: Photographs by Tanya Smith are copyrighted and have been used with permission for SLR Lounge. Do not copy, modify or re-post this article or images without express permission from SLR Lounge and the artist.


Get Connected!