
How You Shot It is a series where you show us how you shot an image. Many who use our presets love to share their special processing recipes. You can join the SLR Lounge Textures and Presets group on Facebook and share your favorite images and recipes as well! For our wedding and portrait photographers, please join the SLR Lounge Wedding and Portrait Photographers group.
Today’s post is from Antti Karppinen. Antti is Digital artist, photographer, retoucher from Finland. Antti is was named Portrait photographer of Finland for 2013 and is an internationally awarded commercial photographer. He belongs to a new generation of image artisans, to whom believe all things are possible and creates complex visual concepts and images with unlimited imagination.
 Background
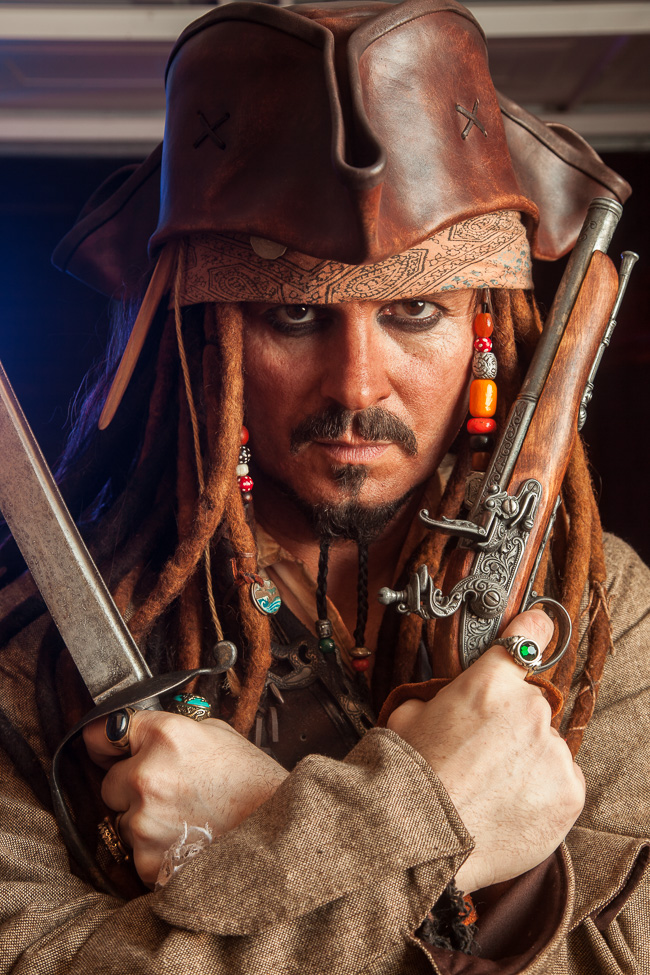
Last year, I stumbled on a Youtube video showing a man dressed up as Captain Jack Sparrow, and decided that this was the one guy I wanted to take photos of and make some movie-like posters. I love everything about the Pirates of the Caribbean movies, especially the movie posters of the whole series.
In reality, Cardiff Jack Sparrow (www.captainjacksparrow.co.uk) is a lookalike of the famous pirate character, portrayed in this case by Terry Cooper, an actor based in Cardiff. And he is pretty awesome! Not only does he have all the bells and whistles to portray Jack Sparrow but his voice and acting in character are just perfect.
I contacted the guy and after few months trying to find a perfect time for the photo shoot, we booked the day and off we went.

The Vision
The idea was to create some images that could look like actual movie posters, and also try to re-create some of the memorable scenes from Pirates of the Caribbean movies. I was especially drawn to that one epic scene (never seen on screen though) where Jack Sparrow escapes from Rumrunner’s Isle with sea turtles. Or at least the legend says he
did escape that way.
The Photo Shoot
It took Terry (Cardiff Jack Sparrow) around 45min to get all the Jack Sparrow gear and makeup done and then we went out shooting. I had already prepared my garage studio and tested the light with myself. I started with couple of basic poses and then moved to do those frames I had in my mind one by one. Since I had pretty much all the images pre-visualized in my head, the photoshoot was pretty straight forward. Basically the only thing I changed with the light over the photo shoot was the gels in the lights. So I changed the backlight gel from orange to deep blue when I was shooting the scenes for the “smoky” image.

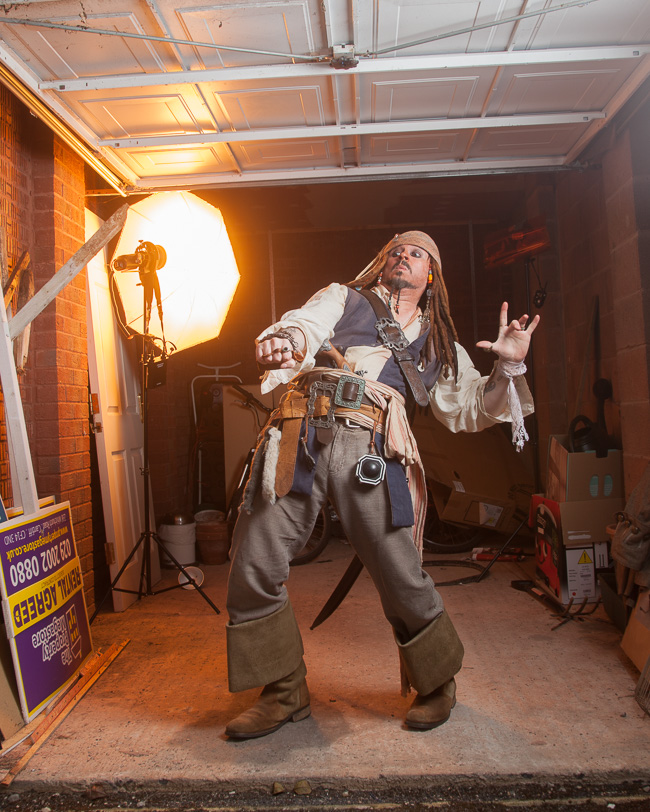

Behind the Scenes
Lighting
 The Post Processing
The post processing of the images had pretty much the same overall workflow. First, I select the frame in Lightroom and then edit the raw to my liking. Usually, I try to even out the contrast of the image in Lightroom to make it more “flat” since I will be bringing those lights and shadows back in Photoshop to get that “painted” look with dodge and burning.
So, after basic tweaking in Lightroom, I will bring the image to Photoshop and usually the first thing is to cut out the character. For this, I use the Pen tool with really high magnification to get a really precise cutout.
After the character is cut out, I will start creating the overall tones to the background, adding the environment, details etc. I’m using images from stock banks like iStock, Shutterstock, etc. and try to use as much my own shots as possible. It is a trial and error kind of work to get the background elements fit the image, and try to achieve the result I
have in my head. I try to be really careful when it gets down to the perspective, shadows and light to make the image more believable. The main character also gets retouched, basic retouch to the skin and then lots of dodge and burning to bring all the lights and shadows back to the places I want them. This will bring out somewhat “drawn or painted” quality to the image.

After the background elements are in place, I will start color grading the image, blending the lights and shades of background to match the character. I add mood with smoke, gradient overlays, lensflares, lights and shadows. It is a long process and depending on the image, this might take me the longest, just to get everything feel “right”
When I’m happy with the image, I will bring the image back to Lightroom where I do some small adjustments to the shades and colors. I add vingetting, noise etc. and then the image is ready.
Gear List
- Camera: Canon 5D Mark II
- Lenses: Canon 24-105mm 4L, f8, Iso 100, 1/160sec
- Lighting Equipment: 2x Godox Witstro 360 with PB 960 battery packs,
- Other Equipment Used: 90cm octabox, reflective umbrella, blue /
orange gels
Since my dream some day is to make these kind of movie posters for real, this was the closest thing to get to shoot Jack Sparrow in real life. Of course, in the REAL world, these would be done in huge studios with lots of cool lights and gear with assistants, but I wanted to show that you don’t need necessary that to create really cool Hollywood grade images. When you put your mind and vision into play, you can make even the simple things work. It is just about going out and doing stuff you feel passionate about. And someday I might be doing these things in bigger scale, you never know.
About the “How to Shoot It” Series
This educational series highlights amazing images from our writers as well as our community. The goal is to not only feature inspirational work but to provide valuable education for our photography community. If you would like to submit your work, please click here for more info on writing for SLR Lounge.


Get Connected!