Sabrina Editorial by Joe Gunawan | fotosiamo.com
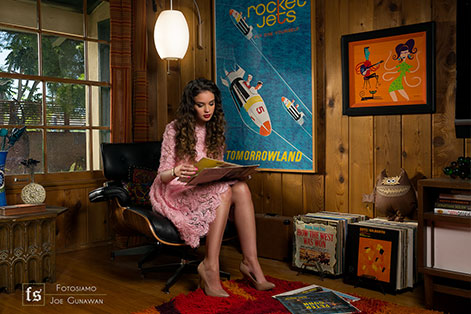
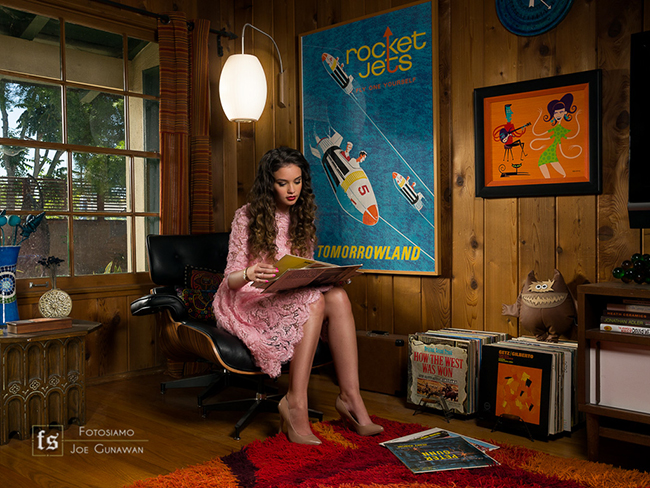
This environmental portrait is part of an editorial assignment that I had for Sabrina Claudio, an up-and-coming young singer-songwriter from Florida. In an environmental portrait, the surrounding tells just as much of the visual story as the subject. The location we shot in provided a lot of great visual highlights and I wanted to make sure that I could include a lot of the great little details into the shot.
Sabrina sings with a lot of soul, so we tied in the vintage records as part of her musical influence.
The client also wanted the lighting to look natural, so the trick here is to add just enough ambient lighting to balance out the three Einstein monolight strobes that I used to light this image.
Camera: Panasonic GH2
Lens: Olympus 4/3 Zuiko 14-54mm f/2.8-3.5 mkII Lens (28-108mm full-frame equivalent)
Focal Length: 18mm (36mm full-frame equivalent)
Shutter Speed: 1/160
Aperture: f/8.0
ISO: 200


I used three Einstein Monolights and a little bit of ambient light from outside the window to light this scene. The ambient light coming in is from the shaded part of the backyard, so it is a very soft, subtle light . I added an Einstein with a 64” Paul Buff Extreme Silver Parabolic Light Modifier (PLM) 4-5 feet outside the window just outside the frame, camera left to further enhance the light that is coming in from outside. Inside, I wanted to light Sabrina and the room with a semi-soft light, so I used the 2nd Einstein with a 22” ePhoto beauty dish with a sock diffuser as the key light on camera right. Because the sock introduced too much spill unto the wall on the right side of the frame, I also used some Black Cinefoil to flag that light from the wall. Finally, the floor under the chair to her right side was too dark, so I used the 3rd Einstein with a 7” gridded reflector to add a little bit of fill light to that area.
The key with all the lighting here is subtlety.

The image above is how it looked like straight out of the camera. I calibrated the scene with a ColorChecker Passport in order to get accurate colors. You can check out my previous article on how to use the ColorChecker Passport in your shooting workflow. It really helps in getting accurate colors quickly.
I used Lightroom to lighten the lamp above her head by using a local adjustment exposure brush. Then I brought the edited RAW to Photoshop. Great thing about this image is that her skin is very clear, so I did not have to do too much retouching on her. I did clean up various distractions in the scene, though. I will go through my
retouching workflow in more depth in another article, but this is the workflow what I typically do for my fashion and commercial work on Fotosiamo.com:
1. Clone Stamp and Content-Aware Fill: Cleans distracting elements out of background like the lamp post that was going through her head.
2. Liquify: Body shape adjustments. I did not have to use this for Sabrina.
3. Portraiture Plugin: Awesome skin retouching plugin that gets me about 85% there for retouching. Take a look at my previous post on Lidsay Adler’s retouching tips on how I use Portraiture with separate exported layers.
4. Frequency Separation: A powerful way to get some deep, refined retouching and light sculpting. The process separates all the texture information on one layer and the color information on another layer. When you work on one layer, it doesn’t contaminate into the other layer.
5. Adjustment Layer Corrections: A series of adjustment layers to further fine-tune color correction, hue shifts, contrast, exposure, etc.
6. Black & White Adjustment Layer on Overlay Blend at 5%-30% opacity: This is what I use to get the look that defines my images.
7. High-Pass Sharpening: My preferred way of sharpening, although Lightroom 4’s Clarity function works a lot like this.
Here is how my layers usually look like. I may have some other corrections outside the norm, like the ones under “Misc Fixes.” Also, I tend to have a lot more global adjustments, but for this image, I didn’t have to do a lot of color correcting, thanks to the ColorChecker Passport.

Here is the final image once again. If you click on it, you can see a higher resolution of the before and after my post processing. Stay tuned for my article on my Photoshop retouching workflow!
You can see more of my images at Fotosiamo.com.


Get Connected!