
There’s a manipulative beast living within your editing software and there’s a decent chance you’re not fully aware of what it can do. Now, I’ll come straight out and say that the majority of you are somewhat familiar with the flexibility and power, and all other merits associated with a RAW file. Furthermore, you are likely familiar with Adobe Camera Raw. Surprisingly, I see people open up RAW images in Photoshop and do the most minor adjustments in Camera Raw, then get to applying whatever other adjustment layers and such within Photoshop itself. This is, in my opinion, something to reconsider.
[REWIND: Great Tip To Recover Shadow Detail In Photoshop]
Camera Raw’s interface looks somewhat archaic compared to Photoshop’s aesthetic, and I think it’s a reason it often gets overlooked – people associate it with being very technically demanding. It shouldn’t be so. I do a lot in Camera Raw – it’s powerful and actually easy to use. If you’re somewhat versed in editing in Photoshop anyway, you’re already familiar with the processes presented in Camera Raw. From brushes, to graduated filters, to white balance adjustments…it’s all there, and easy to do. So yes, use it. However, there’s something I’ve used for the past while which a friend of mine showed me when I was on one of my rants about Camera Raw, which has fundamentally altered how I adjust my images, and how I view JPEGs.
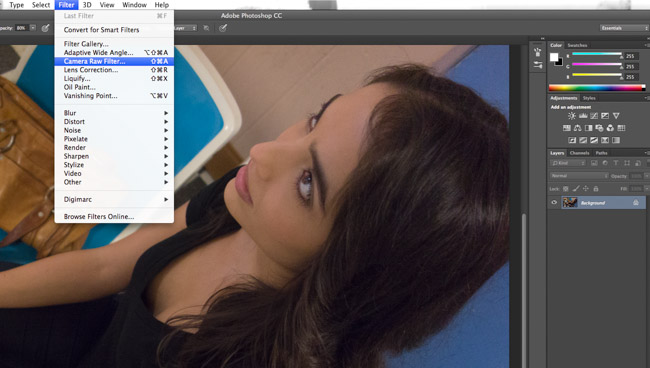
Under the Filter menu, there’s an option for Camera Raw filter. This is probably my dirty little secret tool (yes yes, not a secret, but I know a lot of people don’t use it), and what this allows me to do is re-open a Camera Raw window with whatever file I’m working on. Why would you need this? Sure, you may have just edited in Camera Raw when you imported your RAW files – but it allows you to use Camera Raw on even JPEGS. Not only that, it allows you to pull detail out of JPEGs to a level I never knew was possible until someone showed me. Understand this key point, that Camera Raw uses entirely different algorithms to manipulate a file than Photoshop, and it’s those differences which make it possible to take a JPEG to a new level. This is an example of before and after in Camera Raw from a video (below).


My post yesterday was on a Phlearn tutorial on how to pull hidden detail out of the shadows and it’s effective. The same friend of mine who taught me about this filter told me I should’ve mentioned it, so here it is. I was going to put together a whole slew of images and explanatory examples, but I think this video I found does a beautiful job showing you just what’s possible.
Lastly:
There’s not much to really say or add to this. I should interject however, and stress, that a good edit does not a good photo make (necesssarily); I’m not advocating this be used in a cavalier manner to replace good shooting. No. Get it right in camera whenever possible as there’s no substitute for that. Oh, and shoot RAW. Really.


Get Connected!