
This is a guest post by photographer Glenn Orion
There are far more photographers – from the amateur to the professional – who have embraced the need to become adept at Photoshop than those who haven’t. Once you have the basics down, it simply becomes a matter of refining those skills and having a more efficient workflow.
The foundation of making global adjustments such as Curves, Levels, or Color Toning in Photoshop is done using Adjustment Layers. Simply, they act as filters or gels placed on top of an image making effects as if you were looking straight down on them. With each accompanying layer mask, you have the ability to control using a white or black brush what part of that adjustment layer is exposed or can impact the image below.
Often times, you’ll find yourself with multiple adjustment layers as you progress through your edits. Ben Willmore provides a thorough guide on the creativeLIVE YouTube channel on how to better manage and utilize adjustment layers and masks.
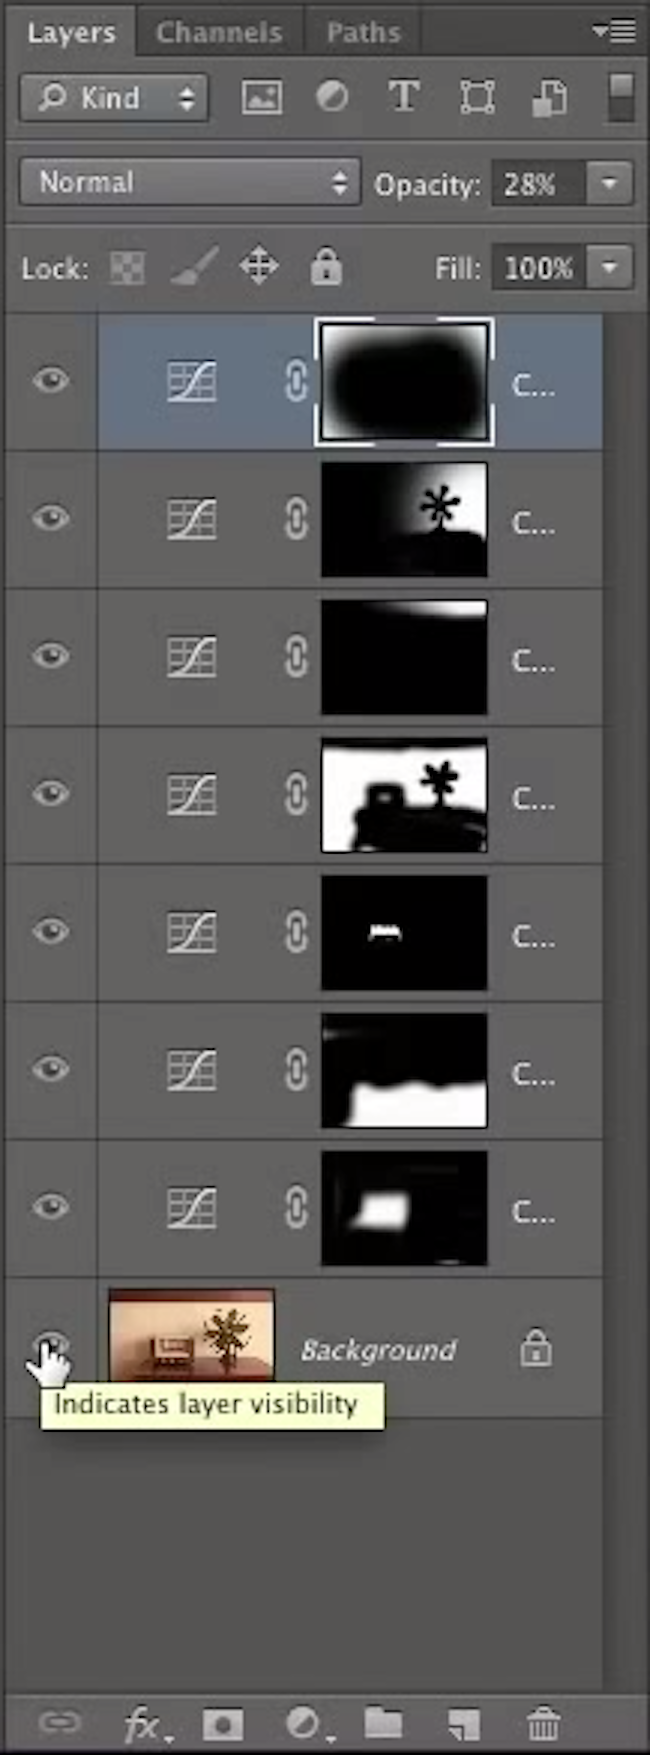
1. Eye Icon to Turn On/Off Layer
Beside each adjustment layer is an eye that toggles the on/off switch for each layer. Additionally, clicking and dragging the eye up through the other layers’ eyes in the column will also turn them on or off. To turn on/off all the layers quickly, Option/Alt-click the eye on the original image (the background layer).
2. Thumbnails At a Glance
Use the mask’s thumbnail to see what part of the image the adjustment layer affects. You can quickly determine exactly which layer you may need to work on depending on what’s painted white or black.

3. Adjustment Layer Fine-tuning
Double-click on the icon representing the layer to reopen the dialogue for Curves, for example, to make any changes. Alternatively, you can also adjust the layer’s opacity in the upper right hand corner of the Layers panel.

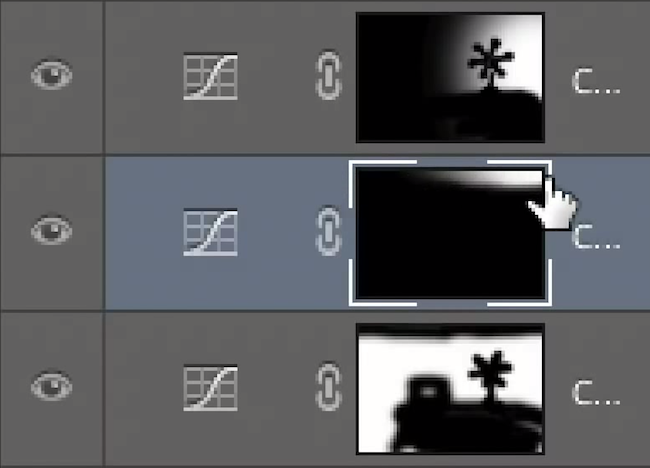
4. Select the Mask to Make Adjustments
This may seem obvious, but for many first-timers or even any veterans burning the midnight oil, inadvertent selection of the layer itself rather than the mask can lead to some confusion when the brush strokes don’t seem to be applied. To make sure you’re working on the mask, check to see that there are brackets on each of the four corners to indicate that the mask is highlighted.
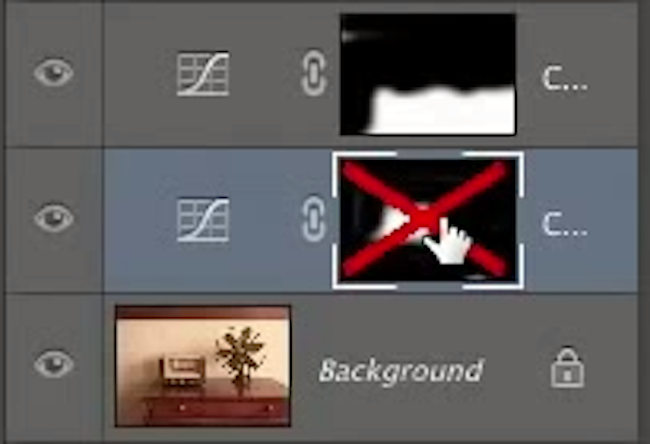
5. Shift-click to Disable/Enable Mask
As opposed to seeing the effect of the adjustment layer with the mask applied, shift-clicking on the mask will disable it temporarily and apply the effect to the entire image. This also allows you to see whether you may want that adjustment layer to apply to more areas of the image.
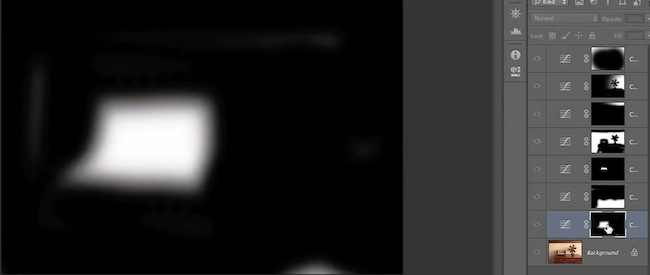
6. Option/Alt-click Mask to See Mask Directly
The mask thumbnails represent the actual brush strokes applied, and it’s often difficult to see if you’ve missed any spots on such a small scale. Option/Alt-click on the mask to view it directly on top of your image and make any corrections needed.
7. Backslash to See Mask Overlay
Doubly helpful is to see the mask and the image at the same time. Hitting the Backslash key (above Return/Enter) with the mask selected will provide you with a red overlay representing the masked areas.

8. Command/Control-click to Load Mask as Selection
Sometimes you’ve work on a part of an image that you realize later on needs to be worked on using a different kind of adjustment layer. By Cmd/Control-clicking on the mask, you can load it as a selection and have it apply to a new adjustment layer where you can easily paint within the selection or quickly fill with either black or white. It can also be useful if you want to apply another effect such as a blur filter to that area.

9. Stack Order is Crucial
It’s important to remember that each adjustment layer affects whatever is beneath it. So when making new adjustment layers, add them on to the top rather than in between or beneath existing layers to avoid unpredictable results and confusion later on.
If you are interested in learning more Photoshop tips from Ben, you might want to check out his Photoshop for Photographers: Beyond the Basics course. It’s bound to be a gem.


Get Connected!